Would you like to learn how to install reptile heat tape? If you’re familiar with reptile husbandry, then you’re aware that all reptiles need a heat source to help them thermoregulate. While heat lamps and heat pads are a common way to heat your animal’s enclosure, there is also another method that we use at Backwater Reptiles: heat tape.
Heat tape is not something that is sold at pet stores, but it is still an excellent D.I.Y. alternative to expensive lights and pads. Only a few of the items you will need to make and install the heat tape are actually required to be purchased from a specialty store or reptile supply company. You should already have most of the other items needed to make the heat tape lying around your home or garage.
So here goes – a tutorial on how to assemble and install your reptile heat tape. (We’ve included a video tutorial at the bottom of this article as well).
First of all, we’ll give you a list of items that you will require in order to put together your heat tape. You can purchase most of these items from a hardware store or even department store in some cases. The only item that you might need to specialty order is the actual roll of heat tape itself.
- Heat tape roll
- Rivets
- Aluminum foil tape
- Electrical tape
- Crimping pliers
- Adhesive rubber pads/insulators
- Electrical cord with ring terminals

Step One
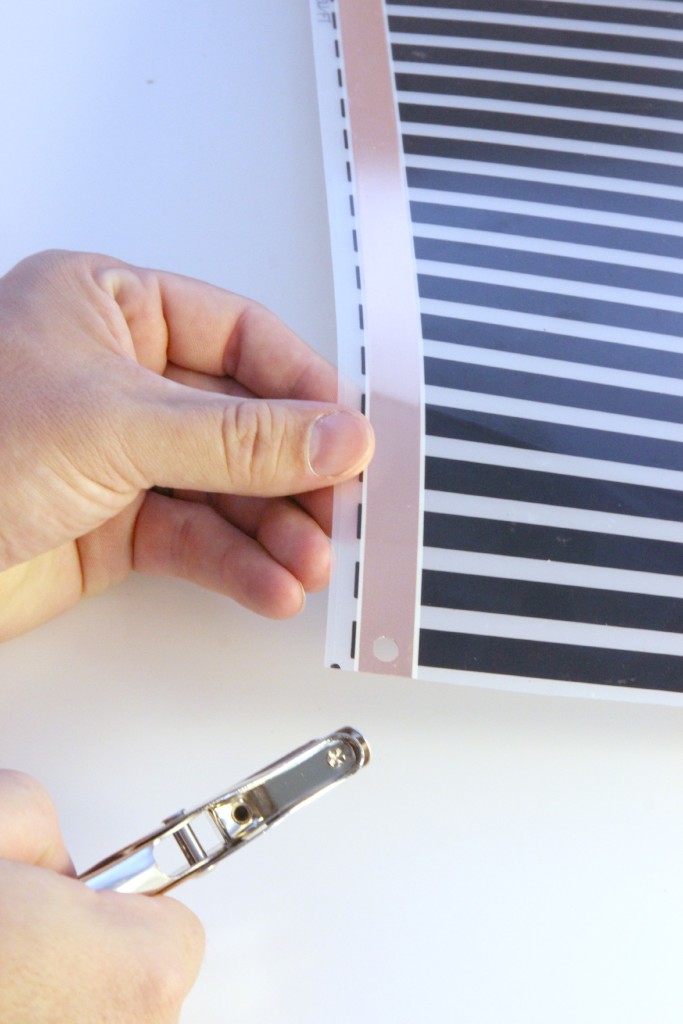
Once you have secured all the items you need, your first step is to measure out and cut the length of heat tape that you want. After you’ve done this, punch two holes in the bottom corners of one end of the heat tape. The holes should be about a quarter of an inch up from the bottom edge of the tape in the copper strip portion. Be aware that you only need to punch these holes on one end of the tape – the other end should have no holes.

Step Two
Next, push one of the ring ends of the electrical cord with ring terminals through the bottom edge of the heat tape sheet. You will essentially be making a “sandwich” with the heat tape and the ring end of the electrical cord. The ring will fit between the two sides of the copper section of heat tape and align with the hole you punched in the tape earlier. Repeat this process on the other corner of the heat tape.

Step Three
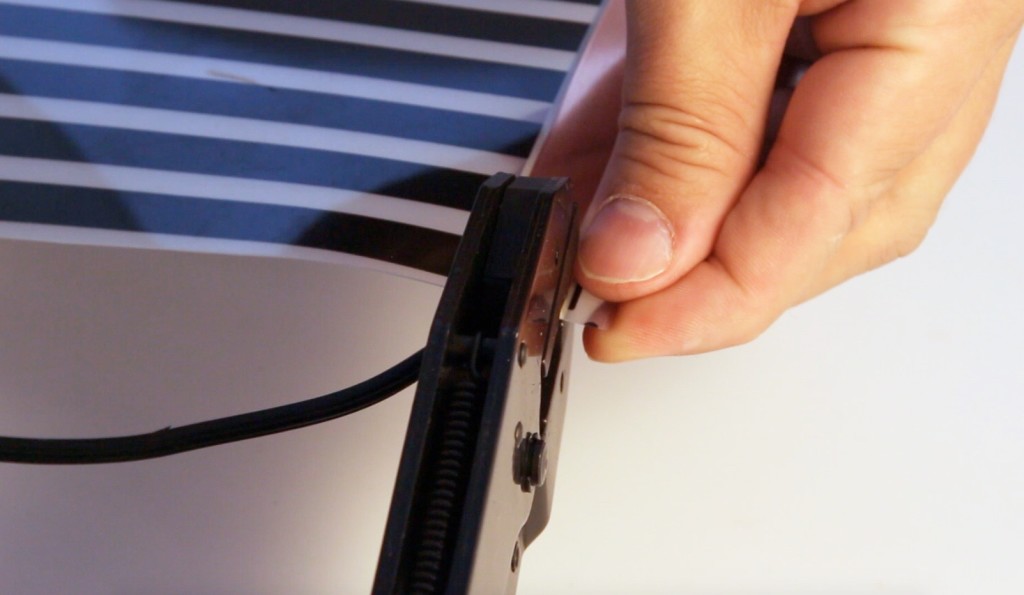
After your electrical cord is attached to your heat tape, you’ll need to secure the electrical cord ends in place with the rivets. Poke one end of the rivet through the hole in the heat tape and the terminal end of the electrical cord. Cap the rivet with its mate piece and proceed to clamp them shut with the crimping pliers.
If you have crimped the rivets correctly, the wires should not be able to spin or rotate at all. They should be firmly stuck in the position in which they were clamped. Repeat this process on both sides of the heat tape.

Step Four
Use the adhesive rubber insulator pads to cover the electrical connectors completely. Do this by peeling off the adhesive backing to one rubber piece. Cover the entire hole punch and electrical cord apparatus. Then peel another rubber piece and simply stick it on the other side of the other rubber piece, sort of like a sandwich, which the connector in the middle.
You should have a nice, complete, solid seal on the entire electrical portion of the heat tape. This keeps the rivet protected and is a safety precaution.

Step Five
You will need two small pieces of electrical tape ready to go for this step.
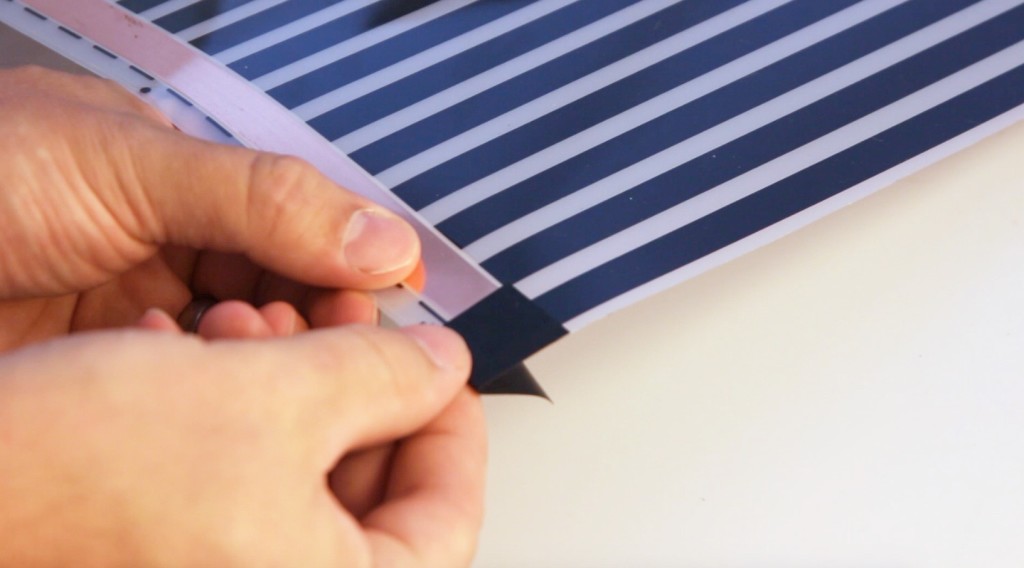
Turn the heat tape around so that you are working with the end that has no wires coming out of it. Simply take your small piece of electrical tape and use it to cover and seal off the copper end of your heat tape. The tape should wrap around and cover the copper strip on both the front and back sides of the heat tape. You will want to do this on both the left side and the right side of the tape where the copper strips terminate.

Step Six
At this point, your heat tape is pretty much complete. You will just need to install it and hook it up to a thermostat.
To install the heat tape, we recommend finding a flat surface that is heat resistant such as glass or ceramic. We do not recommend mounting the heat tape on either carpet or wood for safety’s sake.
All you need to do to mount the heat tape is to tape it down using the aluminum foil tape. Just cut the length of foil tape that you need and run it along the edge of your heat tape. It is vital that you do NOT cover the copper strip with the foil tape. This could cause problems down the line. You just want the foil tape to edge the heat tape and your mounting surface.

We made a video with all of the above steps to go along with our written tutorial. Check it out below.
Step Seven
Your final step is to hook your heat tape up to a thermostat. Believe it or not, heat tape can actually get too hot. For the health and safety of both your animal(s) and yourself, you want to be sure that the tape is kept at a safe temperature. Thus, the need for a thermostat.
Just like your home thermostat, a reptile thermostat will measure the temperature of the heat tape and turn it off when it gets too hot and turn it on when it gets too cool.
To hook up the thermostat, plug in the outlet portion at the end of your heat tape’s electrical cord directly into the thermostat. Your thermostat will have its own separate power adapter that you will need to plug into your wall outlet.
Your thermostat will come with a temperature probe. Plug the probe into the back side of the thermostat (it should have an outlet labeled “probe” specifically for this purpose) and then directly affix the probe to the heat tape. The probe will take temperature readings and moderate your heat tape’s temperature accordingly based on whatever temperature you have it programmed to maintain.
We made a very brief video tutorial explaining how to hook the thermostat to the heat tape. You can view it below.
At Backwater Reptiles, we use various sizes of heat tape for different purposes. We use a wide, fat heat tape to make sure our Dubia roach colonies stay warm and toasty. We also use thinner strips of heat tape to line our leopard gecko and snake enclosures.

We hope you’ve gleaned some helpful information from our tutorial on installing reptile heat tape. In the end, it’s an economical method for heating reptiles, and when combined with a thermostat, it’s exact as well.
