How to Pick Up Your Pet Snake

If you’d like to learn how to pick up your pet snake, you’ve come to the right place. In truth, many pet reptiles and amphibians are better off as observational pets–in other words, it’s better for the animal’s health if you keep the human interaction to a minimum.

Luckily, this is not true for most species of snakes that are commonly kept as pets. In this article, we’ll answer some commonly asked questions about how to handle your pet snake.

How to pick up your pet snake

How should I pick up my snake?

We’d like to start off by stating that even docile snakes can be slightly skittish or nervous when you are in the process of removing them from their enclosure. Sometimes this is due to the temperament of the species, sometimes it is because you are waking up a sleepy snake, and other times, you might unintentionally frighten your snake.

The bottom line is that even the best pet snakes do strike out from time to time, and it is usually when they are in the process of being taken out of the cage to be held.
how to handle your pet snake
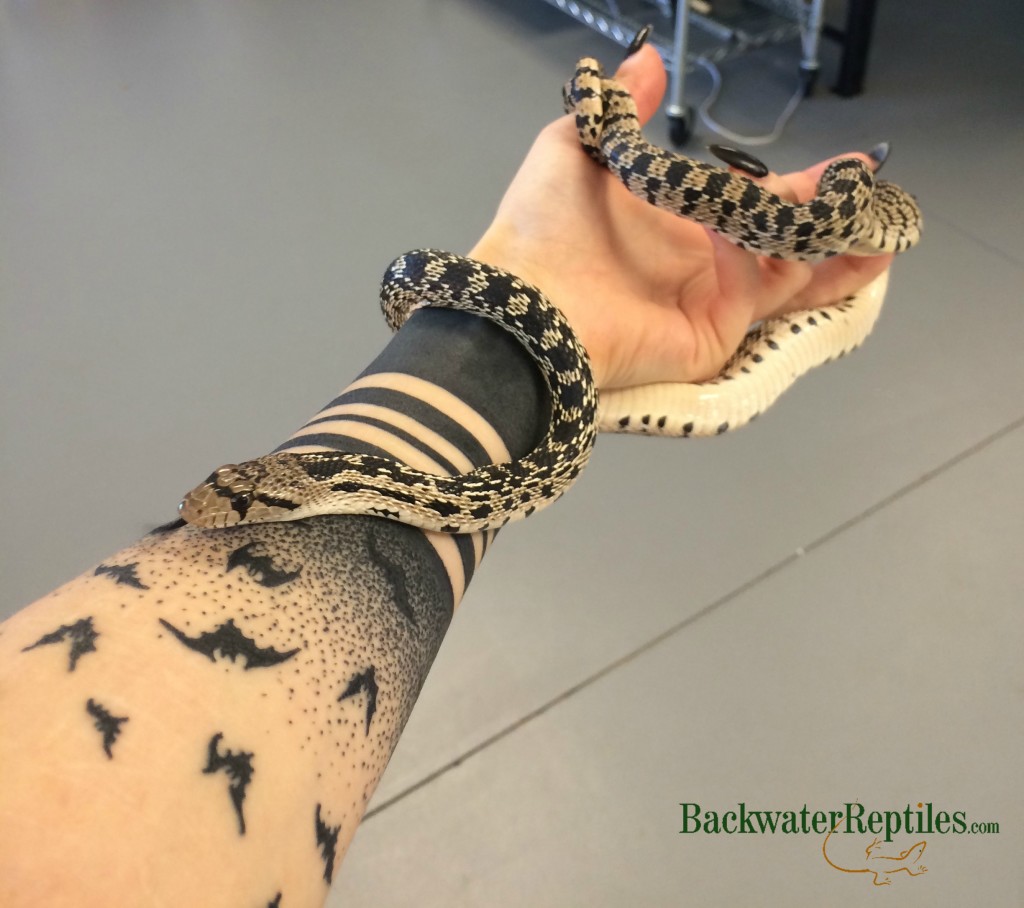
This is a gopher snake being held. Gophers aren’t traditionally “friendly” snakes, although they’re also not typically aggressive. But as you can see, most snakes are friendly once you let them grow accustomed to you.

We also recommend transferring your snake to a separate container for meals. If you feed your snake in its normal enclosure, it could begin to associate the cage opening and therefore seeing you with food. This will lead to unintentional striking and biting at you as the snake will think that every time the cage opens, it’s dinner time.

Getting your pet snake out of its cage is not as simple as grabbing it and lifting it out. There are certain things you should do and things you should also avoid.

Here are some DO’s for picking up your pet snake:

-Do grab the snake around the middle section of its body.

-Do support as much of the snake’s body as much as you can. Try letting it wrap around your fingers, arm, and wrist so that it feels secure.

-Do be confident and consistent in your mannerisms when you pick up your snake. Try not to be timid, shy, or nervous as this will translate in your body language. Consistency will teach the snake that no harm will come to it when you pick it up and it will get used to interacting with you.
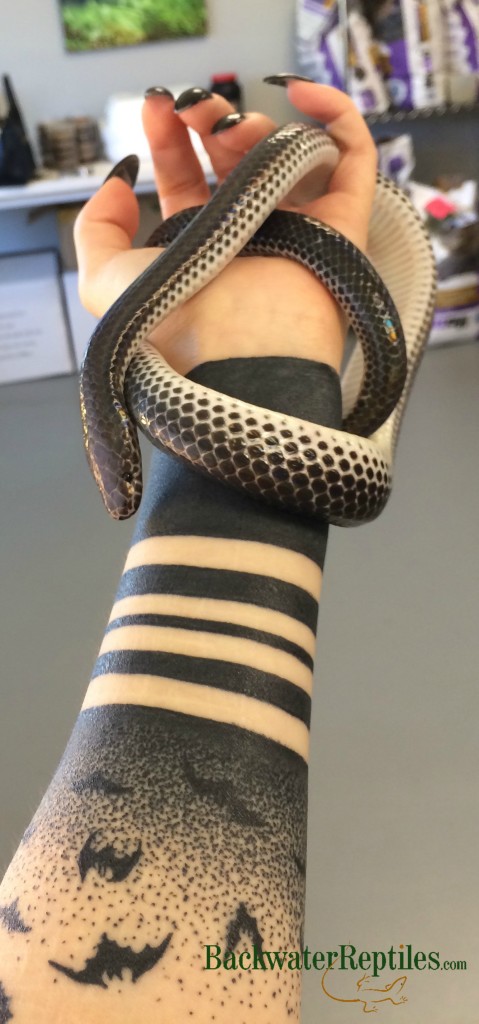
sunbeam snake
When your pet snake is relatively small, it will enjoy wrapping itself around your fingers and wrist. Just make sure most of the snake is supported, and it should be a pleasant experience for both the snake and the owner.

And on the other side of things, here are some definite things you want to avoid when picking up your pet snake:

-Don’t grab the snake by the tail. Many snakes will spin or thrash around if you grab their tail, and this behavior can cause the snake bodily harm.

-Don’t pick up your snake by its head. Many snakes are “head-shy,” which means that anything suddenly touching the animal’s head will scare it and could result in biting.

-Don’t let your snake flail around in your grip. You want the animal to be relaxed and calm, which will happen if you support its body and allow it to feel safe.

What snakes react best to being handled?

Corn snakes, king snakes, boas, pythons, and milk snakes are all good snakes for people that enjoy holding and connecting with their pet through physical contact.

All of these species adapt very well to captivity and many are even captive bred so they have no parasites and are in overall peak health.

Another good thing about many of these species is that they have relatively calm temperaments and with the exception of a few species of constrictors, they also don’t usually grow overly large. Smaller snake = smaller and less harmful bite if the snake does happen to strike at you for some reason.
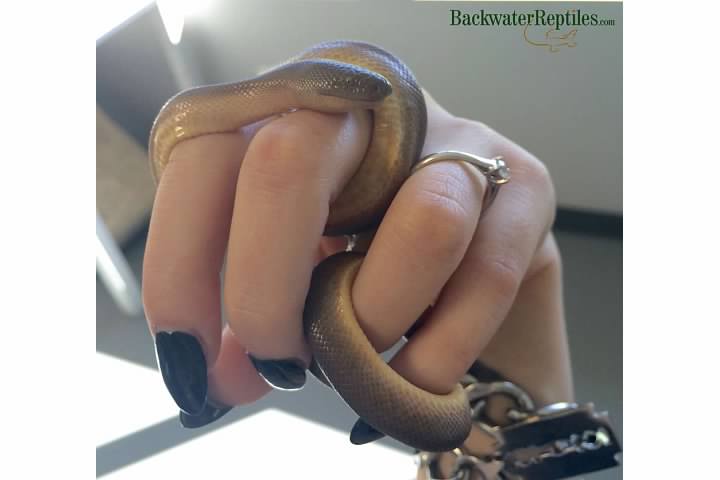
rubber boa
Pictured is a rubber boa. These are very calm, docile snakes and will take to being held very well.

I own a venomous pet snake. How should I pick it up?

We highly recommend that you keep the handling and interaction with venomous snake species to an absolute minimum.

Unless you are an expert, playing with, holding, and otherwise having contact with a venomous snake can spell disaster.

However, if you feel ready to own a venomous pet snake and you want to remove it from its enclosure, we highly recommend using a snake hook, which we will talk about more below.

Should I use a snake hook to pick up my snake?

If you are unfamiliar with what a snake hook is, it’s exactly what it sounds like. It’s a metal tool with a handle on one end and a hook on the other end. They are used to handle venomous, aggressive, or nervous snakes.

snake hook
This is what a snake hook looks like. We recommend using them with venomous species as well as aggressive species.

Generally, once you get to know your pet snake and its own individual disposition, you’ll be able to read its body language. If your snake is in a defensive posture and you need to pick it up, we recommend using a snake hood to avoid being bitten.

Once you have removed the snake from the enclosure using the hook, it is usually safe to transfer it to your hands. Again, as we’ve previously mentioned, snakes tend to be at their most nervous at the initial time you are taking them out of the cage.

Conclusion – How to pick up my pet snake

Many species of snakes do well when interacting with people. Most are content to sit in the palm of your hand, but others develop habits of wrapping around your arm, shoulder, or neck.

No matter where your snake likes to sit, if you follow our tips and tricks, you’ll have a calmer, more pleasant experience each time you hold your snake.

How to Install Reptile Heat Tape Tutorial

Would you like to learn how to install reptile heat tape? If you’re familiar with reptile husbandry, then you’re aware that all reptiles need a heat source to help them thermoregulate. While heat lamps and heat pads are a common way to heat your animal’s enclosure, there is also another method that we use at Backwater Reptiles: heat tape.

Heat tape is not something that is sold at pet stores, but it is still an excellent D.I.Y. alternative to expensive lights and pads. Only a few of the items you will need to make and install the heat tape are actually required to be purchased from a specialty store or reptile supply company. You should already have most of the other items needed to make the heat tape lying around your home or garage.

So here goes – a tutorial on how to assemble and install your reptile heat tape. (We’ve included a video tutorial at the bottom of this article as well).

First of all, we’ll give you a list of items that you will require in order to put together your heat tape. You can purchase most of these items from a hardware store or even department store in some cases. The only item that you might need to specialty order is the actual roll of heat tape itself.

  1. Heat tape roll
  2. Rivets
  3. Aluminum foil tape
  4. Electrical tape
  5. Crimping pliers
  6. Adhesive rubber pads/insulators
  7. Electrical cord with ring terminals
how to install reptile heat tape
All the items needed to install reptile heat tape.

Step One

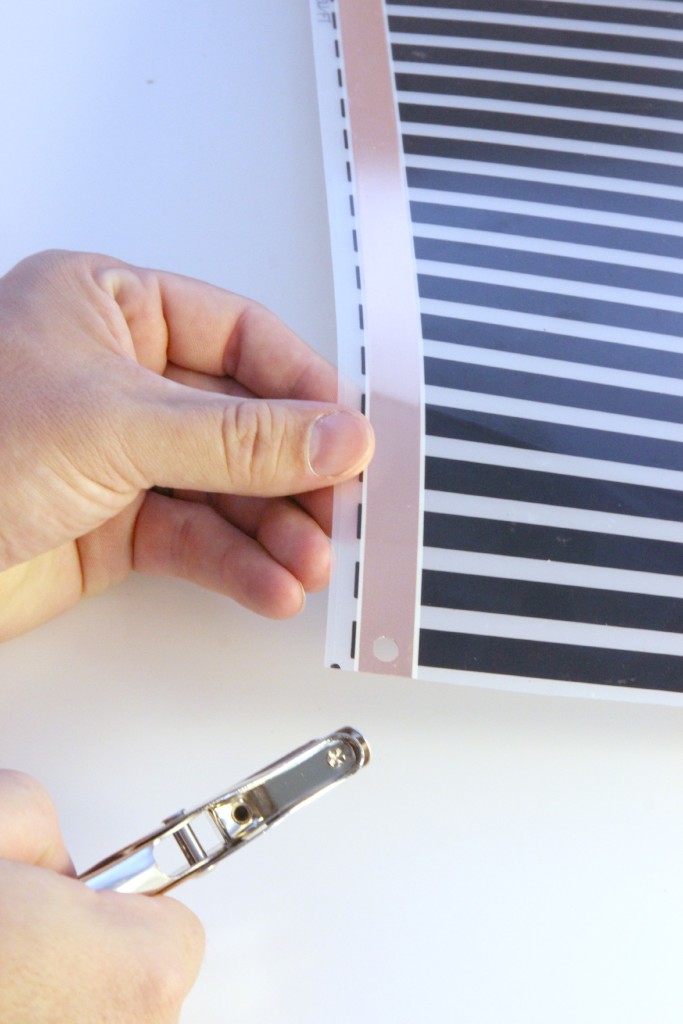
Once you have secured all the items you need, your first step is to measure out and cut the length of heat tape that you want. After you’ve done this, punch two holes in the bottom corners of one end of the heat tape. The holes should be about a quarter of an inch up from the bottom edge of the tape in the copper strip portion. Be aware that you only need to punch these holes on one end of the tape – the other end should have no holes.

reptile heat tape - step one
After you’ve cut your length of heat tape, punch two holes at the bottom edges of your heat tape. One hole per copper strip on both the left side and the right side.

Step Two

Next, push one of the ring ends of the electrical cord with ring terminals through the bottom edge of the heat tape sheet. You will essentially be making a “sandwich” with the heat tape and the ring end of the electrical cord. The ring will fit between the two sides of the copper section of heat tape and align with the hole you punched in the tape earlier. Repeat this process on the other corner of the heat tape.

reptile heat tape - step two
Notice how the looped end of the electrical cord is sandwiched inside the heat tape and aligned with the hole we punched earlier.

Step Three

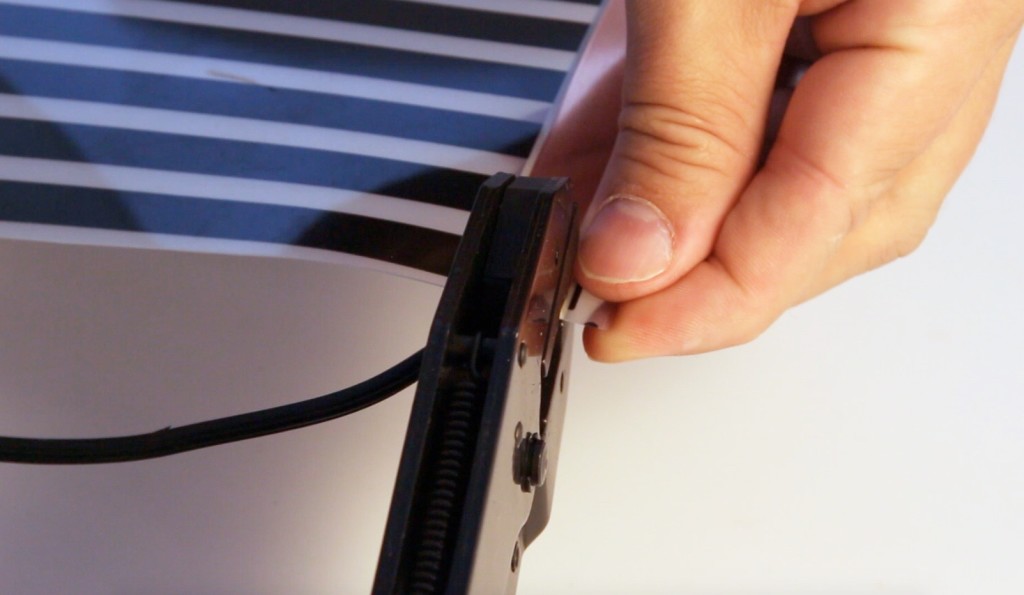
After your electrical cord is attached to your heat tape, you’ll need to secure the electrical cord ends in place with the rivets. Poke one end of the rivet through the hole in the heat tape and the terminal end of the electrical cord. Cap the rivet with its mate piece and proceed to clamp them shut with the crimping pliers.

If you have crimped the rivets correctly, the wires should not be able to spin or rotate at all. They should be firmly stuck in the position in which they were clamped. Repeat this process on both sides of the heat tape.

reptile heat tape - step three
Use the crimping pliers to pinch the rivets through the electrical cord and the hole you have punched.

Step Four

Use the adhesive rubber insulator pads to cover the electrical connectors completely. Do this by peeling off the adhesive backing to one rubber piece. Cover the entire hole punch and electrical cord apparatus. Then peel another rubber piece and simply stick it on the other side of the other rubber piece, sort of like a sandwich, which the connector in the middle.

You should have a nice, complete, solid seal on the entire electrical portion of the heat tape. This keeps the rivet protected and is a safety precaution.

reptile heat tape - step four
This is what your heat tape should look like at the end of this step. Notice how the adhesive rubber pad has completely covered the hole and the electrical connector.

Step Five

You will need two small pieces of electrical tape ready to go for this step.

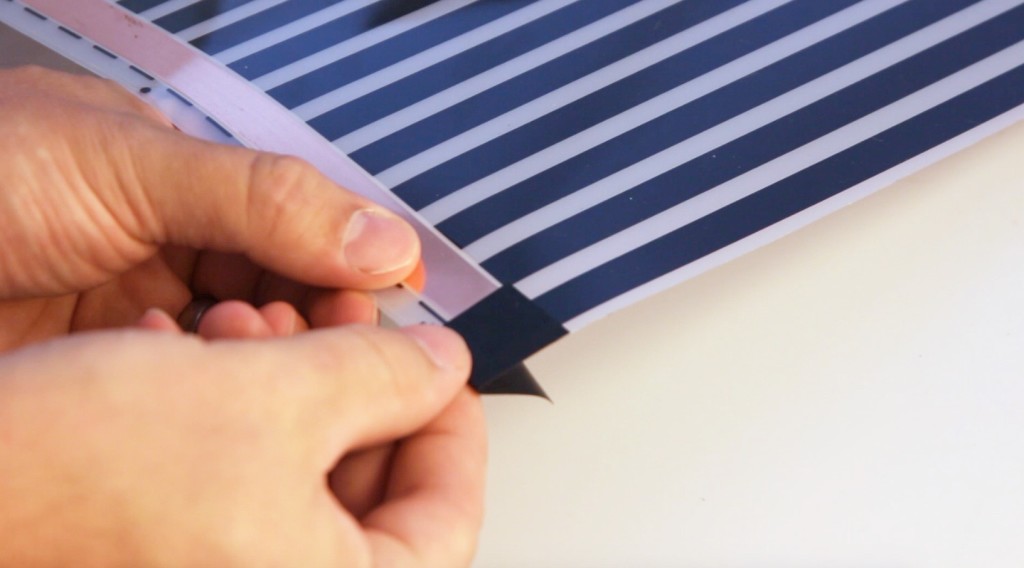
Turn the heat tape around so that you are working with the end that has no wires coming out of it. Simply take your small piece of electrical tape and use it to cover and seal off the copper end of your heat tape. The tape should wrap around and cover the copper strip on both the front and back sides of the heat tape. You will want to do this on both the left side and the right side of the tape where the copper strips terminate.

reptile heat tape - step five
Wrap a piece of electrical tape around the ends of the heat tape opposite to the side with all the wires. Cover both ends where the copper strip is exposed by folding a piece of electrical tape over it.

Step Six

At this point, your heat tape is pretty much complete. You will just need to install it and hook it up to a thermostat.

To install the heat tape, we recommend finding a flat surface that is heat resistant such as glass or ceramic. We do not recommend mounting the heat tape on either carpet or wood for safety’s sake.

All you need to do to mount the heat tape is to tape it down using the aluminum foil tape. Just cut the length of foil tape that you need and run it along the edge of your heat tape. It is vital that you do NOT cover the copper strip with the foil tape. This could cause problems down the line. You just want the foil tape to edge the heat tape and your mounting surface.

reptile heat tape - step six
Here is a sample of a completed heat tape set up. We have only taped a small section to our mounting surface with aluminum foil tape, but you should use enough tape to line the entire edge.

We made a video with all of the above steps to go along with our written tutorial. Check it out below.

Step Seven

Your final step is to hook your heat tape up to a thermostat. Believe it or not, heat tape can actually get too hot. For the health and safety of both your animal(s) and yourself, you want to be sure that the tape is kept at a safe temperature. Thus, the need for a thermostat.

Just like your home thermostat, a reptile thermostat will measure the temperature of the heat tape and turn it off when it gets too hot and turn it on when it gets too cool.

To hook up the thermostat, plug in the outlet portion at the end of your heat tape’s electrical cord directly into the thermostat. Your thermostat will have its own separate power adapter that you will need to plug into your wall outlet.

Your thermostat will come with a temperature probe. Plug the probe into the back side of the thermostat (it should have an outlet labeled “probe” specifically for this purpose) and then directly affix the probe to the heat tape. The probe will take temperature readings and moderate your heat tape’s temperature accordingly based on whatever temperature you have it programmed to maintain.

We made a very brief video tutorial explaining how to hook the thermostat to the heat tape. You can view it below.

At Backwater Reptiles, we use various sizes of heat tape for different purposes. We use a wide, fat heat tape to make sure our Dubia roach colonies stay warm and toasty. We also use thinner strips of heat tape to line our leopard gecko and snake enclosures.

reptile heat tape installed
This photo demonstrates one of the ways we use our heat tape. We line shelves with it and then set our Dubia roach tubs on top of it. You can use it for leopard geckos, snakes, and many other types of reptiles as well.

We hope you’ve gleaned some helpful information from our tutorial on installing reptile heat tape. In the end, it’s an economical method for heating reptiles, and when combined with a thermostat, it’s exact as well.