How to Preserve a Reptile or Amphibian

We’d like to preface this blog article by stating that it’s never a happy occasion when a pet reptile or amphibian passes. It’s a sad occurrence and we’d like to make it known before you delve into this piece that we’re not writing this tutorial with an attitude of callousness or disregard for the lives of the beautiful reptiles and amphibians with which we gratefully share our homes.

We also want to state that this post will be somewhat graphic and depict photos of deceased reptiles and amphibians being preserved. To some people, this might be disturbing and we wish to alert those with sensitive constitutions of this fact before they continue reading.

All of the Backwater Reptiles team loves reptiles, amphibians, and invertebrates and we are writing this article from a place of appreciation for these wonderful animals and the enrichment they  bring to our lives. We’re of the mindset that even after they’ve passed, our loving pets might live on through the preservation process, but we definitely understand that not everyone wishes to see their dearly departed pet after they have moved on.

So  now that we’ve warned you that the content of this post is not going to be appealing to everyone, let us continue forward. We’ll discuss everything from how to humanely euthanize a reptile or amphibian to how to safely create a wet specimen or dry specimen out of an animal that has moved on due to natural causes.
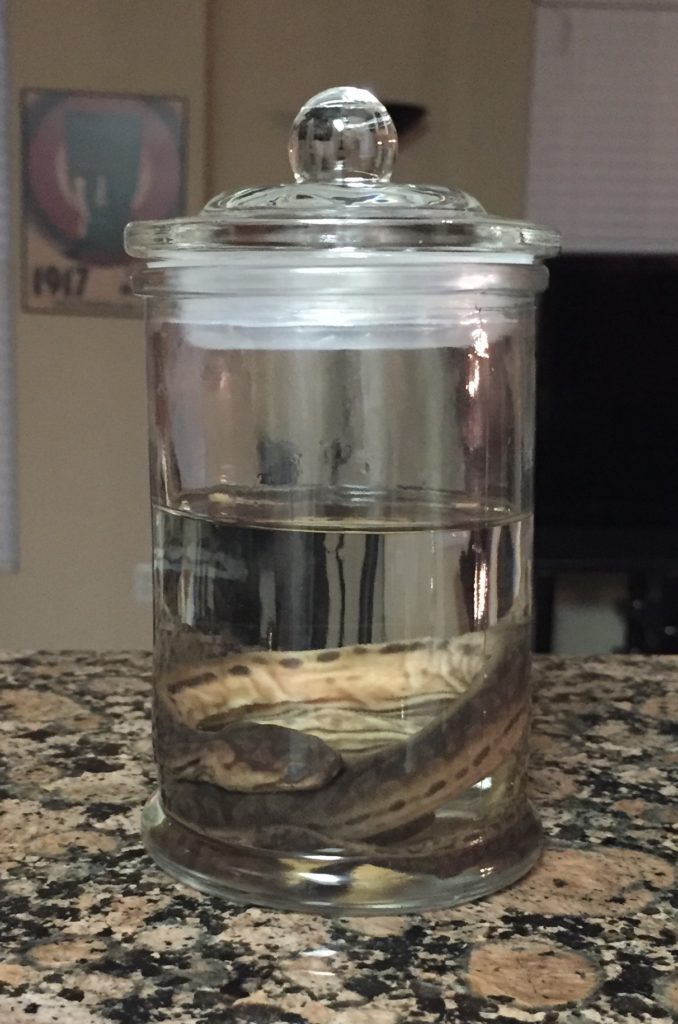
finished-wet-specimen
This is a completed wet specimen of an elephant trunk snake. It is a bit more buoyant than some specimens due to being an aquatic animal by nature.

How to humanely euthanize an ill or dying reptile or amphibian

It’s never an easy decision to euthanize a pet, no matter what type of animal you care for. It’s natural to grow attached to your pet, no matter if it has scales or fur.

It’s standard operating procedure to take a dying or ill cat, dog or other domestic creature to the vet to be euthanized, but what do you do when that pet is a reptile or amphibian? Is the process the same? What is the most humane way to go about helping your reptile over the rainbow bridge?

Obviously, we always recommend taking your reptile to the vet when it comes time to make such a tough decision. Although there are ways to do so at home, they are controversial and we feel that it’s always best to leave such matters in the hands of professionals, so we won’t be touching upon these methods, even though some people might endorse them.

Your herp veterinarian knows how your pet’s body works and will be able to euthanize your herp in a manner that alleviates pain and causes the least distress to the animal and to the owner. Some vets are even kind enough to perform house calls for an additional fee.

How to create a wet specimen from a deceased reptile or amphibian

Before we delve into the process of preserving your reptile or amphibian as a wet specimen, we should probably explain what exactly a wet specimen is.

Unlike mounted skeletons or taxidermy, which both require extensive studying and experience to perform, wet specimens are animals suspended in a liquid matrix in some sort of container such as a jar or a bottle. The liquid can range from ethyl alcohol to formalin, but either way, it will essentially “pickle” the animal in question, preserving it in its entirety.

For the purposes of this article, because we’re not experts on the subject, we’ll stick strictly to preserving a complete specimen. In other words, it is certainly possible to preserve parts and pieces of an animal, but we’re only discussing capturing the essence of an entire creature prior to its decomposition process.

When creating a wet specimen, it’s best to start right away. The less rigor mortis that sets in, the better you can pose your animal into a resting position that you like. However, if you are unable to begin the preservation process right away, you can store your reptile or amphibian in the freezer.

Just keep in mind that freezing works better on animals with scales as the porous skin of amphibians can actually get freezer burn if you’re not careful.
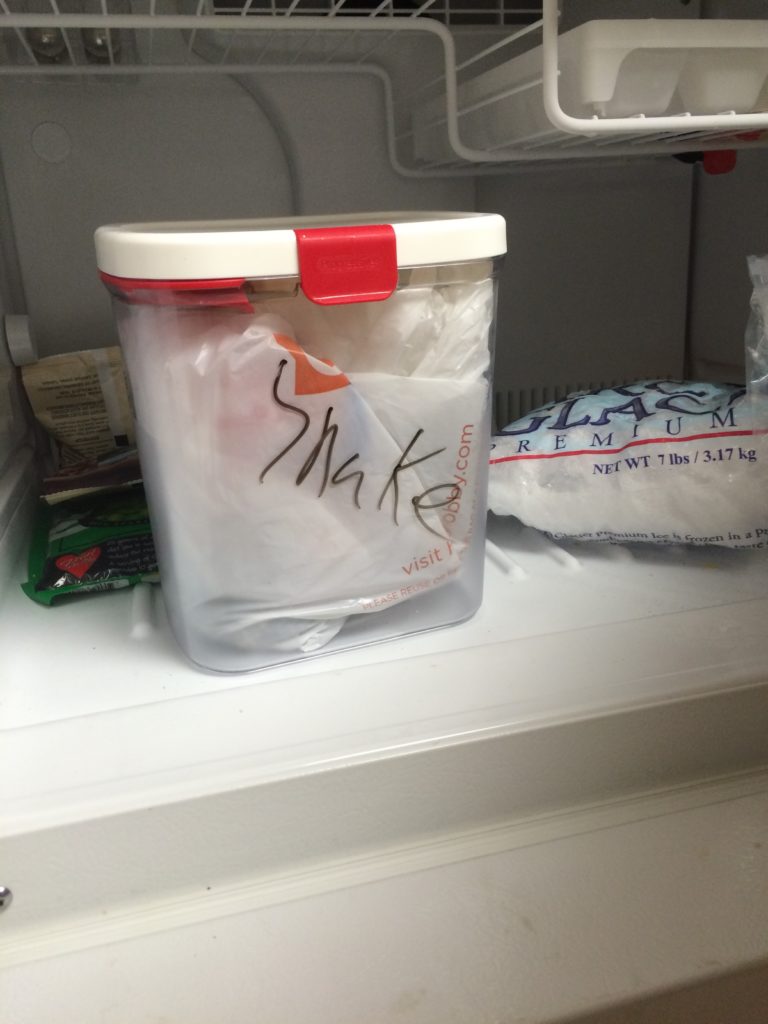
preserving snake in freezer
If you have to put your animal in the freezer for any reason, make sure it is in a tightly sealed container to help prevent freezer burn.

List of supplies needed to create a wet specimen

A jar or container large enough to hold the reptile or amphibian that you will be preservingThis is a no-brainer. You’ll need something to hold both the liquid and the animal in question.

When we’ve created specimens in the past, we’ve purchased glass jars with either twist top silver lids or vacuum sealed glass tops. Pretty and decorative jars and containers can be found in abundance at thrift stores for very cheap or you can head to your local craft store for a wide range of sizes. Just be sure your container is glass because plastic can react poorly with chemicals.

Side note: Although jars with cork lids definitely look appealing and will do the trick for a short amount of time, the cork lid is porous and you will lose preservative through it over time. So although you can certainly cap your container with cork, keep in mind that you’ll have to refill your jar with preservative from time to time.

Preservative liquid. Again, our preservatives of choice are either formalin or ethyl alcohol, although there are others that you can use if you know where to find them.

Ethyl alcohol is a clear alcohol much like rubbing alcohol, however its chemical composition is slightly different. We use a solution of at least 70% alcohol to water that can easily be purchased from any drug store.

Formalin is a bit trickier to work with and is actually a carcinogen, so we recommend using ethyl alcohol if at all possible, even though it is not as strong of a preservative.

Formalin is not as easy to secure due to the strength of the chemical, but it can be purchased online.

No matter whether you choose to use ethyl alcohol, formalin, or some other chemical, be sure that you have enough to inject your animal and enough to fill your holding container.

Needles in syringes. Depending on the size of the reptile or amphibian you’re preserving, you’ll need various gauges of needle, but for most animals, the very small hypodermic syringes used by diabetics work just fine.

If you need needles larger than insulin syringes contain, you can order them online. However, insulin syringes can be purchased at any pharmacy in bulk for relatively cheap.

Plastic sheet liner. This item is not necessary, but we prefer to line our work space with some trash bags or disposable plastic bags just to keep things as sanitary as possible.

Gloves. Here’s another item that is not strictly needed, but we certainly prefer to utilize when available for sanitary reasons.

You can wear latex or rubber gloves, but either way, we choose gloves that are fairly fitted to the skin. This is because a lot of the needlework can require a delicate touch and oversized bulky gloves can make this difficult.

Steps to creating a wet specimen

1. Thaw your reptile or amphibian if necessary. You will be injecting it with a preservative liquid, so if possible, you’ll want the animal to be soft to the touch and pliable, rather than stiff and frozen.

2. Empty a small amount of your preservative liquid of choice into a bowl or temporary holding container. You will be sucking up the liquid into your syringe very frequently, so we’ve found it’s easiest to have the liquid in an open container where your needles have easy access to it.

3. Uncap your syringe(s) and fill it with preservative. Begin either at the tail end of the animal or at the head and start injecting the preservative. Because your animal still contains all its internal organs, you’ll want to get your needles far enough into the body cavities so that the preservative is reaching those organs.

4. Inject your reptile or amphibian’s body cavities until you feel that it is full enough of preservative. This means getting inside the cranium, the abdomen, and even inside the cloaca if necessary.
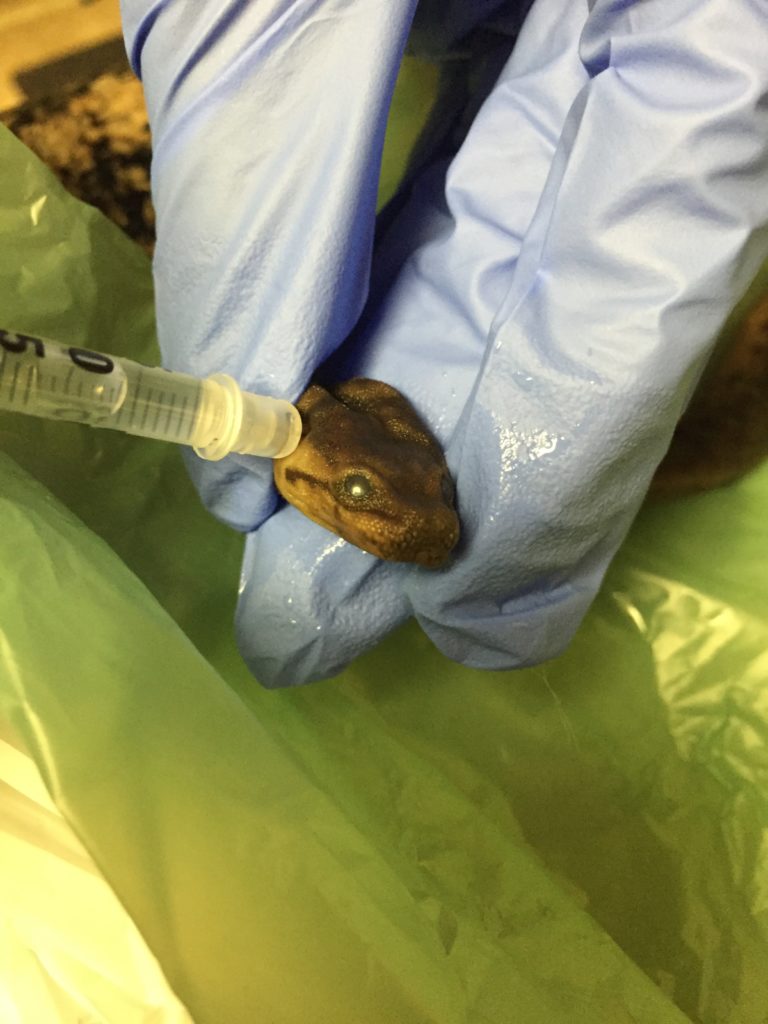
injecting a wet specimen
This snake is being injected with ethyl alcohol in its cranial cavity. For the best results, your entire specimen should be filled with fixative.

There’s not really a way to be one hundred percent sure that your specimen is done being filled. It’s sort of something you gauge by examining and feeling the animal itself. It should begin to “fill out” and sometimes you can even feel the preservative inside to know where you need more.

5. Position your reptile of amphibian inside the container in a position you desire it to remain. Many animals will gently float within the preservative liquid, while others, like snakes, can be coiled up within the jar.

6. Fill the holding container up with enough preservative to cover the reptile or amphibian. If your animal is floating, we recommend filling the entire container up to the lid, otherwise you can just fill it enough to cover your specimen.

7. Put the lid on your container and your wet specimen is ready to display! We would like to mention that often times, the first liquid you fill your jar with will need to be drained and replaced after a few weeks. It’s not uncommon for the liquid to be discolored when the animal is “settling in” so to speak, but you can always drain and replace if you want pristine, clear preservative liquid.

How to create a “dry” specimen from a deceased reptile or amphibian

Transforming your pet or other humanely sourced reptile or amphibian into a dry specimen through methods such as articulation, taxidermy, mummification, or another similar practice is far more complicated than producing a wet specimen. And quite honestly, it takes a far more practiced and knowledgeable individual to perform such tricky jobs. Therefore, for the purposes of this blog article, we’ll simply touch upon how to convert your animal into a clean set of bones.
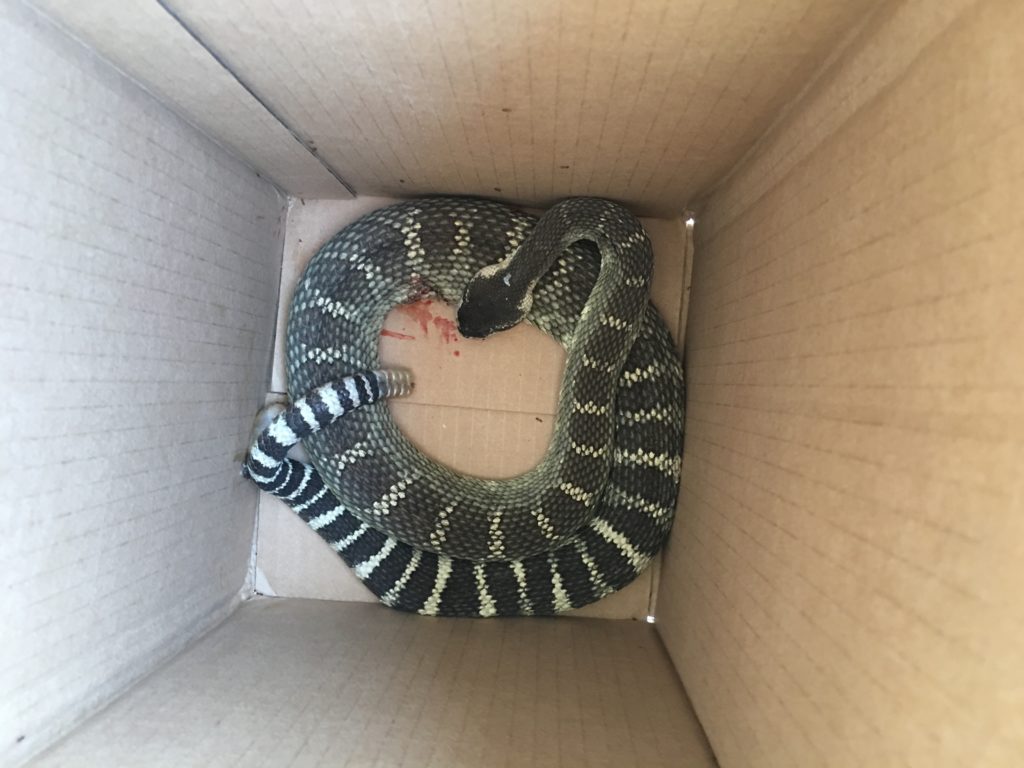
ethically sourced roadkill
Not all preserved animals are deceased pets. This rattlesnake was ethically sourced roadkill and was transformed into a dry specimen.

There is always the old fashioned method of burying the animal and allowing nature to run its course. You can always put your deceased animal into a shoebox or other type of container, bury it for a few months, let the creepy crawlies do their job, and unearth the container later.

Personally, although a simple burial is the most hassle free approach, we prefer faster methods. Not only can it take some time for your specimen to decompose depending on the size of the animal, but there is always the chance that something could go wrong. For instance, if your burial ground is not confined to say, your backyard, hungry wild animals can and will come along and dig up your animal. Then you’ve likely lost your specimen altogether.

We prefer to clean the deceased animal ourself and feed the remains to dermestid beetles. These are a special type of insect that feed upon decaying flesh. They will essentially clean your animal of its skin and other material in a matter of days, leaving you with clean bones.

There are many sources where you can purchase dermestid beetles, but pretty much all of them will be online. We recommend purchasing from a seller who has a track record and instructions on how to feed the beetles because this means they have experience and likely won’t sell you beetles with parasites.

Once you’ve acquired your beetles and created a habitat for them, you will need to skin your animal, especially if it is a snake. Amphibians are a bit easier to work with and won’t require as much work.

The beetles prefer drier meals, so if you are able to safely allow your specimen to dry out for a day or two prior to placing it in the beetle’s enclosure, they will make quicker work of the carcass.

Please be aware that with small animals like frogs, delicate lizards, and other tiny reptiles or amphibians, you might only end up with a skull left over. Sometimes the bones of the body are too delicate or cartilaginous to survive this process.

You can certainly clean your animal to the best of your ability of its internal organs and skin and boil it as well. However, we really don’t recommend this method for reptiles as the bones tend to be so small and delicate that it can be quite a tricky process and might ruin your bones.

Reptile and amphibian skeletons

If you’re just looking for the skeleton to be preserved, there are cleaner insects called dermestid beetles that clean dead animal carcasses to the bone. It’s a fairly clean process, and the beetles can be purchased online.

Conclusion 

There are many ways to preserve and memorialize your pet reptile or amphibian. Whether you choose to try to transform them into a wet specimen or just save their bones, please keep in mind that this article is a beginner’s guide and not an expert tutorial.
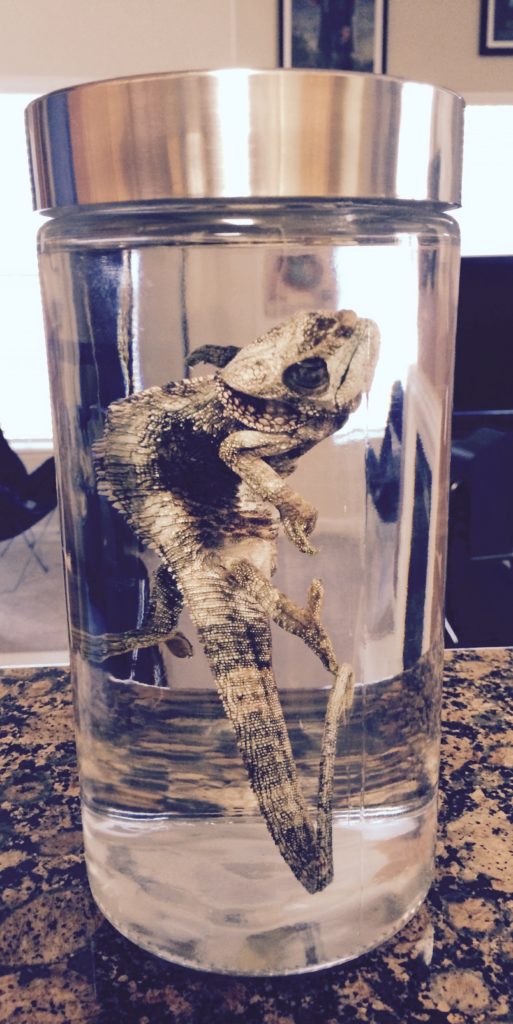
chameleon wet specimen
This is a completed wet specimen of an elephant ear chameleon that died of natural causes. Rigor mortis set in before the animal was able to be effectively preserved, so the specimen is a bit more sunken in appearance.

Conclusion: How To Preserve A Reptile Or Amphibian

If you truly want your animal’s likeness preserved in the most effective manner possible, we recommend finding a specialist in your area that has experience in such matters.

How To Clean A Reptile’s Cage

We all love our pets, but it’s true no matter if you own a puppy or a python that part of the responsibility of pet ownership is cleaning up after it, no matter how unglamorous it may be. The question of how to clean a reptile’s cage is common, and easily answered.

Because reptiles and amphibians live in cages unlike our other furry companions, cleaning up after them is a bit different than scooping the dog poop in the backyard or sifting through the litterbox. However, it’s not a hard task once you’ve done it once or twice.

Many people aren’t experienced with the proper and safe methods to cleaning a reptile or amphibian’s enclosure. That’s why we’ve written this blog article dedicated to explaining how we clean our animals’ cages and passing along this valuable information to you.

How to clean a reptile's cage
Keeping your pet reptile or amphibian’s cage clean is tantamount to keeping the animal healthy.

How To Clean A Reptile’s Cage

What Cleaning Solution Should I Use to Clean My Reptile’s Cage?

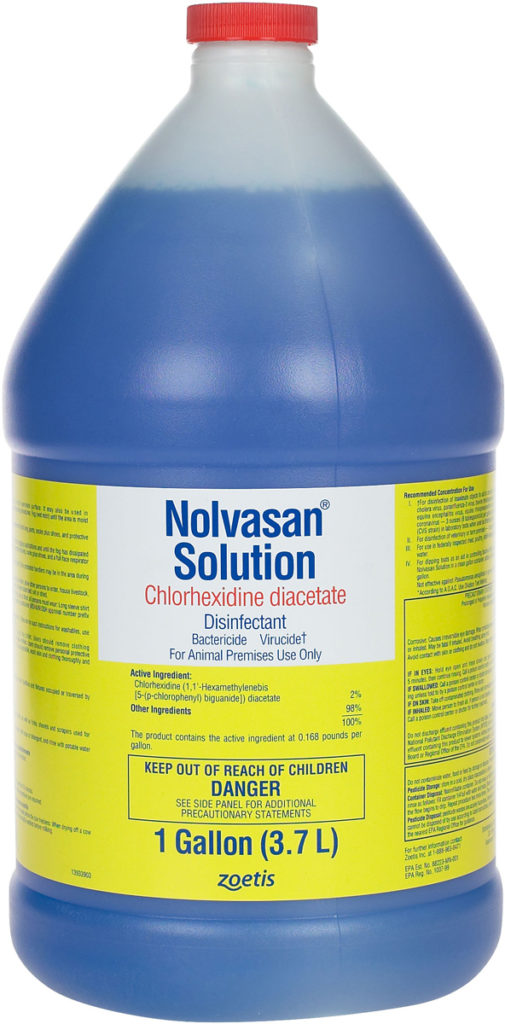
Aside from unscented antibacterial soap and water, we highly recommend using a veterinary disinfectant solution called Nolvasan for all your reptiles, amphibians, and exotics.

Nolvasan is a solution that is commonly used at veterinary facilities because it safely kills many types of viruses, bacteria, and species of fungus that commonly afflict animals and people. What’s more, it’s safe to use around animals, although we do always remove our animals from the tank when using Nolvasan.

You can purchase Nolvasan online through retailers such as Amazon in a variety of different sizes and concentrations. As long as the solution is blue and the active ingredient is chlorhexidine diacetate, you can buy whatever quantity works for your purposes.

nolvasan solution
This is the gallon size Nolvasan solution used at Backwater Reptiles. We place approximately a capful of Nolvasan into a spray bottle and dilute with water. One of these gallon containers will last nearly an entire year!

Because we have such a large volume of cages to keep clean at Backwater Reptiles, we usually purchase a gallon at a time and dilute it with water according to the instructions on the bottle. Then we use the diluted solution in a spray bottle to wipe down cages and flat surfaces.

We’d like to say that although we’re not endorsing Nolvasan, it is the safest product we have found for both human beings and the animals. It leaves no strong ammonia after-smell and is a far safer alternative to water and bleach solutions, which we definitely don’t recommend using.

What Supplies Will I Need to Properly Clean My Reptile’s Cage?

Different supplies will be needed for different scenarios, but it’s always a good idea to have these items handy whether you’ll be spot-cleaning or wiping down the entire interior of your pet’s cage.

Nolvasan solution – As we’ve already discussed, Nolvasan is our go-to cleaning agent at Backwater Reptiles. It is non-toxic and safe for use around people and animals. It leaves no strong, lingering scent and most importantly of all, it kills bacteria, viruses, and fungi. We highly recommend keeping a spritzer bottle of Nolvasan on hand at all times.

Paper towels – It might seem self-explanatory, but paper towels are used during all types of cage cleaning. We use them when cleaning cage accessories, wiping down cage surfaces, and also to pick up fecal matter during spot cleaning. Paper towels are an absolute necessity, but the good news is that most people have them handy around the house anyways.

Rubber or latex gloves – Gloves aren’t an absolute necessity when it comes to cleaning cages, but we recommend using them, especially if touching dirty things isn’t your cup of tea. We buy the single use disposable latex kind so that the gloves themselves don’t become bacteria-ridden.

Back up cage – Unless you have a friend or family member who can hold your pet the entire time you are cleaning its cage, a back up cage is necessary. It doesn’t have to be anything elaborate or large – a holding area will do just fine, so long as you don’t take hours to clean your pet’s cage. The bottom line is that unless you are just spot cleaning and picking up substrate that has become dirty, you will need to remove your pet from its cage in order to wipe down surfaces and cage accessories.

Non-scented antibacterial soap – This kind of soap is best to use when you have cage accessories that have gotten dirty. We use it when rinsing washing water dishes as well as fake plants and hiding spaces. Nolvasan is also an acceptable way to clean these items, but we prefer soap and water in these particular instances.

How Do I Know When I Should Clean My Reptile’s Cage?

There isn’t a schedule you need to adhere to as far as cleaning goes, although you certainly can if that’s your preference. We clean cages as needed, which means if we can tell an animal has defecated, notice a water dish is getting dirty, or see anything amiss in the animal’s cage, we go ahead and tidy up as necessary.

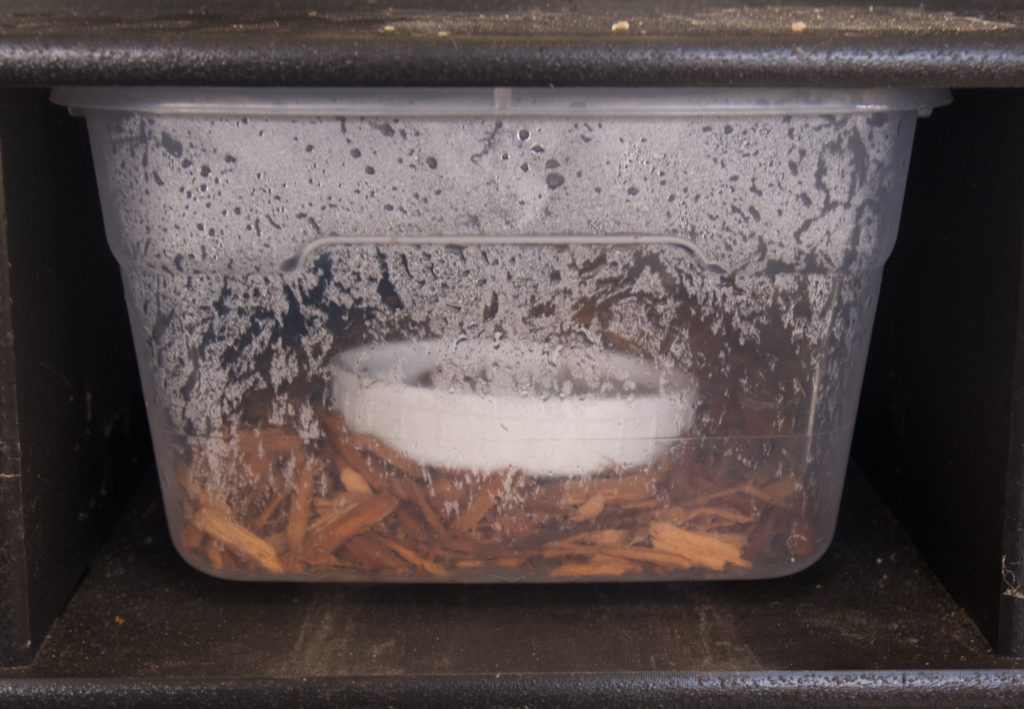
It’s natural for a reptile or amphibian’s cage to have a semi-musky smell, particularly when the animal in question requires high humidity levels. However, if you ever notice too much moisture, fungus growing anywhere within the cage, or smell ammonia, the entire cage should be cleaned.

cage with too much moisture
Pictured is a reptile enclosure that is far too moist and requires cleaning. If you ever notice this much condensation on your animal’s cage walls, you should clean the entire cage to avoid bacteria, viruses, and fungi forming colonies.

How to Clean a Desert Reptile’s Cage

The most important thing you’ll need to keep clean inside your reptile’s cage is its substrate. The most popular substrate option when creating a desert-dwelling reptilian habitat is sand, although you can also use paper towels and reptile carpet.

Usually, if you check your pet’s cage daily, you can easily scoop up any sand clumps that contain feces, urine, and dead insects or plant matter. You can use gloved hands, paper towels, or a tool as specific as a sand sifter. Personally, we prefer the sifters just because it’s the simplest method and grabs all the waste in one easy scoop.

If you line your cage with paper towels or newspaper, odds are you’ll have to replace the lining more frequently. This is because it absorbs odors, bacteria, and fecal waste and can’t be spot-cleaned. The good news is that these substrates are both low maintenance and low cost, plus most people always have some lying around the house.

You can use your handy dandy Nolvasan solution  (or nonscented soap and water) to clean any cage accessories that get dirty including plastic leaves, water dishes, and even glass terrarium walls.

How to Clean a Tropical Reptile’s Cage

Tropical reptiles can live in either mesh screened cages (i.e. chameleons) or glass terrariums (i.e. certain gecko species and certain iguana species). Each type of cage will require slightly different cleaning methods.

The easiest way to clean a chameleon’s cage is to have a hard, flat, plastic liner of some sort on the bottom. Many chameleon cages will have a separate access point to insert and remove this liner. We highly recommend investing in one of these style cages if you don’t already own one as it makes spot cleaning a breeze. All you need to do is open the bottom hatch, slide out the liner, and wipe it using Nolvasan. You can also run it under water in the sink using your non-scented antibacterial soap.

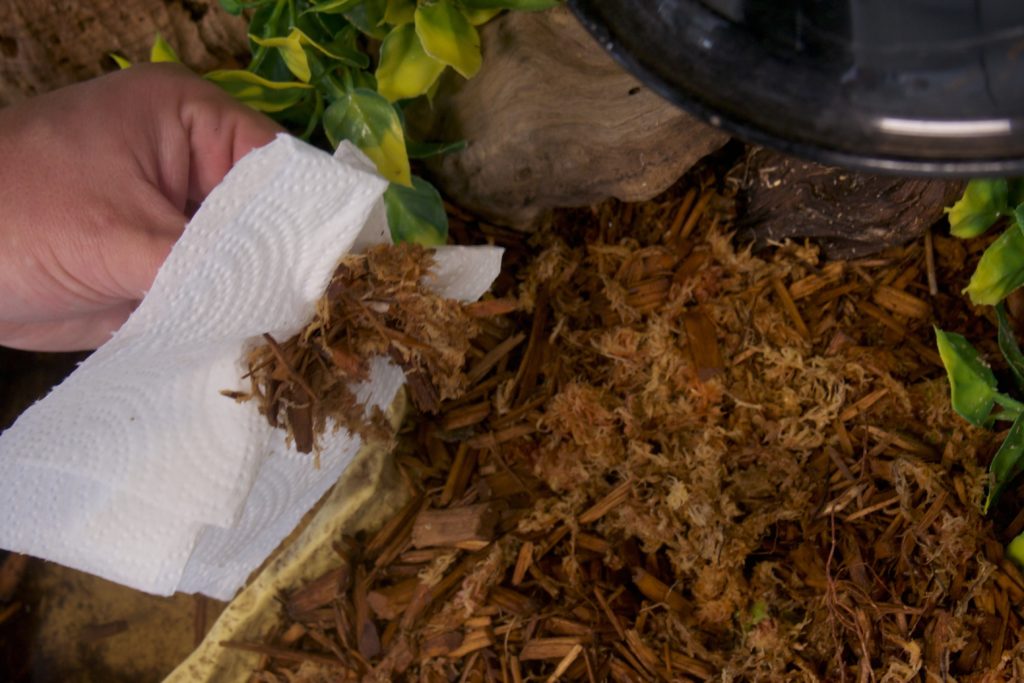
spot cleaning a reptile cage
Many enclosures, whether they house a tropical reptile or a terrestrial amphibian, can be spot cleaned very simply. Just scoop up the dirty substrate with a paper towel or a sifter scooper.

Most chameleon feces and dead insects will collect along the bottom of the cage, so this is the area that will get dirtiest and require the most cleaning. However, if you have plastic plants and vines within the cage, you will also need to clean these items from time to time. Again, we use Nolvasan solution or non-scented antibacterial soap depending on the degree of dirtiness.

Glass tropical enclosures can be cleaned much the same as a desert enclosure. Spot cleaning is perfectly acceptable, but every now and then the entire cage should be cleaned out. New substrate should be put inside the cage, accessories and cage “furniture” should be washed down, and your reptile will need to be transferred to a separate holding cage for this process.

How to Clean an Aquatic Reptile’s Tank

What do we mean by aquatic reptile? Well, turtles are the most common, although crocodilians are also aquatic by nature.

Keep in mind that aquatic reptiles eat, sleep, drink, and defecate in their water source, so keeping it clean means your pet will be much healthier.

You should remove any uneaten food from the tank on a daily basis. Whether you feed your pet pellets, worms, or fresh vegetation, be aware that leaving any of these food items in the tank can allow harmful bacteria to thrive.

We also highly recommend purchasing a quality tank filter as it will save you a lot of hassle. A good filter will allow you to clean the entire tank and cycle out the water far less frequently.

When it does come time to clean your aquatic reptile’s tank, we don’t recommend changing out all the water at once. While turtles are tougher than amphibians when it comes to sensitivity to ammonia, nitrates, and nitrites, you still don’t want to risk upsetting the tank’s natural balance unless you absolutely have to.

If your tank has a substrate such as rocks or gravel on the bottom, you can even buy a fancy vacuum that sucks up unwanted detritus that collects along the bottom.

How to Clean an Amphibian’s Enclosure

There are two types of amphibian enclosures you can potentially have to clean – aquatic and terrestrial. Aquatic amphibians include newts and certain species of frog, whereas terrestrial amphibians are tree frogs, toads, and salamanders.

You will need to be very careful when cleaning the water in an aquatic amphibian’s home. If you empty out all the water and start fresh, you could potentially kill your pet by unintentionally causing a spike in ammonia, nitrates, and/or nitrites. Aquatic amphibian tanks behave much the same way fish tanks do – you will need to cycle the water carefully to maintain the eco balance.

Just like when you own an aquatic reptile, we recommend investing in a good water filtration system for your aquatic amphibian. The filter will help maintain the tank’s  equilibrium on its own, at least for the most part. That isn’t to say that just because you have a filter, you won’t need to clean the cage. Rather, you can go longer between cycling the water out, which is better for the health of your pet and also means less labor on your part.

Cleaning a terrestrial amphibian’s cage is far less complicated. Generally, terrestrial amphibians will live in glass terrariums so you can clean them much the same way as any other reptile’s enclosure.

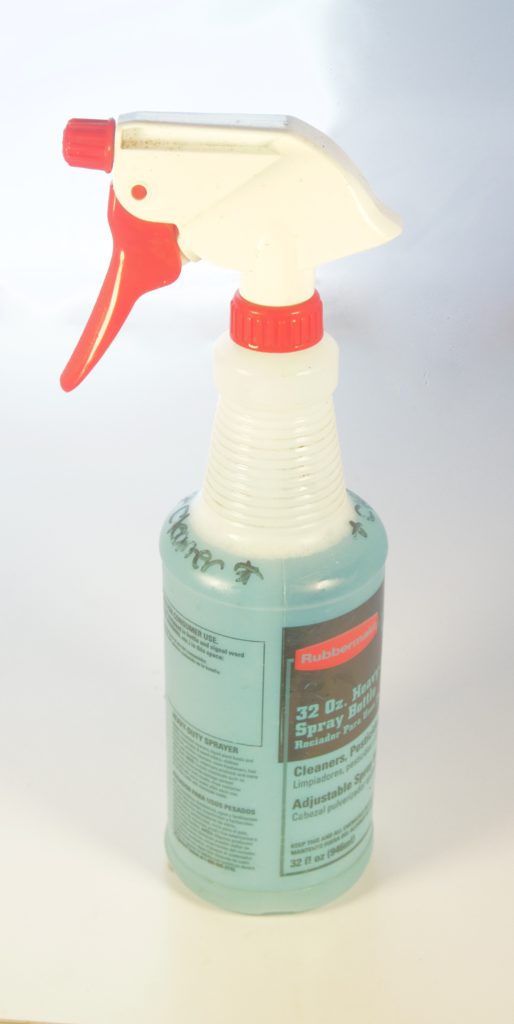
nolvosan solution spritzer
We dilute our Nolvasan solution and use it in a spritzer bottle.

The main difference between cleaning a desert-dwelling reptile’s tank and a terrestrial amphibian’s tank is the type of substrate you will be dealing with. Many amphibian tanks will be lined with sphagnum moss or eco-earth, both of which can be scooped up if needed. Keep in mind that both of these substrates are chosen for these types of habitats for their ability to hold moisture, so they will be wetter than sand, paper towels, or other desert substrates.

One thing you will probably notice more with terrestrial amphibian cages is water spots. These can develop from misting or, in the case of many “sticky” species of frog, from the animal itself adhering to the walls of the cage. While water spots can be unsightly, they won’t harm the animal and aren’t necessarily an indicator of cage cleanliness.

BONUS: How to Keep Your Feeder Insect Container Clean

Did you know that you can also use Nolvasan solution to clean out feeder insect containers? It really is a wonderful cleaning agent to have on hand when you own reptiles.

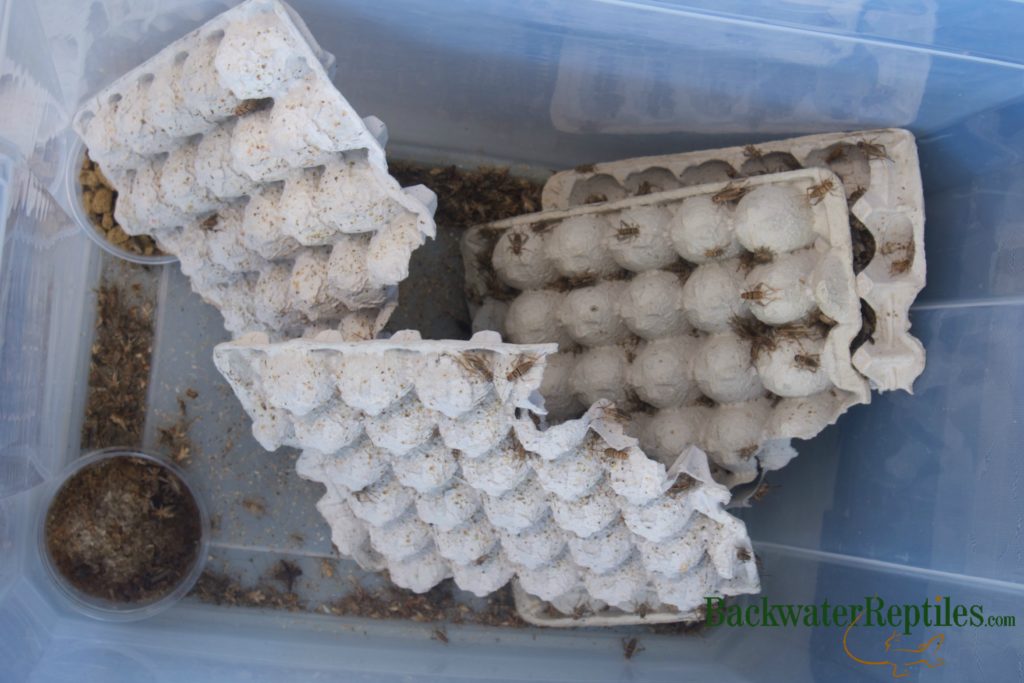
We wipe down our cricket tubs with Nolvasan when we clean them out. We usually do this when we notice the tubs starts to smell or when we see a lot of insect feces collecting in the egg crates and other surfaces within the tub. This tends to happen approximately once per week.

feeder crickets
Nolvasan solution can be used to clean out feeder insect cages too!

Another thing to watch out for when keeping crickets as feeder insects is moisture. Crickets won’t last very long if your tub and accessories are too wet.

Conclusion

No  matter whether you own a desert-dwelling reptile, tropical reptile, aquatic reptile, or pet amphibian, it goes without saying that you will be required to clean the enclosure at some point. Sometimes only spot cleaning is necessary, but at other times, you’ll definitely need to do a deep clean.

We hope that this article has given you some helpful tips and tricks on how to clean all sorts of herp enclosures, but feel free to ask any questions in the comments!


How To Gift Wrap a Reptile

If you’re wondering how to safely and humanely gift wrap a reptile, you’ve come to the right place!

We’d like to preface this tutorial article by saying that although we think reptiles and other exotic animals can make excellent gifts, we’d very much like to make it clear that you want to be one hundred percent sure that the recipient of any live animal as a gift is fully prepared to handle the responsibility of caring for a living creature.

We love all the animals we sell at Backwater Reptiles and while any one of the Backwater team would definitely love and appreciate receiving an invertebrate, reptile, or amphibian as a gift, we also know how these exotic animals need to be cared for properly.

Although many of the animals sold by Backwater Reptiles are relatively low maintenance in comparison to a pet dog or cat, they are still life long commitments and we want to include a disclaimer in this article making it known that we wish all gift givers to do their research before giving a friend, family member, or significant other a pet as a gift.

Many of the animals we sell can actually have very long life spans and taking on a new pet is not something that should be taken lightly. Again, do your research on the animal and please be sure that the recipient is fully qualified and capable of caring for it.

That being said, this article will focus on the methods we recommend for safely gift wrapping a reptile, invertebrate or amphibian.

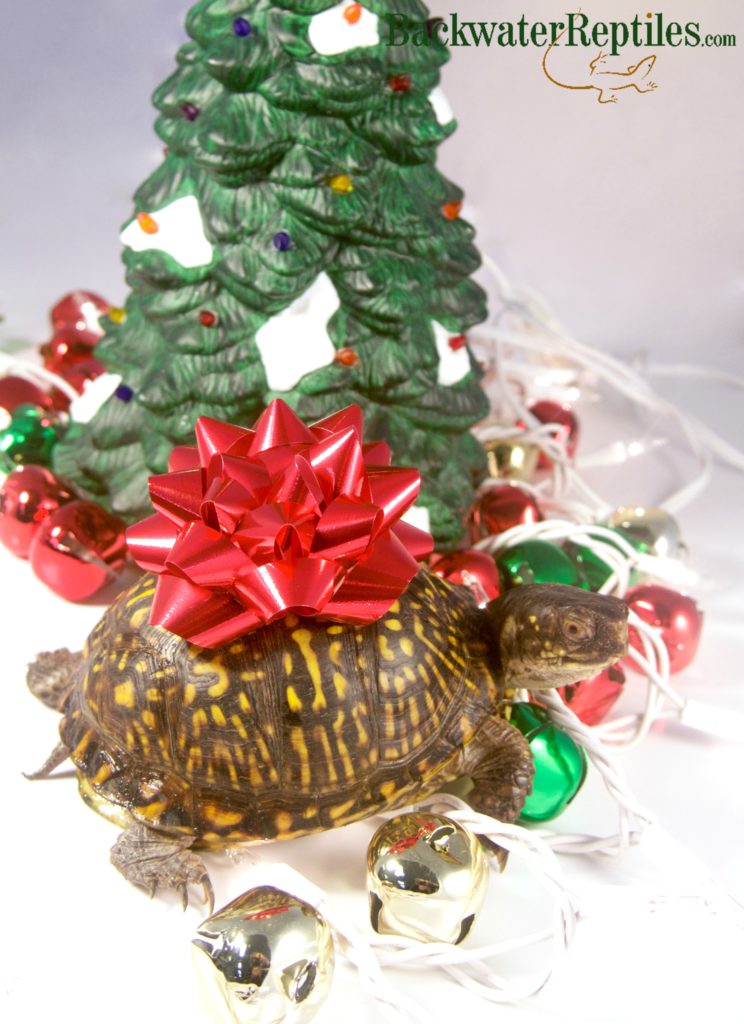
gift wrapping a reptile
Unfortunately, it’s not always as simple as placing a reptile with a bow under the Christmas tree! Read this article to find out how to safely wrap a reptile, amphibian, or invertebrate for any occasion.

How To Gift Wrap a Reptile

What supplies will I need to wrap a reptile, invertebrate, or amphibian?

Fortunately, wrapping up a reptile, amphibian, or invertebrate is not all that complicated. It’s actually very similar to wrapping any other gift, with a few exceptions. What this means is that you probably won’t need many special supplies.  Most of the items needed you should already have around the house.

Supplies needed to gift wrap a reptile, amphibian or invertebrate:

-Scissors. This is a pretty self-explanatory tool. You’ll need to cut your wrapping paper and/or tissue paper. Regardless of whether you wrap your pet in a box or a gift bag, we pretty much guarantee you’ll need scissors at some point.

-Pen, screwdriver, or other strong, slender and pointy utensil. You’ll only need this tool if you are choosing to wrap your animal using the box method.

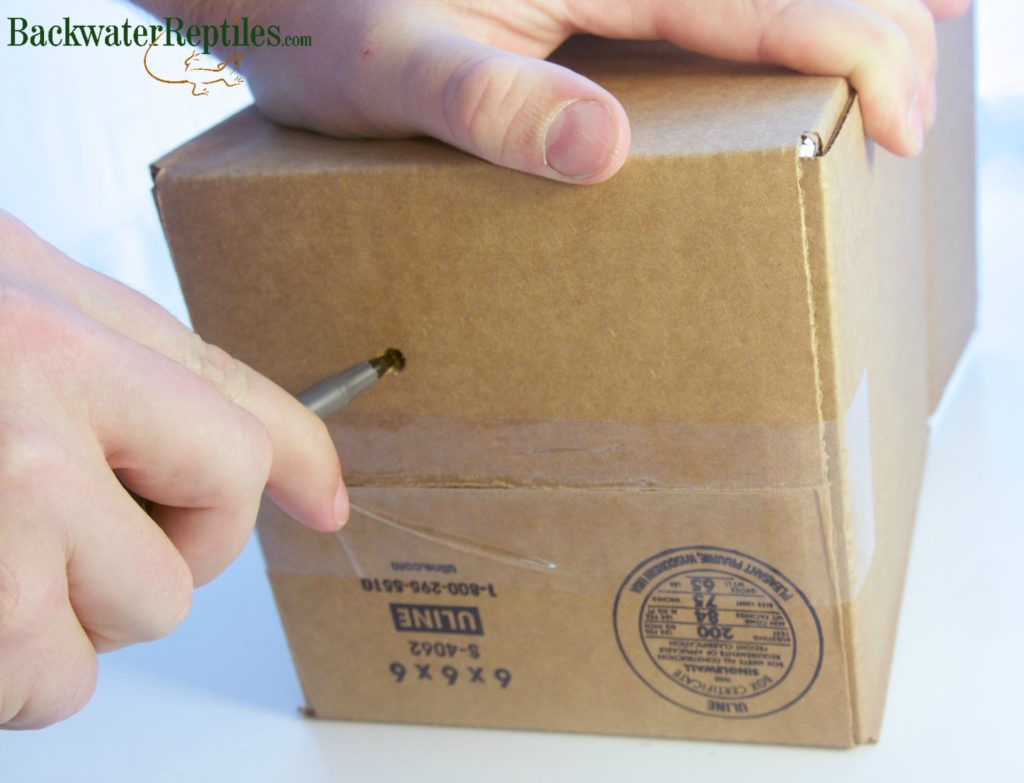
There are many objects you could use that you’re likely to already have handy around the house – a sturdy pen, a screw driver, or even a letter opener – but the reason you need this kind of tool is to poke air holes in the bottom or sides of the gift box. We prefer a screwdriver or pen as both are sturdy enough to poke through card board and they produce nice, solid, round holes that are appropriately sized.

-Gift bag and tissue paper OR gift box and sheer, breathable wrapping fabric or paper. Again, this is another supply that is pretty straight forward. Your wrapper of choice will largely depend on whether you wrap using a gift bag or a box.

If you use a gift bag, you will essentially only need to place the animal inside the bag with its heat pack and artfully place tissue paper to stick out of the bag to hide what’s inside.

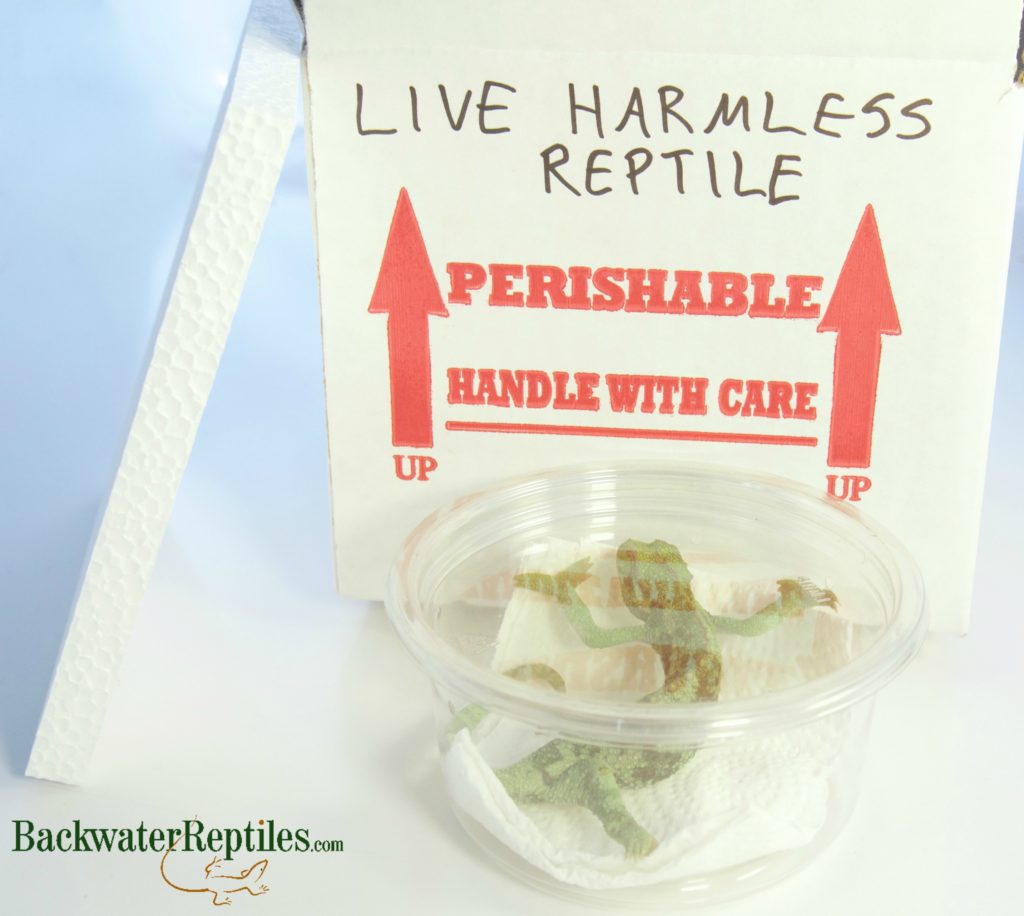
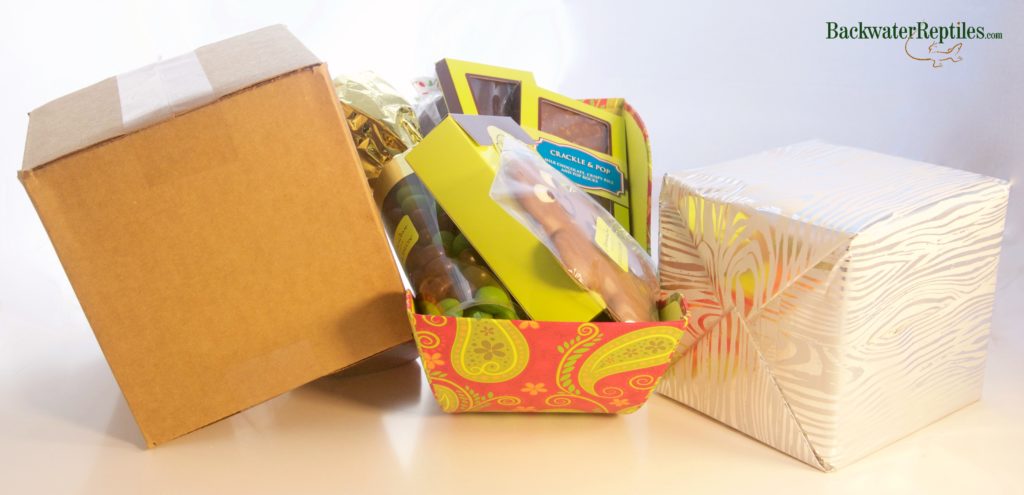
If you prefer to wrap using a box, obviously you’ll need an appropriately sized box. We recommend using a different box than the one your critter is shipped in as the shipping box will be labelled “LIVE HARMLESS REPTILE” and sheer, breathable wrapping fabric will not hide this text.

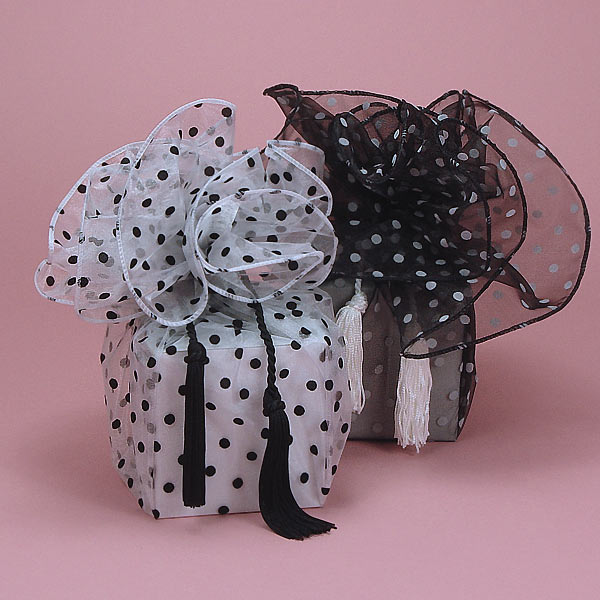
You will likely need to purchase a special type of wrapping paper or fabric in order to successfully wrap a reptile, amphibian, or invertebrate. This is because you need to use a material that allows air to pass freely through the wrapping material. Traditional wrapping paper will block the air holes you poke in the box.

If you’re unsure what types of materials are appropriately breathable, we recommend a mesh or tulle style fabric. In fact, it might be easier to go to a fabric store and purchase the material rather than a box retail store with regular, solid wrapping paper.

-Bows, ribbons, or other decorative accessories. Once more, this item on the list of supplies needed comes down to personal preference. If you wish to add a bow to your box, you certainly can. Ribbons are also nice touches. Be as creative as you’d like!

-Packing tape or clear scotch tape. Just like wrapping any other type of gift, you’ll need clear tape to hold your box shut. You’ll also need it when adhering your wrapping material to your box. Pretty cut and dry.

When should I gift wrap my reptile, amphibian, or invertebrate?

Most people’s first question or concern when gift packaging a living creature is is it safe? In short, YES, it is indeed safe for exotic animals to be gift wrapped, so long as you don’t leave them unattended in a box for an extended period of time.

how reptiles are shipped
Once you’ve opened up your reptile, amphibian, or invertebrate, we recommend giving it some time to “air out” and “breathe” before you wrap it.

The appropriate time to wrap your pet for the recipient is the night before. For instance, if you are gifting a snake as a Christmas present, we recommend wrapping it and placing it under the tree on Christmas eve. Just make sure that no sneaky gift sleuths shake the box or bag trying to figure out what’s inside!

As long as you follow the instructions below to safely and humanely prep a reptile, amphibian, or invertebrate for gifting, you can leave the animal wrapped for an overnight time frame safely.

How to gift wrap a reptile or invertebrate

The nice thing about packaging a reptile or amphibian up into a neatly decorated little package is that they don’t require as much moisture as amphibians do. This ultimately means less hassle and far less to take into consideration when prepping your pet for the recipient.

Step One – take the reptile or amphibian out of its shipping packaging.

Your critter will arrive in a plastic cup with a lid on it with air holes. It should also contain a heat pack and the proper amount of moisture or substrate within the cup for the animal to live comfortably for a day or two.

We highly recommend taking the animal out of its shipping box and letting it “breathe” or air out in a temperature controlled environment for a few hours before wrapping it.

shipping a live animal
Your reptile, amphibian, or invertebrate will arrive in a box that looks much like this one. The first step in gift wrapping it is to open up the box!

If you are so inclined, the animal would probably appreciate a little bit of time outside of the plastic cup as well. However, if you’re not comfortable handling the animal, it will be just fine in the cup for another day.

Step Two – poke air holes in your gift box. You can skip this step altogether if you are wrapping the animal using a gift bag.

poking air holes
Use a pen, screw driver, or similar implement to poke air holes in the bottom and sides of the gift box.

Remember that pen, screw driver, or other sturdy tool from the supplies list? You’ll need it to poke a fair amount of air holes in your gift box. We definitely recommend poking holes in the bottom of the box, however, if you are not concerned with the aesthetic appearance of the box, you can also poke extra holes on the sides.

gift box with air holes
Your gift box should have at least this many air holes poked into the bottom.

Step Three – wrap, wrap, wrap! Now that you’ve poked air holes, it’s time to proceed as usual. Secure your critter inside the box so that the plastic cup it arrived in doesn’t shift around, make sure the heat pack your animal was shipped with is secured inside the box, wrap your critter’s box with your sheer, breathable fabric, top with a bow, and you’re all set!

Once you’ve finished the wrapping process, we’d like to mention that unless you’ve poked holes in the sides of your box, you should prop it up at a slight angle so that the air holes aren’t directly against a flat surface. This is usually easiest when you are placing the animal under a Christmas tree. Other gifts around the oddly angled box will usually make it appear less strange.

prop up wrapped gift
Although this box has not been properly wrapped, you can see that it is propped up at an angle. The angle allows the air holes in the bottom to be exposed. You can use virtually anything to prop your wrapped reptile at an angle.

You can use virtually anything to prop up the gift. We think other, smaller presents work great! But tissue paper, a door stop, or any other wedge-shaped object will be fine.

How to gift wrap an amphibian

You can wrap an amphibian using the same methods described above, but there is one additional aspect to take into account. Reptiles and invertebrates don’t require as much moisture as amphibians do. Amphibians need to have moisture present in their environment in order to survive, so you’ll want to be sure that there is plenty of moisture present in your amphibian’s temporary plastic carrying cup home before wrapping.

When we ship an amphibian, we will include some type of moist substrate in the shipping cup, usually wet paper towels. Paper towels tend to hold the proper amount of water and are easy to wring out if you accidentally over saturate them.

sheer wrapping paper
This is the type of wrapping paper needed to wrap a living animal. It is sheer, porous, and breathable and allows air to enter and exit the breathing holes poked in your pet’s gift box.

The paper towels in your amphibian’s overnight plastic cup home should be wet but not dripping. You want them to be wet to the touch but if you were to pick up the paper towel from the cup, you don’t want it to be dripping any water. If you include the proper amount of moisture, you shouldn’t have any leakage onto the pretty packaging of the wrapping material.

What species are best or easiest to gift wrap?

Overall, we think it’s easier and safer to wrap a reptile or invertebrate over an amphibian. Amphibians tend to be more delicate – they’re more sensitive to moisture changes, temperature changes, and other external stimuli.

Our top pick for the easiest reptile to gift wrap is the bearded dragon. Not only do they make fantastic pets who enjoy being handled, but they are extremely hardy and won’t mind being in a box overnight.

Most species of snakes that are commonly gifted such as corn snakes, milk snakes, boas, and pythons are also pretty tough little critters. Most snakes are content to sit calmly coiled up in their plastic shipping cup for another night and will experience no additional stress.

Scorpions and spiders are also great animals to gift wrap. Unless you specifically order a mature spider, most will arrive as tiny spiderlings and will fit nicely in cute little boxes or bags with no issues.

What if I’m not comfortable gifting a live animal?

If this article still hasn’t convinced you that gift wrapping a reptile, amphibian, or invertebrate is really not too tough of a task, then there is another option available to you if you really want to give someone a pet as a present.

Backwater Reptiles currently offers gift cards in $25 increments!

Let your gift recipient choose the exact animal they want and avoid having to wrap a critter all at the same time!

Conclusion

Again, we want to stress that gifting a living animal is not to be taken lightly. We want all the animals we ship out to go to loving homes with owners who are fully devoted to caring for the critter for the duration of its life.

gift bag wrapping method
Gift bag wrapping is also an option when gifting a live animal. The tissue paper and open nature of the bag allows the animal to get plenty of fresh air circulating. Just be sure to include the heat pack your animal was shipped with.

Research is essential! Make sure that you are not giving someone something that they are not prepared to handle. Investigate the life span of the animal, what it eats, how large of an enclosure it will require, and any other special care requirements.

Happy reptile wrapping!

How to Set Up a Chameleon Cage Habitat

We love chameleons at Backwater Reptiles. In fact, we specialize in these quirky, colorful, and always fascinating lizards. If you’re wondering how to setup a chameleon cage habitat or enclosure, you’ve come to the right place.

We’ve bred and hatched thousands of chameleons over the years, everything from common species to extremely rare. We’re experts on everything from breeding, feeding, and even hydrating these reptiles and we’re going to pass our knowledge on to you!

Many people are drawn to the bright complexions of chameleons and their ability to alter their color, but they don’t always take the time to research and find out the specific needs of their new pet lizard.

What might seem like common sense to experienced herpers is often like learning a foreign language to new reptile enthusiasts. They often need help getting started. That’s where this blog article comes in!

Not only will we provide written instructions on how to set up your pet chameleon’s enclosure, we’ll explain to you why things need to be done this way. And we’ve even thrown in a video tutorial for good measure!

So read on to find out how we set up our chameleon cages at Backwater Reptiles as well as learn some tips and tricks even if you are an experienced chameleon owner.

Overview of setting up your chameleon’s cage

Before you get into the nitty gritty specifics as detailed in writing below, we wanted to give you the chance to watch a video we made detailing how to set up the perfect enclosure for your pet chameleon. Watch the tutorial video and then read our FAQs for even more details!

What type of cage should I get for my chameleon?

Unlike many species of reptiles which will thrive in glass tanks, all chameleons (with the exception of the pygmy chameleon) should have a mesh or screen cage.

Although there are cages that have mixed glass and mesh walls, we recommend an enclosure that is completely screens with no glass walls to ensure your pet chameleon’s optimum health.

Are you wondering why your chameleon should have a mesh cage? The answer is simple really – ventilation. A glass cage prevents air from circulating properly and creates a stagnant environment within the chameleon’s home.

If the air doesn’t circulate properly, your chameleon can develop a respiratory infection due to stagnant, humid air. Once an infection takes hold, they’re not easy to eliminate.

If you’re wondering where to find a specialty chameleon cage, you can purchase them right on our website–the same ones we use so successfully. Each chameleon page has a supplies section if you scroll-down just a bit.

Many types and brands of chameleon cages exist, but we usually go for ones that give easy access to the animal with secure latches and swinging doors on the front. Some will also have sliding screen tops, although we prefer the front access kind.

simple chameleon cage setup
This is a classic chameleon cage. Notice how it has an aluminum (no corrosion) frame and all screen walls. Chameleon cages shouldn’t have glass walls to encourage air circulation.

Usually we also prefer mesh cages that have two separate swinging front doors – a larger top door for gaining access to your chameleon itself and a smaller, lower door. The lower door is opened to slide out your cage liner so you can wipe up dead insects and any feces that might collect.

Backwater Reptiles has a simple selection of cages and cage requirements that you can purchase at the same time you buy your pet chameleon. As mentioned, just scroll down a bit on any of our chameleon pages.

What size enclosure should my chameleon have?

Most chameleons are relatively small lizards with the exception of a few species such as Oustalets chameleons (Furcifer oustaleti), Parson’s chameleons (Calumma parsonii), and Mellers chameleons (Chamaeleo melleri). This means that you can house most species in small to medium-sized cages.

Babies and juveniles obviously don’t need as much space as their adult counterparts. In fact, we recommend smaller cages for babies because it can be hard for them to find their food source (i.e. catch the tiny crickets and fruit flies that they eat) in such a large cage.

However, there are certain instances where you can get one size cage and keep it for the entirety of your chameleon’s life.

Most common species of adult chameleons that are kept as pets such as Jackson’s chameleons (Chamaeleo jacksonii), Panther chameleons (Furcifer pardalis), and Veiled chameleons (Chamaeleo calyptratus) do just fine with a mid-size cage.

We recommend an enclosure that is eighteen inches deep by eighteen inches wide and thirty-six inches tall for sub-adults and adults. However, smaller cages can be used successfully.

Panther chameleon cage
Here’s one of our more prolific Ambilobe Panther chameleon breeders (a male). Females are much less colorful–you can see one on the left side of the picture.

Notice that the cage we recommended is more tall than it is wide? That’s because chameleons are arboreal species and they will spend most (if not all) of their time up in the branches and foliage you provide for them. You’ll very rarely, if ever, see your chameleon on the floor of the cage.

This means that height is far more important than floor space when keeping a chameleon’s life style in mind. More height means that the chameleon has more room to thermoregulate.

It can choose to be up high close to the heat source and UV lights to bask or it can descend further down into the enclosure to cool off.

What kind of accessories are safe to put inside my chameleon’s enclosure?

When it comes to decor and accessorizing your chameleon’s cage, we’re of the mindset that natural is beautiful. In other words, although it might not harm your chameleon to add cute little cage decorations, there certainly is no benefit to doing so.

We prefer our set ups to mimic the conditions of the chameleon’s natural habitat as closely as possible, which means plants and vines are our go-to accessories.

We recommend either artificial or living plants as your main cage decor. This is both practical and aesthetically pleasing. Chameleons needs lots of foliage to climb on as they are arboreal lizards and having plants inside the cage will satisfy this need.

Many cage set ups actually come with some artificial vines and foliage and these are perfectly acceptable options.

If you do choose to go with living plants, please make sure that you are not buying a toxic plant. Below is a list of a few species that we have used successfully in our set ups at Backwater Reptiles:

Hibiscus – This tropical plant has fairly large, green leaves and very gorgeous flowers when it blooms.

hibiscus
This is a mature hibiscus plant growing in the wild, but you can purchase much smaller, potted hibiscus plants from your local hardware store.

Ficus benjamina –  This species of fig is commonly known as the weeping fig, Benjamin fig, or even simpler yet, the Ficus tree. Although this “plant” will eventually grow into a tree, if you purchase a young one at a hardware store, it will last you many years inside your chameleon’s enclosure.

Pothos Plant – Considered by many to be a classic house plant, the pothos plant is very easy to care for. It will grow quickly and “outward” unless you give it something to grab on to though, so we recommend a sturdy stick or branch to make it grow upwards within your chameleon’s cage.

Schefflera arboricola – We highly recommend this species if you want living plants in your chameleon cage. This species does very well under stress and doesn’t require much care to thrive.

The verdict – although we think living plants are more aesthetically pleasing, they can also add another layer of care to your chameleon set up. Not only will you have to care for a chameleon, but you’ll also have a plant to water and provide sunshine for.

Plastic foliage requires no additional care and is also easier to spot clean for feces and dead bugs.

What type of lighting and temperatures will my chameleon need?

Make sure that you provide a UVB light for your chameleon. It should sit atop the cage. You will also need to make sure that the foliage and climbing areas within the enclosure allow the chameleon to be within six inches of the UV light.

This distance is important because you don’t want to allow the chameleon to get too close to the light because it could unintentionally burn itself. But on the opposite side of the spectrum, if your chameleon can’t get close enough to the light, it won’t be able to properly absorb the rays and synthesize the vitamins that help it to develop strong bones.

At Backwater Reptiles, we prefer to use Zoo Med Reptisun 5.0 bulbs. We’ve had great success with these bulbs and we highly recommend them whenever people ask us. You can purchase the ones we use right on our website.

One quick note regarding all UV lights, whether they are used for a chameleon cage set up or for some other reptile – they need to be replaced every nine to twelve months. They lose their efficacy if you don’t replace them. We recommend changing sooner rather than later if you ever have doubts.

As far as temperature is concerned, we’ve found that room temperature tends to be just fine for most species of chameleons unless your ambient room temperature drops below seventy or above eighty-five degrees Fahrenheit.

You can provide a basking heat lamp in addition to a UV light. The ambient temperature around the basking area should be between one hundred and one hundred ten degrees Fahrenheit. You should invest in a reptile heat gun in order to monitor both your ambient cage temperature as well as your basking spot temperature.

Does my chameleon need a water dish?

The shortest answer to this question is no, your chameleon does not need a water dish.

Chameleons actually don’t drink water from a bowl. In fact, they will die of dehydration before drinking water from a dish. They simply won’t recognize it as a source of hydration.

How then do you get a chameleon to drink water and stay healthy and hydrated? The answer is simpler than you might think. All you need to do is regularly mist inside the cage or provide some sort of drip system on top of the cage.

Because we have many cages and many chameleons to care for, at Backwater Reptiles we have automatic misters called monsoons on top of all our chameleon enclosures. However, these are rather pricey misting systems and we only really recommend them if you have multiple animals and a very busy schedule.

If you just have a single chameleon or even a breeding pair living in a single enclosure, there are many ways to make sure your chameleon gets water. The first way is to simply manually use a spray bottle and mist the cage several times per day.

You’ll want to make sure that in addition to creating humidity, you are spritzing in areas to collect water droplets on the leaves.

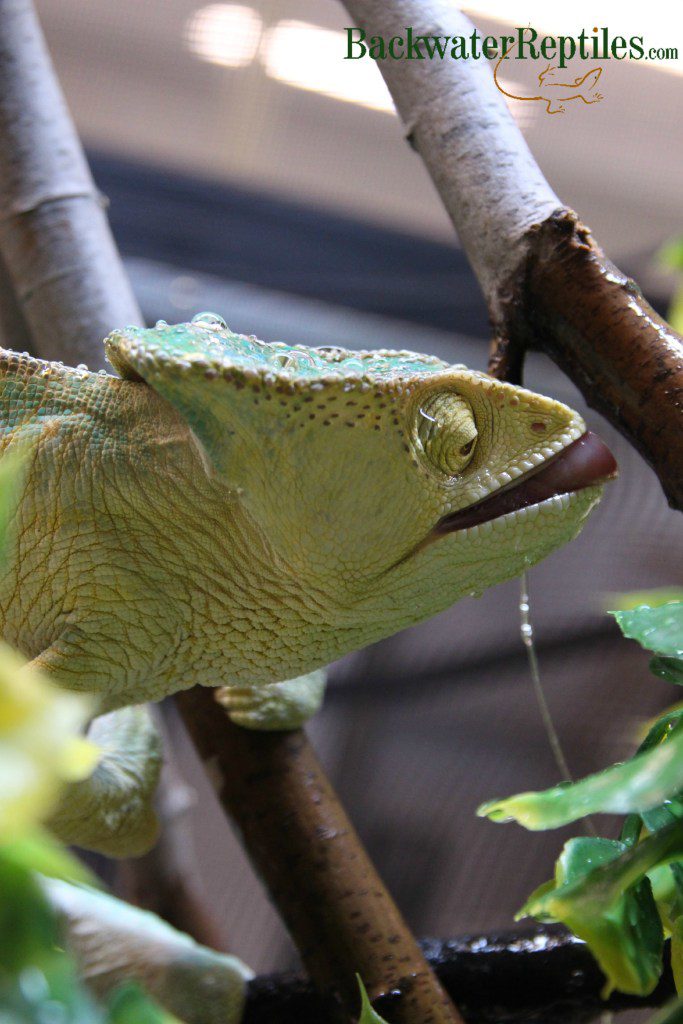
chameleon drinking water
This Parson’s chameleon is lapping up water that has collected on the foliage in its enclosure.

You can also buy an inexpensive drip system from just about any pet store. These drip systems are usually tubs with a spout that allows you to control the intensity of the drip.

And if you’re real thrifty, you can even hydrate your chameleon using a small, plastic, disposable cup! All you have to do is poke a small hole in the bottom of the cup, fill it with water and set it in a place atop the mesh cage where it will drip onto leaves and create small pools of water for your chameleon to lap up.

So, we’ve learned that you can choose to hydrate your pet chameleon using several methods – manually misting, setting up an automatic mist system, or creating some sort of dripping apparatus.

However, one thing is definitely clear – a water dish is not necessary and your chameleon will not drink from it.

Conclusion – Setting up a chameleon cage

Chameleons make fantastic and rewarding pets. They are so fun to show off to friends and family and many can even be trained to eat from your hand!

Setting up a proper environment where they can thrive is paramount. We hope that this blog article has helped you out with your own chameleon’s set up, whether you’re brand new to keeping chameleons or an experienced herp enthusiast.


How to Pick Up Your Pet Lizard

Wondering how to pick up a lizard? There are countless numbers of animals available in the reptile hobbyist world and many of them can be picked-up and held. Some pet lizards even enjoy human interaction.

However, lizards are not domesticated animals like cats or dogs, and so they can be tricky to handle if you don’t have experience. That’s why we’ll explain our methods for picking up lizards, address some common mistakes made when handling lizards, and offer up helpful tips and tricks we’ve learned throughout our years of experience dealing with all kinds of lizard species.

How to pick up a lizard

There are several methods you can use when picking up lizards and in truth, the best method will vary from animal to animal, species to species, and even person to person! It’s going to take some experience on your part to learn which way works best for your own pet.

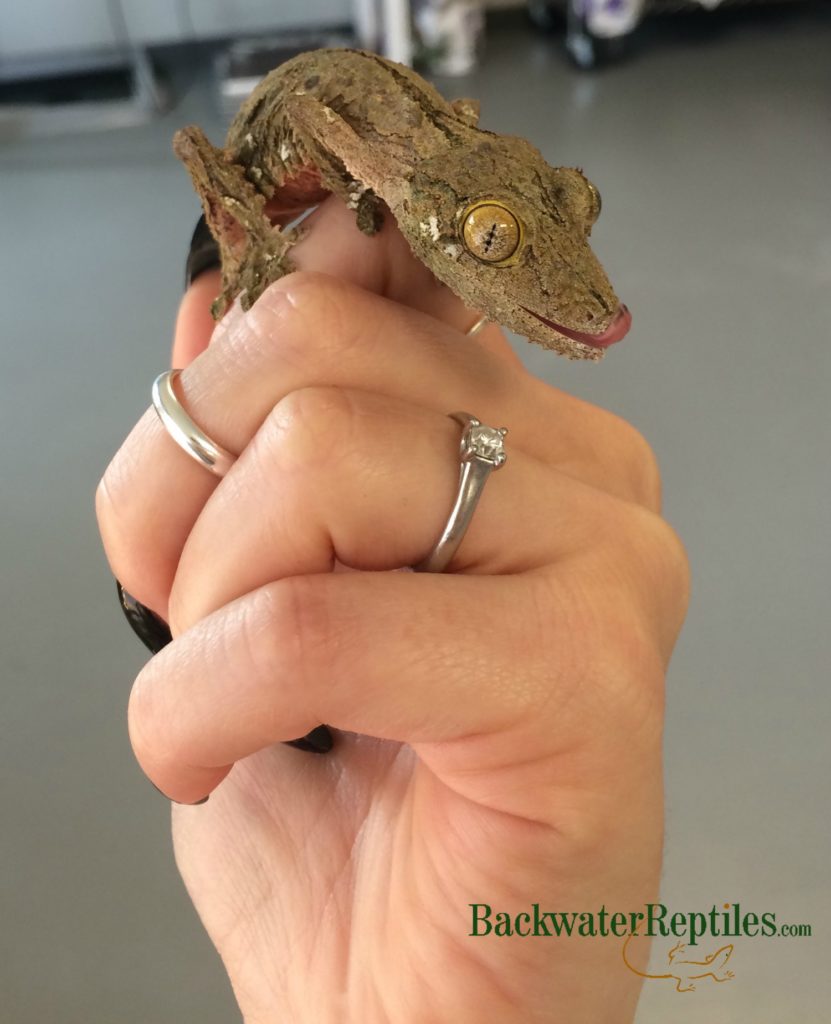
how to pick up a lizard
Geckos are more delicate than other species of lizards. Be careful not to restrain them too tightly or you may accidentally injure them. Gentle handling is the key.

The first thing to take into account when picking up and handling any pet lizard is the size of the animal. Larger species such as bearded dragons and Savannah monitors will require a different technique than something as small as a dwarf gecko species.

If you are dealing with a larger species or a species that has a good disposition, such as a leopard gecko, then picking up and handling the lizard is very straight forward. Approach the animal steadily with no jerky or overly speedy movements and simply pick it up. Once the lizard is in your hands, make sure it is supported and that it has a place to crawl if it is moving or wiggling a lot.

If you are working with a smaller species or a more delicate species, such as a day gecko or an anole, we recommend cupping the animal rather than grabbing it outright. You can accomplish this by literally trapping the animal under a cup and sliding a piece of paper or other flat, solid object underneath the cup. Or, alternately, you could form a cup with your hands over top of the lizard and pick it up from there.

Things to avoid when picking up your pet lizard

Possibly the most important thing you want avoid when dealing with your pet lizard is squeezing it or making it feel trapped. If you hold it too tight in order to prevent escape, your lizard will feel very stressed and uncomfortable. If you can’t hold the lizard without feeling like you’re physically restraining it, odds are you’ve got a lizard that isn’t meant to be held.

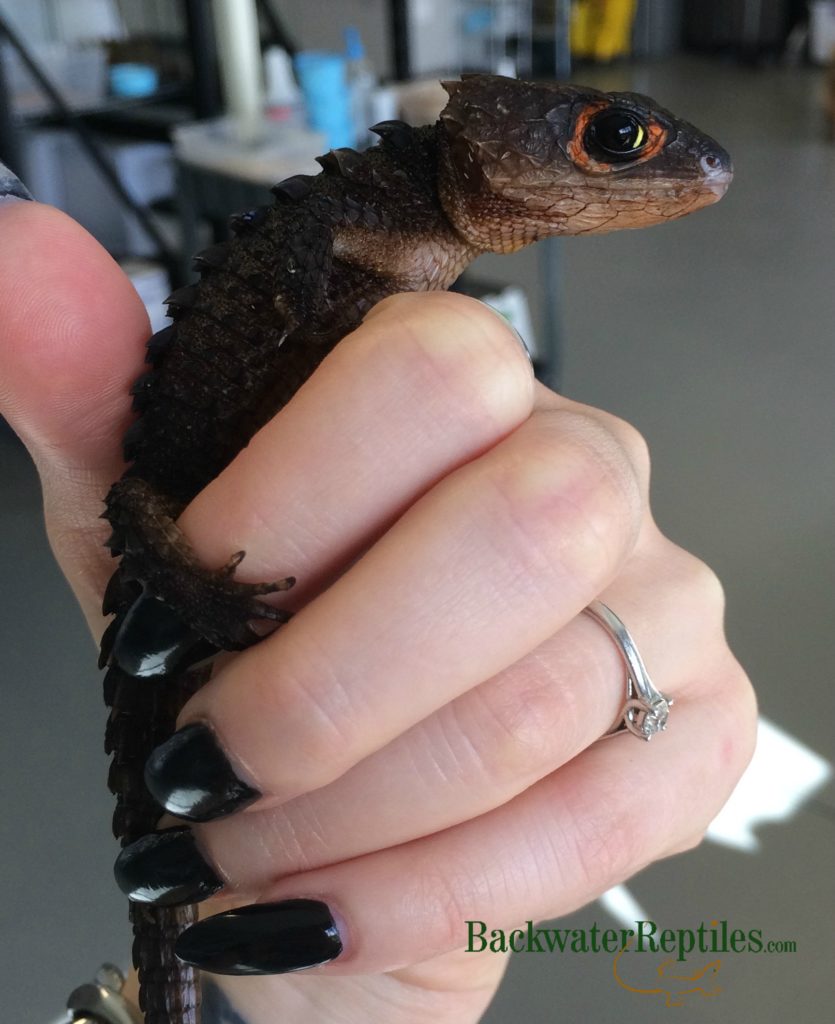
crocodile skink
This crocodile skink is being supported and has a comfortable perch. Be sure to cradle and not squeeze your pet lizard and you will both be more at ease during the handling process.

Never try to hang onto a lizard by its tail. Many species actually drop their tails as a defense mechanism against predators when they are stressed. While its true that ultimately it won’t harm your lizard in the long run to drop its tail, it’s still a stress to the animal at the time it occurs and many people dislike how their lizard appears cosmetically after losing a tail.

Helpful tips and tricks for handling your pet lizard

  1. Big lizards will need two hands. It’s common sense that you shouldn’t try to pick up a four foot long monitor with just one hand. Bigger lizards need more support and therefore more hands.
  2. Not all lizards should be picked up. Again, keep in mind that lizards are not domesticated animals and they do not all enjoy interacting with people. In fact, many of the smaller, flightier species will get overly stressed out if you handle them because they will think that you are a predator. And some species are so delicate that you can actually injure them if you pick them up incorrectly.
  3. Take some time to get to know your lizard’s personality and read its moods. If you invest in learning about lizard body language, you’ll be able to tell if your pet is in the mood to come out and play or not. This will help avoid unnescessary stress and will also help avoid any unnecessary biting or scratching.

Conclusion

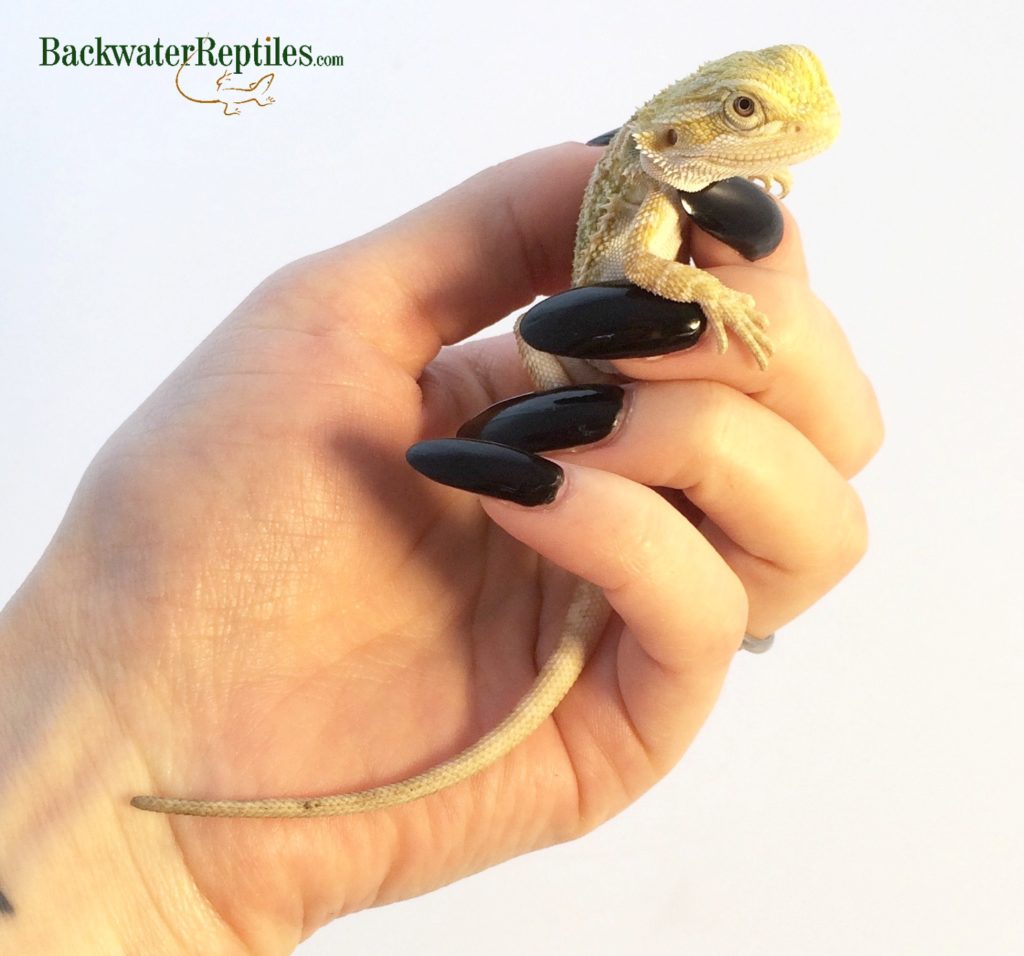
bearded dragon hatchling
Bearded dragons are very interactive lizards that enjoy being held by humans.

Lizards make great pets and there are many species that are hands on and incredibly interactive animals. However, not all species will enjoy being held and it’s up to you as a potential pet owner to do your research and make sure you’re choosing a species that suits your needs.

We hope that this article has given you some insight into how to handle different species of lizards. But if you have any tips or tricks of your own, feel free to share them in the comments!