What Are the Best Pet Omnivorous Reptiles?

If you’re wondering what the best omnivorous pet reptiles are, we’ve got answers for you.

In our opinion, the best omnivorous pet reptiles are Blue Tongue Skinks, Green Iguanas, Box Turtles, and Bearded Dragons. In addition to veggies and fruit such as leafy greens, carrots, squash, berries, and bananas, these reptiles commonly consume protein items as well. Typically they eat diets that are a mixture of insects or other meat coupled with plant matter.

Most types of reptiles are primarily either carnivores or vegetarians. But, there are a few species that are omnivores that eat both plants and protein (i.e. meat). Some people prefer one over the other, however we think omnivores are the most versatile. You can go to the store and buy them insect dinners or you can pull your leftover salad greens and other veggies out of the fridge to feed them. In our opinion, this variety and choice of meals makes them ideal pets.

In this article, we’ll discuss the top reptiles that are commonly kept as pets that thrive on omnivorous diets.

Our Top Picks for Best Omnivorous Pet Reptiles

Blue Tongue Skink 

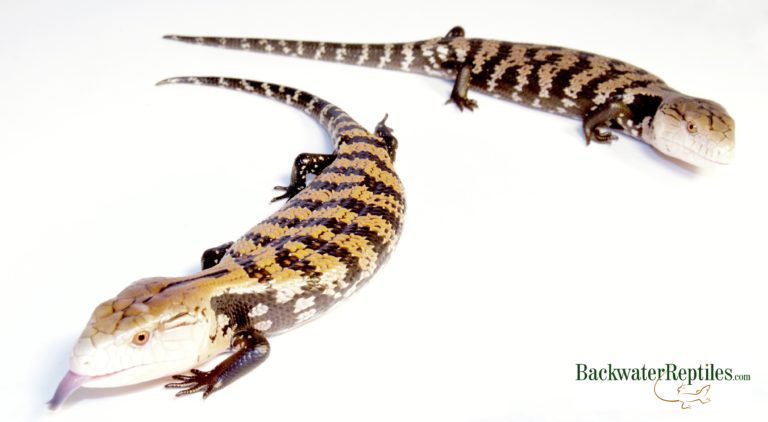
We adore Blue Tongue Skinks at Backwater Reptiles. Their long, think bodies and tiny little arms get to us every time! And they are extremely popular pets to boot. It seems that as quickly as we receive them, they are on their way out the door to their new forever homes.

They are very interactive as well, which is likely a big reason people love them so much. While some can be a bit “hissy,” most are very even-tempered, especially if you get them as a baby.
best omnivorous pet reptiles
Baby Blue Tongue Skinks will eat more protein than adults since they are growing quickly. But all Blueys should be offered vegetables and fruit as well as protein.

There is a bit of debate as to how much protein should be included in a Blue Tongue Skink’s diet. Some owners feel that up to fifty percent should be meat-based products, while others feed their skink primarily a vegetarian diet and supplement with protein once per week or so.

At Backwater Reptiles, we are of the mindset that variety is the most important element in a Blue Tongue’s diet. We feed mostly vegetation and fruit and supplement with vitamins and proteins as needed.

Good sources of protein for Blue Tongue Skinks include: canned super premium cat or dog food, canned insects, mealworms and super worms, hard boiled eggs, cooked lean turkey or beef, and occasionally a thawed pinky mouse. When it comes to giving your lizard anything that comes in a can, we highly recommend reading the label to be sure that there are not any odd seasonings or preservatives that could potentially be harmful to your pet.

When it comes to vegetables, Blue Tongue Skinks are pretty laid back and will typically eat whatever you give them. Good choices include: leafy greens such as collard, kale, and mustard greens, squash, carrots, dandelions, brussel sprouts and peas.

Because fruit is so high in water and natural sugars, it should be fed sparingly. We recommend no more than fifteen percent of your skink’s diet  consist of fruit. Good types of fruit to offer your skink as a treat include: mango, raspberries, strawberries, papaya, cantaloupe, and blueberries.

There are a few menu items that we advise steering clear of. Make sure that if you use canned pet food of any kind that there is no added sodium. No citrus fruits (orange, grapefruit, lemon, lime, etc) and avocados are also big no-nos. Iceberg lettuce is also not recommended as it holds little to no nutritional value.

A final word of advice when it comes to Blue Tongue Skink diet – make sure it’s varied so that your skink gets as many different vitamins and minerals as possible. Babies will require more protein to grow than their adult counterparts, so you should also be feeding babies a higher percentage of protein.

Green Iguana

The great thing about Green Iguanas is that they are extremely flexible when it comes to diet. They’ll gladly eat everything from commercially prepared iguana chow to fresh veggies purchased at the supermarket. This means their nutritional requirements are very easily met and they’re also fun at mealtime.

One thing we constantly recommend to iguana owners when it comes to diet is variety. The more varied your iguana’s diet is, the more likely he or she is to be adequately supplied with the appropriate nutrients, vitamins, and minerals.

In addition to pre-made iguana food from the pet store, we recommend feeding your iguana mostly vegetables with a small amount of fruit for treats. Protein should be given, but sparingly. In the wild, iguanas are opportunists and will eat animals that are smaller than them that fit in their mouth, however the majority of their diet is still plant-based. So while most pet iggies will gladly eat things such as cooked chicken, canned pet food, and even thawed rodents, we don’t recommend making protein the majority of their calories as it can cause kidney issues and eventually, renal failure.
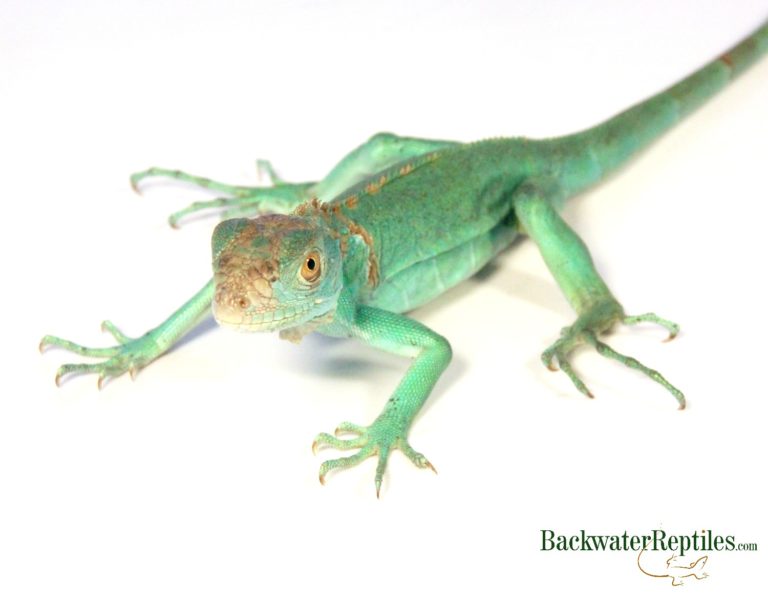
blue iguana baby
Although we discussed Green Iguanas, this Axanthic Blue Iguana is the same species but with a different coloration. They have the same dietary requirements and care requirements.

Vegetables that are good for iguanas to eat include: collard greens, turnip and dandelion greens, squash, green beans, and kale. There are many other options that are equally nutritious as well. A word of advice – steer clear of iceberg lettuce! Not only is mostly water, it contains very little value nutritionally and will likely leave your iguana feeling hungry and malnourished.

Too much fruit in a Green Iguana’s diet can cause diarrhea, so only about ten percent of what goes into your iguana’s tummy should be fruit. Fruit should be viewed as a treat.

While most fruit is acceptable to feed your iguana, ones that are commonly chosen include: strawberries, blueberries, mango, banana, and small pieces of apple. It’s best to avoid citrus fruits.

Now that you have an idea of the iguana’s diet, we do want to mention that as common as Green Iguanas are as pets, we advise that any potential owner do research and prepare to care for the animal for its entire lifespan of 15 to 20 years. Keep in mind that baby iguanas are a very manageable size, but they grow fast! Mature iggies can be four to five feet long and will therefore need a very large enclosure to thrive. Please make sure that you are willing and able to accommodate the animal’s needs as an adult prior to purchasing it as a baby.

Box Turtles

Box Turtle babies and adults have different dietary needs. Babies will need a lot more protein in order to grow up strong and healthy, whereas adults require only about forty percent meat in their diet. Keep in mind that this ratio varies between Box Turtle species and is not a hard and fast rule. It’s more of a guideline that can be altered based on the specific needs of your particular turtle.

Baby Box Turtles eat protein in the form of insects such as small crickets, roaches, and various worms. The protein in the diet of an adult Box Turtle is much the same, although the size of the insects will be larger. They sometimes also eat canned dog or cat food provided that it has no added sodium or preservatives. We recommend inspecting the label carefully prior to offering any kind of commercial pet food not specifically designed for turtles.

Appropriate veggies for Box Turtles include dark leafy greens, carrots, squash, green beans, and cactus pads. Fruit such as berries and other soft, manageable fruit is also a nice treat, but make sure to give it in moderation to avoid inadvertently giving your turtle loose stool. Again, avoid iceberg lettuce since it’s not nutritious.

There are also many types of pre-made, commercial turtle foods and pellets on the market. These are typically easily purchased from any pet store and can be used in addition to a varied, fresh diet of both protein and veggies.

Although Box Turtles are relatively low maintenance and make great pets for children and families, we do want to make sure that potential owners are aware that they need full-spectrum UV lighting, which means UVB light is necessary. We also recommend regular vitamin dusting of their food to allow for proper utilization of the vitamins and to make sure that their shells, nails, and limbs are able to stay healthy.

Bearded Dragons

Bearded Dragons are hands down one of the most popular pet reptiles out there. While we believe this is mainly because they have such stellar personalities and are pretty simple to care for, it’s likely also due to the fact that they have an omnivorous diet.

Like all the other omnivorous reptiles on this list, Beardies commonly consume insects such as crickets, Dubia roaches, and meal worms on a regular basis. They are most definitely not known to be picky eaters and if it squirms, they’ll likely try to eat it!

While Beardies do eat vegetation, we’ve found that it’s more common that they want to fill up on protein and eat veggies secondarily. Sounds like how a lot of children tend to eat!
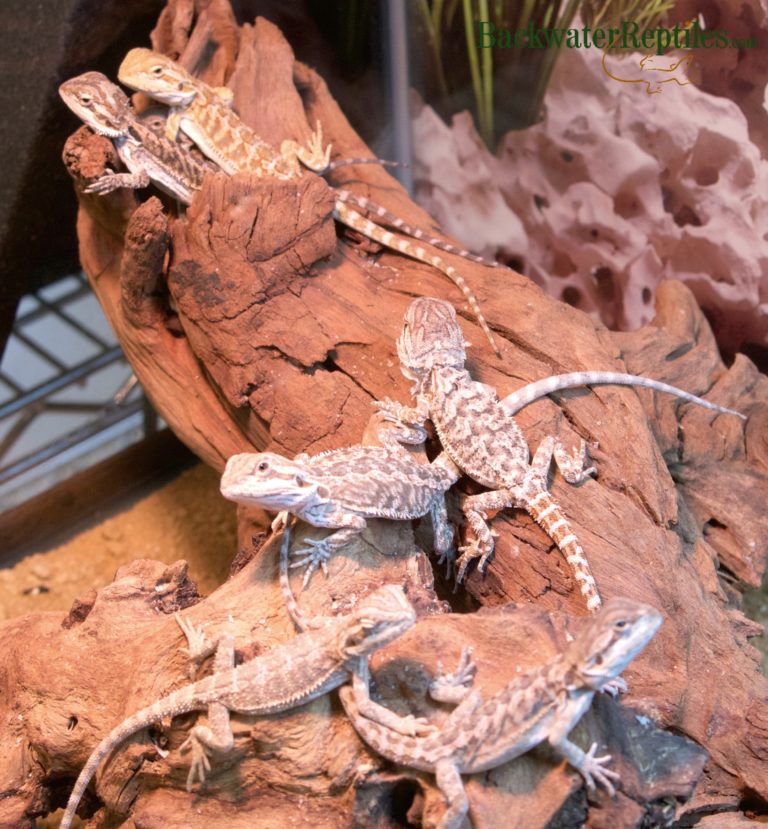
baby bearded dragons
Baby Bearded Dragons are pretty much always hungry and will eat many different types of insects and veggies.

At Backwater Reptiles, we chop up dark leafy greens, squash, grapes, green beans and other nutritionally dense veggies into small pieces and leave them in a dish in the Beardie’s enclosure on a daily basis. Any uneaten veggies are removed that evening or the following morning.

Because Bearded Dragons can get overweight if you allow them, we monitor them closely when we feed them insects. Usually, we toss a few insects into the cage at a time and allow the Beardie to catch and eat them for a period of about fifteen minutes each day. We also dust the insects with vitamins prior to putting them in the cage.

When it comes to Bearded Dragon health, we would like to mention that if you do line your Beardie’s cage with sand as a substrate that you should probably feed them in a different location. This is because scurrying insects that are being snatched up off of sand could easily bring sand along with them into the Bearded Dragon’s digestive system. If your Beardie eats enough sand over any given period of time, it could become impacted and require a trip to the vet.

Conclusion

Diet is a huge factor to take into consideration when choosing a pet reptile. If you choose a carnivore, insects or rodents will need to purchased on a regular basis and if you choose an herbivore, veggies and fruit will need to be readily available in your refrigerator. Omnivores, such as the ones discussed in this article, are great because they allow for feeding versatility.

Ultimately, the choice of whether or not to own an omnivorous reptile is up to you, but we think that these particular omnivores have a lot to offer and would recommend them as pets for herp enthusiasts experienced and new to the hobby.

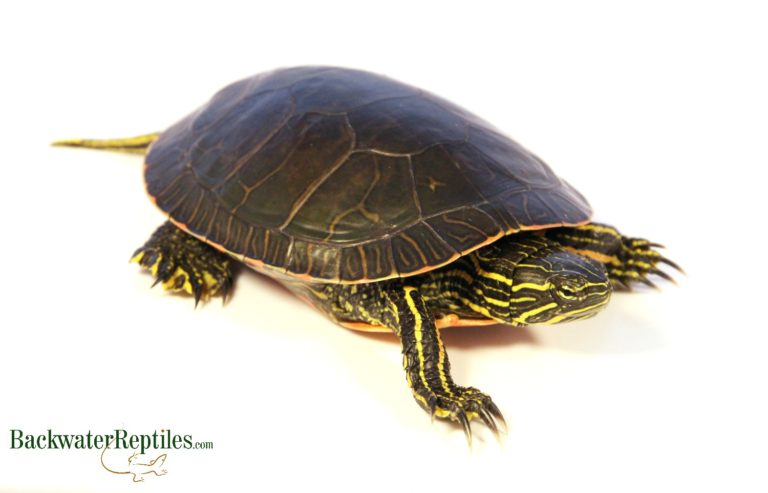
Common Pet Reptile Illnesses

Dealing with illness in your pet reptile

Unfortunately, sometimes part of owning a pet of any type, whether it’s a scaly companion or a furry friend, can be dealing with illness. Just like human beings, our pets can become sick or exhibit symptoms of the onset of an illness and it’s not always anyone’s fault.

Luckily for reptile owners, veterinary medicine is still evolving to accommodate more and more reptilian patients. This means that should your pet become seriously ill, a professional diagnosis and treatment are not too hard to come by.

While the Backwater Reptiles team  has no veterinary training, we do handle reptiles on a daily basis and we have been working with them, handling them, feeding them, and yes, even treating their illnesses for many years. In fact, many of the Backwater Reptiles staff have been keeping pet reptiles since childhood.

In this article, we’ve combined the knowledge of our staff in order to address and discuss some of the most common reptile ailments that a reptile owner might encounter. Again, please bear in mind that any treatments or recommendations listed in this article are suggestions and should not take the place of the diagnosis and/or treatment from a licensed veterinarian or herpetologist.

common reptile illnesses
A very good way to avoid illness in your pet reptile is to keep its enclosure clean. This is especially important in aquatic or semi-aquatic species such as turtles.

What are the most common reptile illnesses and ailments in captivity?

Mouth Rot

Mouth rot is a very common ailment that is also known as oral inflammation and infectious stomatitis. This is a condition that you can clearly see and often times diagnose at home that affects snakes, lizards, turtles, and even tortoises.

Mouth rot occurs when a reptile’s immune system is unable to maintain the natural balance of bacteria that normally occur within its mouth. This can be caused by any number of factors but usually always involves a catalyst that stresses the reptile and its immune system to the point of being unable to function properly. Examples of such situations could be: improper temperature or humidity fluctuations or gradients within the animal’s enclosure, improper or poor diet, or oral injuries caused by snout rub against the cage walls or other surface, injury to the mouth by live prey, or even chewing on substrate/bedding.

The main symptom of mouth rot includes red, swollen, or otherwise irritated oral tissue. However, if left untreated, the inflamed mouth tissue can become black and necrotic or even start leaking pus. Another prominent symptom is a loss of appetite for obvious reasons.

Treatment for mouth rot varies, but if you catch it early, you can generally correct it without too much fuss. You can treat at home for minor symptoms by putting antibiotic ointments on the affected area and making necessary adjustments in your reptile’s enclosure that caused the infection in the first place.

For more severe cases, you will likely need to get a vet involved and have the mouth rinsed and treated with antiseptic liquid and further treated with ointment. Surgery might even be necessary in particularly bad cases.

Prognosis with mouth rot varies and is best viewed on a case by case basis.

Mites

It is known as acariasis when a reptile becomes infected with the external parasites known as mites. While there are numerous species of mite that your reptile might encounter, they are all tiny invertebrate parasites that suck blood.

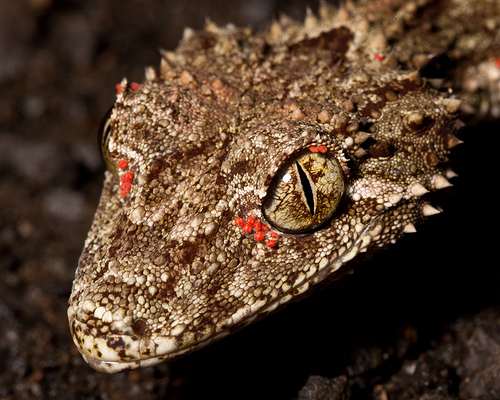
The symptoms of mites not be all that obvious to you at first if the infestation is a small one. You’ll probably most certainly see the mites first thing though. They tend to look like little black or red specks that hang out around your pet’s eyes or scale crevices.

Mites in and of themselves aren’t too dangerous or threatening to your pet’s health if treated promptly. The main cause for concern should be where and how your reptile got the mites since it’s very easy for them to spread from species to species, particularly if you house all your reptiles in a shared space or room.

reptile mites
Not all reptile mites appear as the ones in this stock photo. Different mites attack different species. Please be aware that this is not a photo of an animal from the Backwater Reptiles facility. It is simply a photo used to help demonstrate what mites can look like and where they might congregate.

While poor husbandry can be the cause of a mite infestation, that is not always the case. Many animals that are imported (i.e. wild caught and not captive bred) are bound to have a few mites as this is a very common occurrence in the wild. The problem occurs when the mites migrate to other reptiles in your home or when the animal becomes confined to its captive enclosure and the mites have a smaller space to multiply. It is at this point that your reptile might develop second hand symptoms from the mites such as a compromised immune system or dehydration.

Mites can be treated first and foremost with isolation or quarantine. The first thing you will want to do as a responsible reptile owner is to separate the infected animal from any others you might have in your home.

Next you will want to clean the infected animal’s enclosure thoroughly by tossing out substrate, soaking/washing all cage accessories in a hot soapy water mixture, and wiping down the interior of the cage.

You will treat your animal with a veterinarian approved mite solution. While there are over the counter solutions sold in many pet stores, we highly recommend checking with your local vet to make sure that the treatment you are choosing is both safe and effective. Never use flea, mite, or tick sprays made for mammals without your vet’s express consent as these often contain ingredients that are more harmful to the reptile than to the mites.

Luckily, if treated accordingly, mites are a fairly common ailment that can be cured with some effort.

Metabolic Bone Disease 

Metabolic bone disease is a serious issue in reptiles that is characterized by an improper balance of calcium, phosphorous, and vitamin D. It primarily affects reptiles that are insectivores and is typically not seen in snakes since most species eat rodents which provide complete and adequate nutrition.

Symptoms of metabolic bone disease, or MBD as it is commonly known amongst herp enthusiasts, include: limping, bowed limbs, hard lumps along the legs, spinal column, or jaw, softening and unusual flexibility of the lower jaw, difficulty raising the body off the ground, and a marked decrease in appetite. If calcium levels fall too low, extreme lethargy, tremors, and depression can result in death.

The most common cause of MBD is an imbalanced diet. We highly recommend that all reptile owners check to see what vitamins their pet requires in captivity and that insects are dusted accordingly.

MBD in turtles, tortoises, and some lizard species can also be caused by inadequate exposure to UVB rays. Many types of reptiles need UVB light in order to properly metabolize calcium, phosphorous, and vitamin D, so make sure that your UV light bulbs are changed at least every six months and that your pet has adequate time and space to bask in these rays daily. Many reptile owners will also take their pets outside to get natural UVB rays from the sun.

The good news is that if MBD is caught right away and treated immediately, it can usually be corrected. If the disease is allowed to progress too far without treatment however, sadly, often times the ailing animal is unable to pull through.

rescued red iguana
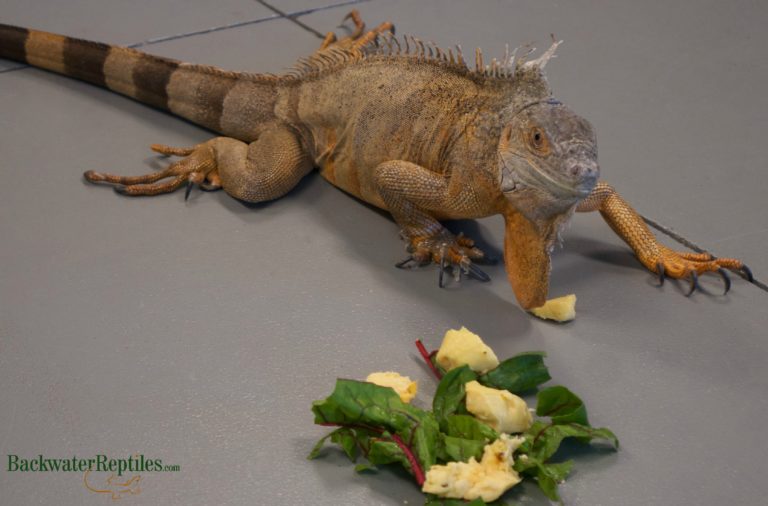
A proper diet is essential to your pet reptile’s health. Not all species eat the same foods and with many species, such as Green Iguanas, variety is key. This rescued Red Iguana is getting some exercise outside her enclosure along with some tasty treats.

Obesity

Obesity is much the same monster in reptiles as it is in humans. Typically, it most commonly affects amphibians. However, there are certain reptile species with hefty appetites that are predisposed to obesity.

Species of reptile that are more commonly treated for obesity include: Blue Tongue Skinks, Bearded Dragons, certain species of monitor lizard, and Tegus.

As you might have guessed, the primary cause of obesity in reptiles is overfeeding. Many reptiles are so eager to eat that they don’t stop when their tummies are full. This obviously results in an overweight animal.

The treatment for obesity is fairly simple once the problem is recognized. Usually, all it takes is some portioned meals and maybe some exercise if you have a species of reptile that can be taken out of the cage for some activity.

Respiratory Infections

The main respiratory infection that is commonly seen in captivity is pneumonia. This disease and most other respiratory issues that a reptile could potentially battle are caused by a bacterial infection.

Depending in the illness or bacterial infection in question, your reptile could potentially exhibit any number of symptoms. The most common symptoms of respiratory infection are: difficulty breathing which can sometimes be hard to notice at first, keeping the mouth held open while breathing, unusual wheezes, crackles, or other sounds while breathing, and any kind of discharge from the mouth and/or nose that could appear clear, white, brown, or even green in color. Symptoms as the illness progresses might include lethargy, loss of appetite, and weight loss.

Although this is not always the case, typically respiratory infections in reptiles are caused by unsanitary conditions in the reptile’s environment. Occasionally, they can be caused by an environment that is too moist and does not maintain proper temperature gradients.

Because the exact cause of respiratory infections can be difficult to diagnose, we do recommend seeking professional veterinary help should you notice that your pet reptile is exhibiting unusual symptoms and/or having difficulty breathing. Your vet will be able to properly diagnose your pet’s illness and issue antibiotic treatment accordingly.

toffee hognose snake
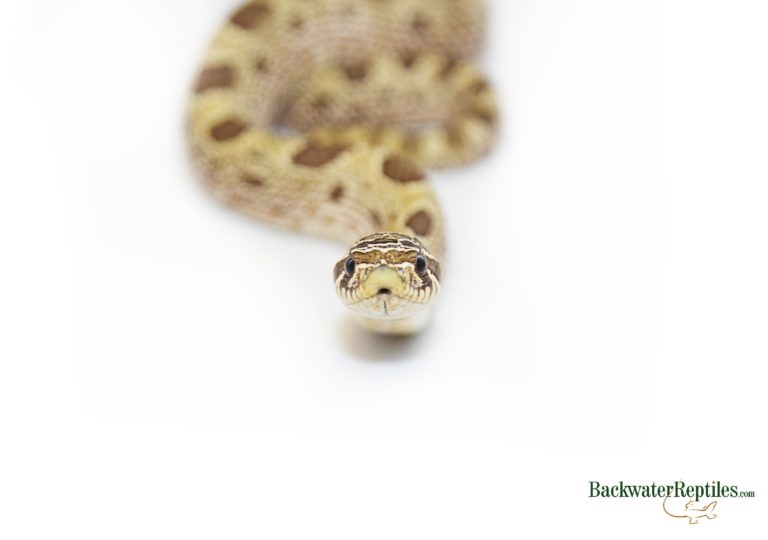
In order to keep your pet reptile healthy and illness-free, we highly recommend making sure that your reptile’s enclosure contains the proper substrate and accessories. A clean cage suited to the needs of your specific pet is one of the best ways to avoid illness.

Conclusion

While we sincerely hope that you never have to deal with a sick pet reptile, it can happen. Our goal with this post is to help identify and perhaps trouble shoot potential issues you might encounter.

Please keep in mind that while Backwater Reptiles has helped rehabilitate sick animals that have been brought to us as rescues, we do not always recommend home treatment. Veterinary care is always the safest option when you notice any symptoms of illness in your pet.

How To Trim Your Tortoise’s Beak and Nails

We care for turtles and tortoises of all types, ages, and sizes at the Backwater Reptiles facility. While most of these shelled reptiles are pretty low maintenance, from time to time, they do require some additional care such as nail trimming or beak trimming.

Most of the time, trimmings won’t need to occur more than once or twice per year, and the process will be quick and easy to perform. However, because Backwater Reptiles accepts rescue animals, we do often receive turtles and tortoises who need to have this process taken care of right away.

In this article, we’ll address these topics and answer the following questions:

How to trim turtle and tortoise nails
Why is it necessary to trim turtle and tortoise nails?

How to trim a tortoise’s beak
Why is it necessary to trim a tortoise’s beak?


How to Trim Turtle and Tortoise Nails

What supplies do I need to trim my turtle or tortoise’s nails?

Luckily, you really don’t need many supplies to trim turtle or tortoise nails and the supplies are identical regardless of whether you’re using them on a turtle or a tortoise.

In order to trim your turtle or tortoise’s nails or claws, you will need:

1) Cat/Dog Nail trimmer OR human cuticle nail trimmer

2) Paper towels or other soft pliable material such as a normal towel

3) Corn starch

How do I trim my turtle or tortoise’s nails?

The first step you’ll want to take when trimming your turtle or tortoise’s nails is to secure the animal safely and eliminate squirming and discomfort to the animal as much as you can. This can be accomplished by wrapping the animal in paper towels or a soft towel. It will also help avoid slipping as it can be somewhat tricky to get a firm grip on the animal’s shell without some sort of “blanket” to hold the animal in place.

If you are trimming the front nails, wrap the back half of the animal firmly but not too hard. You don’t want to squash or harm the animal, and wrapping it up half way will help to make sure you don’t unintentionally over-restrain it.

Some owners find it useful to place the turtle or tortoise between their thighs while trimming, while others keep the animal on a counter or other hard, torso-height surface. We have used both methods and we recommend doing whatever feels safest for you as the whole process will run smoother if you are confident in your abilities.

turtle nail trimming
Sometimes turtle claws require trimming. This photo shows what the turtle’s nails looked like before being trimmed using the methods described in this article and what they looked like once the process was completed.

Once your turtle or tortoise has been securely wrapped, you’ll need your clippers. There are many types on the market and the type of clipper you will use will vary based on the size of your animal and the thickness of the animal’s nails or claws. We don’t usually use the guillotine type of clippers as we find they provide less accuracy, particularly with terrestrial turtles and tortoises. Our clipper of choice tends to be either the manicure clippers used by people or the scissor type used on cats and dogs. When it comes to your own pet’s needs, we recommend using whatever feels most comfortable for you personally that will also get the job done quickly. The speedier you are able to perform the process, the less stress you will cause the animal.

Once you’ve determined which type of nail clipper works best for you and your animal, you will simply trim the nail as close to the quick as possible without actually hitting the quick itself. The quick of the nail is the portion that still receives blood flow. It’s essentially a blood vessel within the nail or claw.

The corn starch is really just a precautionary measure. You will only require it if you accidentally trim the nails or claws too close to the quick and cause bleeding. If this occurs, simply dab the tip of the claw in enough corn starch to staunch the bleeding. And while you’ll obviously want to avoid hitting the quick if possible, this is not always realistic as reptiles are not known for their ability to sit still during procedures such as nail trimming. But not to worry – your animal will recover quickly and so long as you keep an eye on the nail itself to avoid infection, there shouldn’t be any lasting damage.

Keep in mind that turtles and tortoises in particular, can be shy animals. They will likely do everything in their power to tuck in their feet as much as possible when you try to trim their nails. Please be patient with your pet and don’t attempt to trim their nails if you don’t feel you are capable and prepared for this measure. There are plenty of veterinarians who will perform this process for a small fee and we highly recommend taking your turtle or tortoise to the vet if you are nervous about doing the procedure on your own.

A word of caution: Sometimes the process of nail trimming can bring out attitude in even the calmest of animals. If at all possible, keep your fingers away from the beak of your turtle or tortoise so that you can avoid potential bites. You also want to avoid being scratched by the long nails, which is another reason why we do recommend wrapping the animal in a towel if possible.

Some helpful tips and tricks for getting your turtle or tortoise to stick out a leg:

1) Tickle the animal’s shell. This is particularly useful underneath the shell on the plastron. Sometimes the sensation of touch elsewhere on the animal’s body will bring it out of hiding.

2) Push in gently on the leg on the other side of the retracted limb. There is only so much room inside a shell and a natural response to the crowding will be to relieve it by pushing out a limb.

3) Hold the animal in the air rather than cradling it in your lap. Because the animal will sense that there is nothing underneath it, it might try to walk or start wiggling a little bit and there’s your opportunity!

4) Please be patient with your shelled friends. Never shake or jiggle your turtle or tortoise as this is not only stressful but could cause the animal injury. Eventually, your turtle or tortoise will get tired and you will be able to get at their toes without much struggle.

For your convenience and reference, we’ve included a brief video below demonstrating how we trim nails at the Backwater Reptiles facility.

Why is it necessary to trim my turtle or tortoise’s nails or claws?

While it is true that several species of turtle (cooters, sliders, and three-toed box turtles to name a few) naturally have longer front nails as a sign of prowess or physical fitness, in captivity, these long nails can become a health hazard if they grow too much.

Aquatic turtles can accidentally get their claws caught in filters or in carpet if you remove them from the tank for some exercise. The nails can also unintentionally injure other turtles as they do tend to climb all over one another if they are kept communally. Not to mention, if you enjoy handling your turtle, shorter, clipped nails are far less likely to inflict scratches on their owner.

In the wild, turtles and tortoises walk or exercise enough that their nails will naturally wear themselves down to a manageable length. However, in smaller enclosures, the nails can continue to grow and therefore will require trimming.

How To Trim a Tortoise’s Beak

What supplies will I need to trim my tortoise’s beak?

Trimming a tortoise’s beak is a bit tougher than trimming a turtle or tortoise’s nails, although the supplies needed are virtually the same.

1) A pair or clippers. Human cuticle clippers or pet scissor nail clippers will both work.

2) Paper towels or another type of soft towel or wrap.

3) A nail file. Do not use the metal or glass kind.

And that’s pretty much it! Not much is needed, but you will definitely want to make sure that the pair of clippers you select is an appropriate type. They need to be small enough but still strong enough to cut through the beak quickly.

tortoise beak trimming
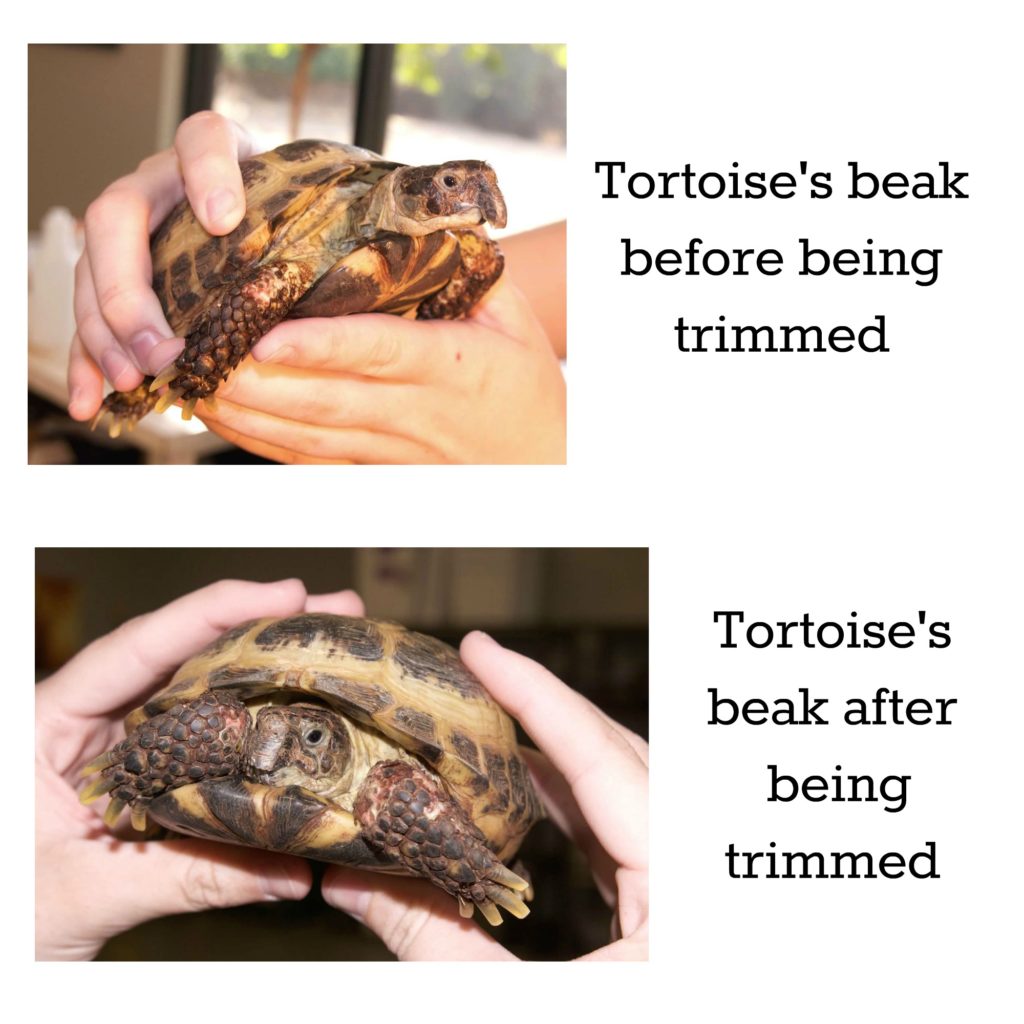
This rescue tortoise was in desperate need of a beak trim. We used the methods described in this article to carefully trim his beak to a normal and manageable length.

How do I trim my tortoise’s beak?

First of all, we’d like to mention that you can help minimize the amount of beak trimming you actually have to do by providing a cuttlebone within your tortoise’s enclosure. Like many bird species, tortoises can use a cuttlebone to chew or nibble on to keep their beak at bay.

However, if you do find that you need to trim your pet’s beak, the first step is to secure the animal using the paper towels or other wrap. If possible, you’ll want to make sure that you can keep the legs inside the wrap so the tortoise doesn’t push the clippers away or use them to shield its face.

Next, you’ll want to be very patient in order to gain access to the tortoise’s face. Odds are your tortoise will be shy and it will retreat into its shell. If you are careful and very delicate, you might be able to trim the beak while the tortoise’s head is inside the shell, but it’s much easier if you can gain access while the tortoise has its head outside the shell.

Sometimes, it’s helpful to grip the tortoise’s head gently but firmly for a few brief moments while another person utilizes the clippers to trim the beak. However, we’ve found that for most tortoises, this can actually stress the animal more. Ultimately, you know your animal best and you should use whatever methods work best for you and your pet while minimizing stress.

With most clippers, we’d recommend performing a series of clips. You likely won’t be able to clip the entire beak in one shot. Try angling the clippers at 45 degrees on both sides at first to create a “point” at the beak’s tip. Then you can carefully trim the tip of the point and get it semi-squared off. You’ll want to mimic the natural shape of the tortoise’s beak as much as possible.

Once you have managed to trim the beak down to a normal length, you might need to file it a bit in order to shave down any rough edges. This is where your nail file or emery board comes in handy.

When filing, we highly recommend avoiding files with sharp points or very stiff natures as they can unintentionally injure the tortoise if it happens to jerk or squirm during the process. A simple, flat, emery board works best for this procedure.

Below you will find a video demonstrating how we trim tortoise beaks at the Backwater Reptiles facility.

https://youtu.be/pXrW7jTxP9Y

Why is it necessary to trim my tortoise’s beak?

In the wild, tortoises have to work a lot more to find their food as well as to consume their food. This means that their beaks actually endure more wear and tear and essentially, trim themselves.

In captivity, your tortoise has no need to forage or roam or even really chew its food because most owners do all of that for them. While this is standard pet owner behavior, it does mean that your tortoise could eventually require a beak trim, especially if it doesn’t have a cuttlebone to rub on.

If you allow your tortoise’s beak to become overgrown, it can actually inhibit the animal’s ability to eat. The beak can prohibit the tortoise from opening its jaw wide enough to fit anything its mouth.

Another serious issue that we’ve witnessed in some of our rescue tortoises is scale rub. If the beak becomes too overgrown, it can begin to rub against the scales on the tortoise’s front legs causing irritation and infection.

Conclusion

Turtles and tortoises are very popular pet reptiles and they require relatively minimal care. However, from time to time, it might become necessary to trim either their beaks, their nails or both.

We hope that this article has helped instruct you how to go about these processes. And please – if you’re not comfortable performing these procedures or you think that you might injure the animal by performing them, take the reptile to a vet. Don’t risk your pet’s health.

How to Care for Your Red Eared Slider Turtle

Did you know that red eared sliders are one of the most popular species of turtles kept as pets? They are great aquatic reptiles that can be kept in either a tank or an outdoor pond environment, are hardy and versatile, and also quite cute which makes them appealing to both seasoned herp enthusiasts and those just getting introduced to the hobby as well.

Because red eared sliders are so common, we’re dedicating this blog article to discussing how to care for these fantastic turtles. We’ll answer some commonly asked questions such as:

Do red eared sliders make good pets?
What do red eared sliders eat?
What kind of habitat will my red eared slider need?
Can I keep my red eared slider outdoors in a pond?
Are red eared sliders good classroom pets?

So if you’re contemplating getting a pet red eared slider or you already have one and you want to make sure you’re giving it the best care possible, read on!

How to Care for your Red Eared Slider Turtle (Trachemys s. elegans)

Do red eared sliders make good pets?

To sum it up – yes! Red eared sliders make excellent pets, which explains why they are so popular!

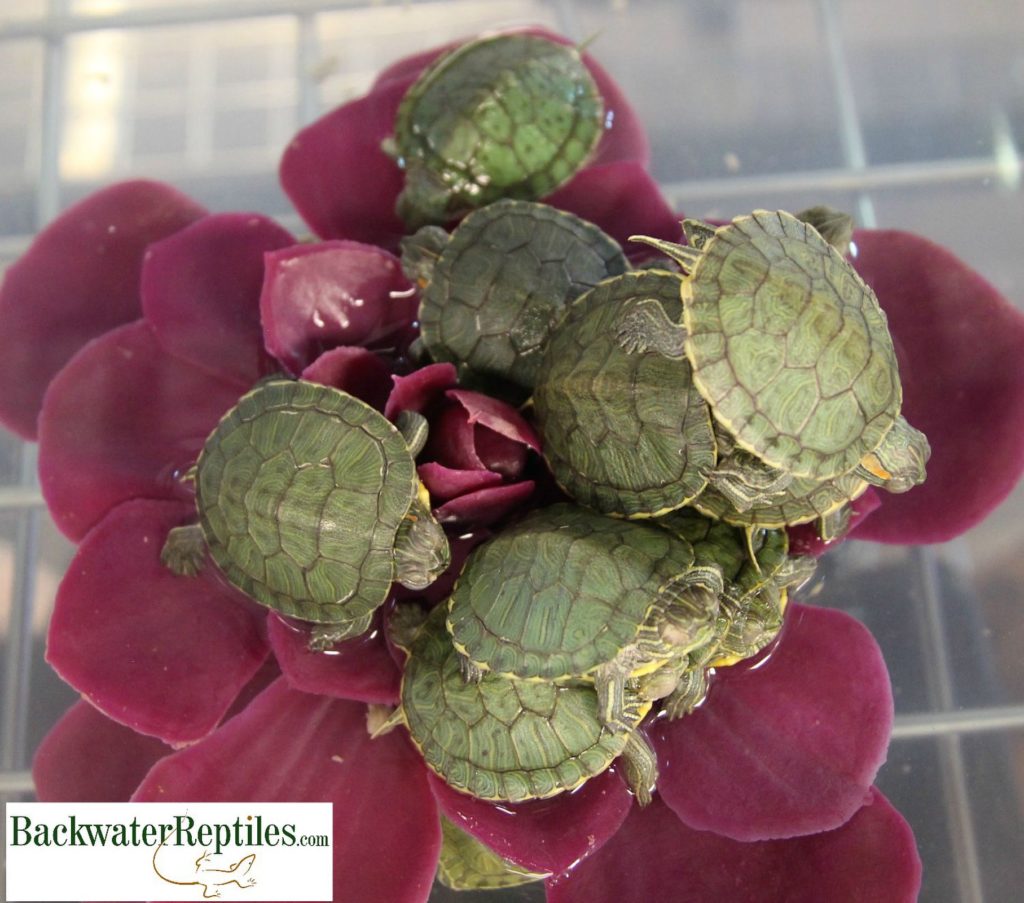
baby sliders
Red eared sliders are communal and often stack on top of one another when basking. It’s quite humorous to watch them slide into the water when they’re hanging out in groups like this.

Red eared sliders get their common name from the distinctive red mark or stripe behind their eyes where typically an external ear would be found. They range in color and can have shells that are greenish brown, olive green, or even just brown. They always have yellow bellies with irregular markings on their belly scales or scutes.

Red eared sliders can be longer than sixteen inches, however it is far more common to see turtles that range in size from six to ten inches. They are relatively long-lived animals and typically live between twenty and thirty  years.

Not only are sliders appealing to look at, they are great outdoor and indoor pets. Many people build fancy ponds in their yards and enjoy watching the sliders thrive in a very natural outdoor environment, while others are content to create aquatic enclosures within their homes. No matter where your slider lives, they are communal creatures and it is entertaining for young and old alike to watch them stack on top of each other while basking, only to scuttle into the water when startled. Funny enough, this habit is actually where the “slider” portion of this turtle’s common name originated.

What do red eared sliders eat?

In the wild, red eared sliders are omnivorous. They eat both protein (meat) and vegetation. Ideally, this omnivorous diet should be replicated in captivity as well, with a good balance being struck between the amount of protein your turtle eats and the amount of plant matter.

Aquatic vegetation and plants that occur naturally in pond environments coupled with dead fish, frogs, and invertebrates are all food items consumed by red eared sliders in the wild. In captivity, in order to ensure a proper diet with all the correct nutrients, many slider owners feed their turtles commercial pellets. But like people, sliders shouldn’t necessarily eat the same thing all the time, so it’s a good idea to offer leafy greens, crickets, roaches, worms, krill, and even pinky mice as treats from time to time. Most sliders aren’t picky eaters and will pretty much enjoy eating anything you feed them.

We recommend that vegetable matter always be available for your turtle to consume when it’s hungry. Protein items can be offered daily, but don’t be alarmed if your slider doesn’t eat them right away. Reptiles have much slower metabolisms than mammals and actually don’t need to eat as frequently.

What kind of habitat will my red eared slider need?

Because red eared sliders are semi-aquatic turtles, you will need to provide them with an aquatic set up, whether you choose to house your turtle(s) indoors in an aquarium environment or outdoors in a contained pond.

Creating an Indoor Habitat

We always recommend keeping hatchlings and juvenile turtles under four inches long indoors. This way you can monitor their diet more closely, keep an eye on them to ensure they don’t escape your yard, and also make sure that no predators manage to capture them.

Indoor aquatic set ups for red eared sliders aren’t very complicated, although because sliders are a messy species of turtle that produce a lot of waste, you will be required to clean the tank fairly often, even with a very good filtration system.

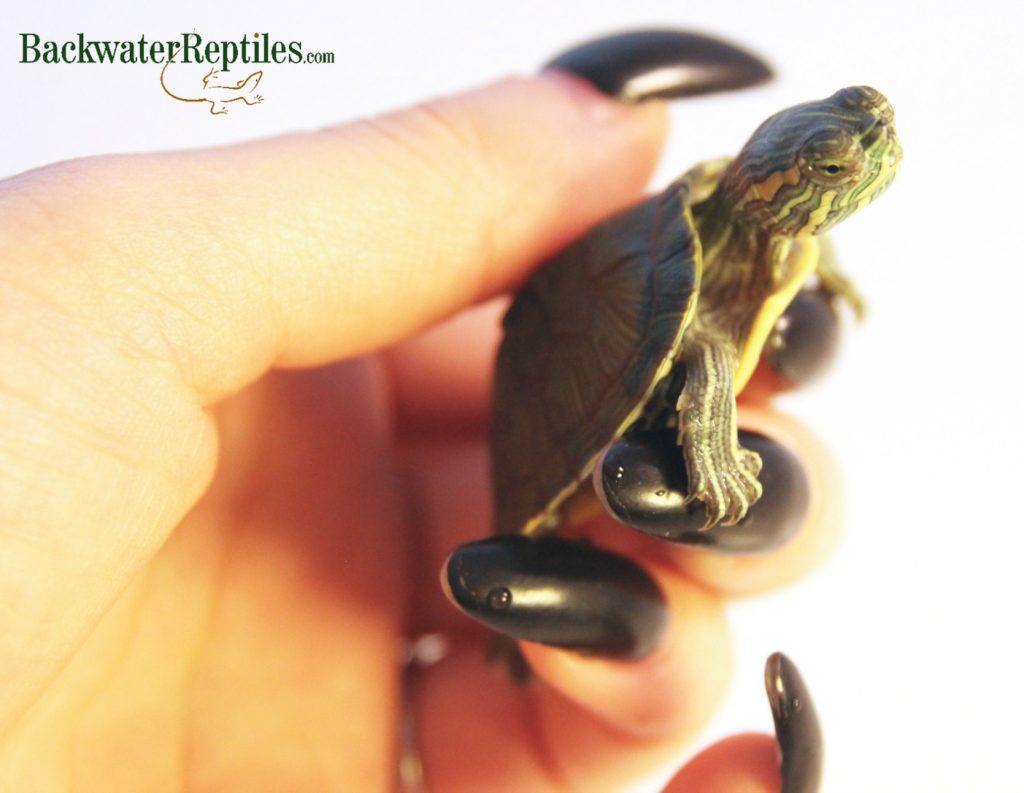
baby red ear slider
Baby red eared sliders are best kept indoors in small tanks. They are more vulnerable to weather, predators, and other threats than their older counterparts.

When it comes to setting up a tank for your red eared slider(s), the general rule of thumb is that the enclosure should be able to comfortably hold ten gallons of water for every inch of the turtle’s shell. So, for example, if you have a hatchling slider that is three inches long, your tank should hold at least thirty gallons of water. This might seem like a lot of space for such a small reptile, but keep in mind that red eared sliders are a particularly active species of turtle and they do quite a bit of swimming and spend a lot of time in the water. For this reason, we do recommend making sure that you can provide a home large enough for your adult turtle before you purchase. Considering that at maturity, although rare, very large sliders can be around sixteen inches long, you’ll want to make sure that you are prepared to provide an aquatic enclosure that holds at least 160 gallons of water.

In addition to making sure your tank is the proper size, your turtle’s aquatic set up will require several other elements.

We recommend a good filtration system to help keep the tank clean since we’ve already established that sliders are messy. While a filter is certainly not a replacement for regular cleaning of the tank, it will certainly help keep things as clean as possible between cleanings.

Your red eared sliders will also require a UV lamp. Both UVB and UVA rays are  essential to your slider’s health, so make sure your bulbs are full spectrum and mimic the rays of the sun. The temperature of the basking area beneath the lights should be between eighty-five and ninety degrees Fahrenheit.

In addition to a basking light set up, your red eared slider will need what’s referred to as a basking dock. This is essentially an area or platform completely out of the water where the turtles can emerge to dry off and soak up the UV lights. Basking docks can be hand made or purchased at commercial pet stores.

While we have seen aquatic turtle set ups without a water heater, we do still highly recommend purchasing one. Turtles of all species will thrive when the water temperature is consistent. If you keep the water temperature from fluctuating too much, your slider’s metabolism will stay active, making for an overall healthier reptile. Our recommendation for the ideal water temperature is between seventy-five and eighty-five degrees Fahrenheit.

Creating an Outdoor Pond Environment

We highly recommend keeping larger red eared sliders outdoors in contained pond environments, provided the temperatures and weather are appropriate. It is better for the health of the turtle(s) and it is also far less hassle to maintain since large turtles require large bodies of water.

Read on to find out more about how to create an outdoor pond set up for red eared sliders.

Can I keep my red eared slider outdoors in a pond?

As we’ve already touched upon, yes, you can most certainly keep your red eared sliders outdoors in a pond environment! However, please keep these things in mind when you choose to use this housing method:

  1. Your pond needs to be large enough to accommodate the number and size of sliders that you own. Most turtle pond set ups don’t just have a single turtle living in them, so you’ll want to be sure that your pond is large enough to comfortably contain all your sliders.
  2. The outdoor temperatures and weather in your area need to be red eared slider friendly. This means that if you love somewhere extremely cold or conversely, extremely hot, you might want to reconsider having a turtle pond.
  3. Your outdoor pond should be contained. Red eared sliders are active reptiles and they might want to go exploring. You’ll want to be sure that they are unable to go far if they leave the safety of the pond, so backyards with fences are ideal.
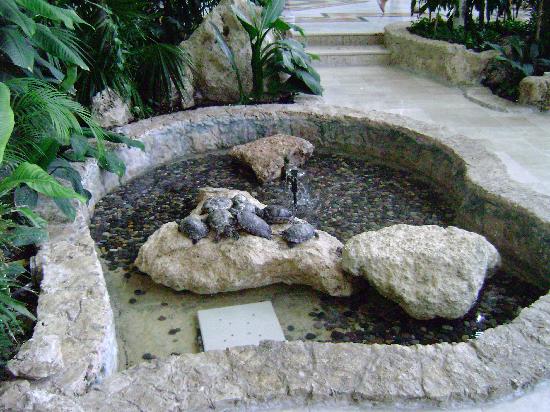
turtle pond
Turtle ponds can be as elaborate or as simple as desired.

When building a turtle pond, you’ll want to protect it from local wildlife, namely any potential predators. Racoons, foxes, and coyotes are often quite threatening to turtles, believe it or not. You can protect your enclosure and help prevent escaping turtles too by setting up a fence or other similar border around the pond.

Another consideration when you build your pond is to make sure that the water is not always in direct sunlight. You will want some form of shade present so that the turtles can thermoregulate and the temperatures don’t get too hot. Essentially, just like you want a hot and cool side for your indoor tank, you will want to fulfill the same requirement for your outdoor pond.

You can go as big or as simple as you want when building your pond. There are so many different options available for budgets and yards of all sizes. You can even include fish and aquatic plants as natural sources of food for your red eared sliders.

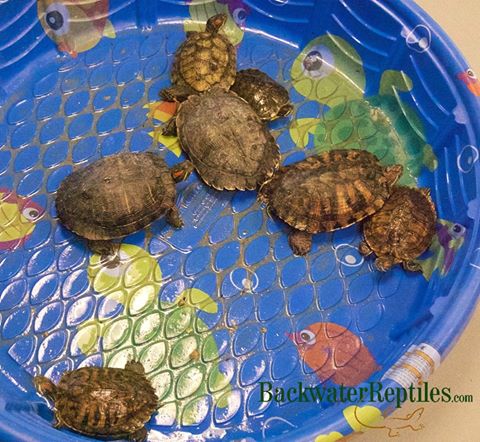
group of turtles
Because Backwater Reptiles also re-homes and rescues reptiles, we get so many sliders brought in from the side of the road. Good Samaritans often save them from being run over but then don’t know where to safely return the turtles to the wild.
The turtles in this photo are all rescues being temporarily housed in a kiddie pool until they are re-homed.

One thing we’d like to stress when it comes to creating an outdoor pond environment is that you need to make sure your pond is secure. Red eared sliders are so hardy and versatile that they have actually become an invasive species in many areas. They can escape yards and wind up interfering with natural ecosystems if you’re not very careful. Please plan your pond’s “security” accordingly. Ideally, no predators should be able to get in and no turtles should be able to get out.

Are red eared sliders good classroom pets?

Red eared sliders can make excellent classroom pets, however please make sure that you are not keeping small turtles in a classroom with children who still like to put small things in their mouth. For this reason, we’d recommend only turtles with shells over four inches long for any classroom.

Sliders are great animals to teach kids responsibility. Not only do they need to be fed a balanced diet, they need to be cleaned up after frequently. Red eared sliders provide a good way to teach children the responsibilities of cleaning up their pet’s waste.

No matter what age group your classroom happens to be, it is important that all children wash their hands after handling the sliders. While most people with healthy immune systems are fine being exposed to the natural bacteria sliders carry, it is always best to be safe. We recommend that any time the sliders are handled by anyone, that person wash their hands with antibacterial soap to kill any potential bacteria such as Salmonella.

Conclusion

Whether you keep a single red eared slider in a tank inside your home or build a fancy outdoor pond habitat for many red eared sliders, know that these turtles are popular pets for a reason.

Red eared sliders are very versatile, hardy, and beautiful reptiles and we guarantee that you and your family will get hours of enjoyment and entertainment from watching them and interacting with them.

Ready for a red eared slider of your own? Backwater Reptiles has sliders of all sizes available for sale.


What’s the Difference Between Turtles & Tortoises?

Have you ever wondered, “What’s the difference between turtles and tortoises?” If so, you’re not alone. Many people confuse turtles and tortoises because these two types of reptiles are very similar in overall physical appearance.

However, when it comes down to it, turtles and tortoises are very different animals and have very different care requirements when kept as pets.

In this article, we’ll delve into the similarities and differences between turtles and tortoises. In our opinion, both make excellent pets, but you’ll want to know if a turtle or tortoise is better suited to your needs before you adopt one.

turtles vs tortoises
This hatchling common snapping turtle (Chelydra serpentina) is a turtle species that spends nearly all of its time in the water.

What’s the Difference Between Turtles and Tortoises?

Physical Traits

Upon first glance, turtles and tortoises appear very much the same, mainly because they both have hard shells that allow their body to retreat inside of it. However, when you examine both reptiles closer, you’ll see that their physical characteristics are actually slightly different to reflect their different life styles.

The shells of tortoises tend to be dome-shaped and weigh a fair amount. The shape helps to ward off potential predators. On the other hand, turtle shells are usually flat, smooth, and overall fairly light-weight in proportion to the animal. This is to keep the animal stream-lined for an aquatic or semi-aquatic life style.

A tortoise’s legs are chunky, sturdy and stay bent at the “knee” area to promote walking on land. Conversely, turtles’ legs tend to come straight out from underneath their bodies to support swimming and a more aquatic life style.

peninsula cooter turtle
This Peninsula Cooter (Pseudemys peninsularis) turtle has a flat shell, webbed feet, and claws which suit it to an aquatic life style.

Turtles also have claws or toe nails on their webbed feet, which tortoises tend to lack. And if a tortoise does have toe nails, the nails themselves are worn down and not sharp due to the fact that they spend a lot of time walking on dry land. Some turtles have even adapted to have flippers instead of feet. This is generally only true if the turtle species in question is truly aquatic (i.e. a sea turtle).

Habitat

We’ve already hinted at what is probably the biggest different between turtles and tortoises – their habitats. Turtles tend to live fully aquatic or semi-aquatic lives, whereas tortoises live on land.

While there are some turtles that prefer life on land such as box turtles and there are also some turtles that live in the water nearly 100 percent of the time, such as sea turtles, most turtles will split their time between both land and water.

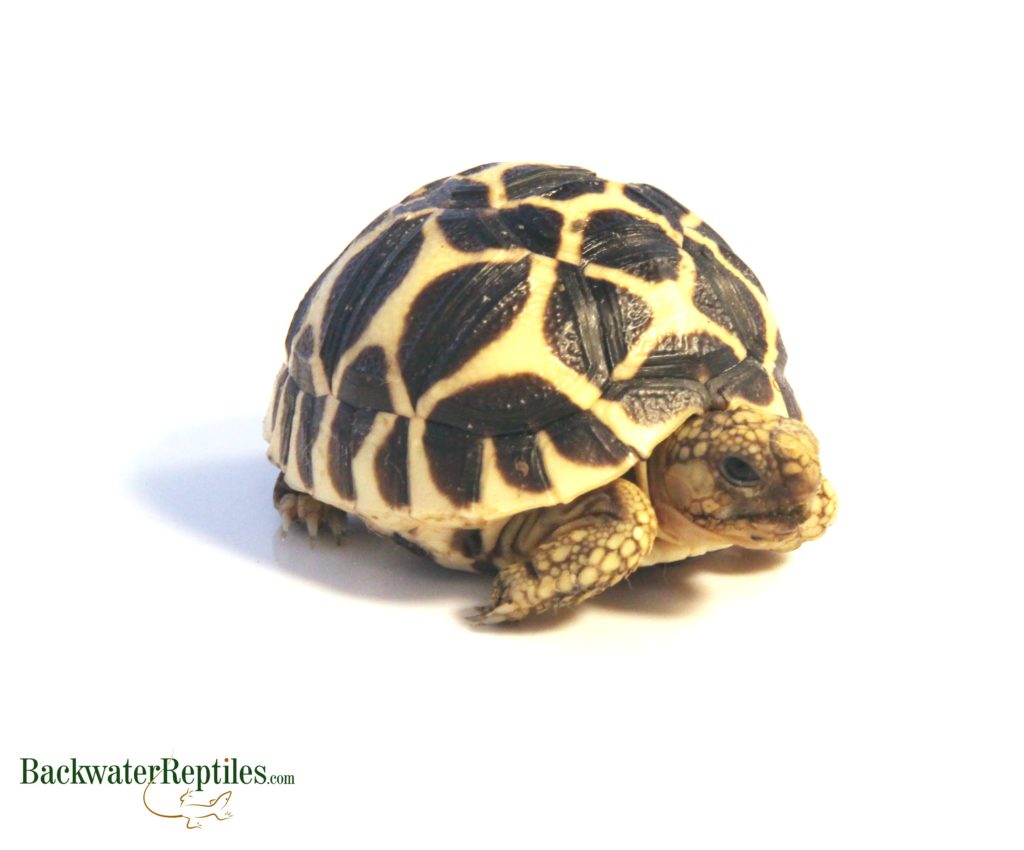
sri lankan star tortoise hatchling
This Sri Lankan Star Tortoise hatchling (Geochelone elegans) has a dome-shaped shell to protect it from predators on land.

When you create a turtle habitat in captivity, you need to do your research and make sure that you are setting up the proper habitat to support your turtle’s life style. Some need a dry home with a water dish, whereas others will need a tank filled with water with a platform to emerge from the water to bask. It really does depend entirely on the species you choose to keep as a pet.

Turtles vs. Tortoises: Diet and Food

Most tortoises are vegetarian herbivores, but turtles can be carnivores or omnivores. Just like with habitat requirements, dietary requirements vary from turtle species to turtle species because they consume a wide variety of food.

Pet tortoises need to have leafy greens and veggies as their main diet. We give ours kale, collard greens, spinach, and root veggies like carrots. Occasional fruit can be given as treats too. And we should mention that commercial tortoise pellets are also a great option if you worry about your tortoise receiving a fully balanced diet.

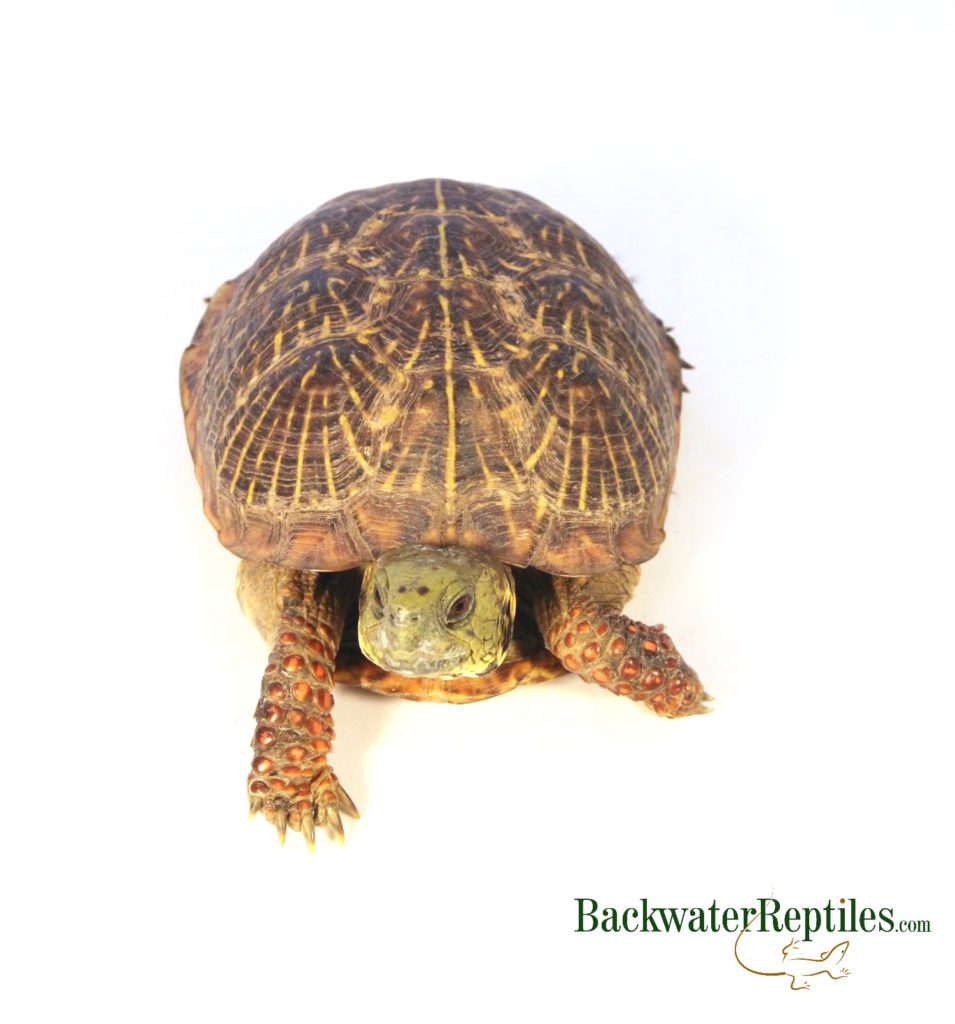
adult ornate box turtle
This is an adult Ornate Box Turtle (Terrapene ornata). Although it is a turtle, it is a species that is primarily terrestrial.

Feeding a pet turtle is actually really easy. Aquatic turtles tend to like turtle pellets. We supplement pellets with crickets, roaches, and meal worms too. And it’s wise to leave some vegetable matter in the enclosure too so that your turtle has access to it if it chooses.

Reproduction

Both turtles and tortoises lay eggs. Both species dig a hole, lay their eggs, and then cover the eggs. The eggs will incubate for a time and then the hatchlings will dig their way out of the dirt or sand.

The main difference between turtle and tortoise reproduction is in incubation times, which vary from species to species, and in upbringing methods. Turtle hatchlings are essentially on their own from the time they emerge from the egg. Tortoise hatchlings, on the other hand, have some degree of protection from their mother. Some tortoise species will guard their nest, while others simply stick around and babysit the hatchlings for some time.

Conclusion

Ultimately, turtles and tortoises are very similar in build and physical appearance and we would recommend either reptile to anyone interested in a  relatively low maintenance pet.

If you are debating between a pet tortoise or a pet turtle, we recommend going with a tortoise if you want a land-dwelling animal and a turtle if you want to provide an aquatic habitat.