Which Substrate is Right for Your Reptile?

The first step in caring for a new pet reptile, amphibian or invertebrate is to make sure that it has a suitable environment to make its home. This means that you’ll need to set up an enclosure that mimics the animal’s natural habitat as closely as possible. You’ll need to take into account temperature, lighting, cage accessories, and humidity.

Another very important aspect of creating your new pet’s ideal home that can easily be overlooked is substrate. You wouldn’t want to live in a house without carpet, tile, or some other type of finished flooring, would you? Similarly, our herp friends need appropriate “flooring” in their cage in order to thrive and live long, happy herp lives.

In this article, we will discuss various types of substrates and which types of animals they are best suited for.
types of substrate
There are so many options when it comes to reptile, amphibian, and invertebrate substrates.

What options do I have when it comes to substrate?

Did you know that choosing the correct type of substrate is essential not only to an attractive-looking cage, but a healthy herp as well? Not all substrates are right for all types of animals, and it is very important that you do your research prior to choosing a substrate.

Substrates help keep cages clean, make it easier to collect and spot clean feces, waste, and shed skin, and they also ensure that your pet feels at home and unstressed in its environment.

Below, we’ve listed the pros and cons of the most popular types of substrates and what types of animals they are best suited for.

Wood

Substrates made of wood are usually broken down into chips, shavings or pellets. Aspen is a very common example of a wood substrate, however wooden substrate can be made of cedar, pine, aspen, and cypress.

Pros:

Wood substrates are generally very easy to obtain from nearly every pet store.  You need not travel far to find the most common types of wood substrates.

Wood substrates like aspen snake bedding work very well for species that prefer dryer environments. With a high moisture absorbency rate and a tendency to stay dry overall, it’s a great option for burrowers who don’t need a lot of humidity in their environment.

Wood shavings, pellets, and chips are very easy to spot clean. Waste tends to stay put and not be dragged around or aggregate throughout the enclosure, so when it’s time to tidy up, not much effort or time is needed.

Cons: 

Some shavings can be too “hard” on specific species. For instance, shavings can hurt sensitive toes and hands or even act like splinters.

Some types of wooden substrates might be dyed or colored and this could negatively impact the health of your animal. Be sure to check the label to ensure this is not the case.

Cedar is not a safe substrate for most reptile species, particularly snakes! The oils present in cedar are commonly accepted to be toxic to many reptiles. Our advice? Steer clear of cedar altogether!
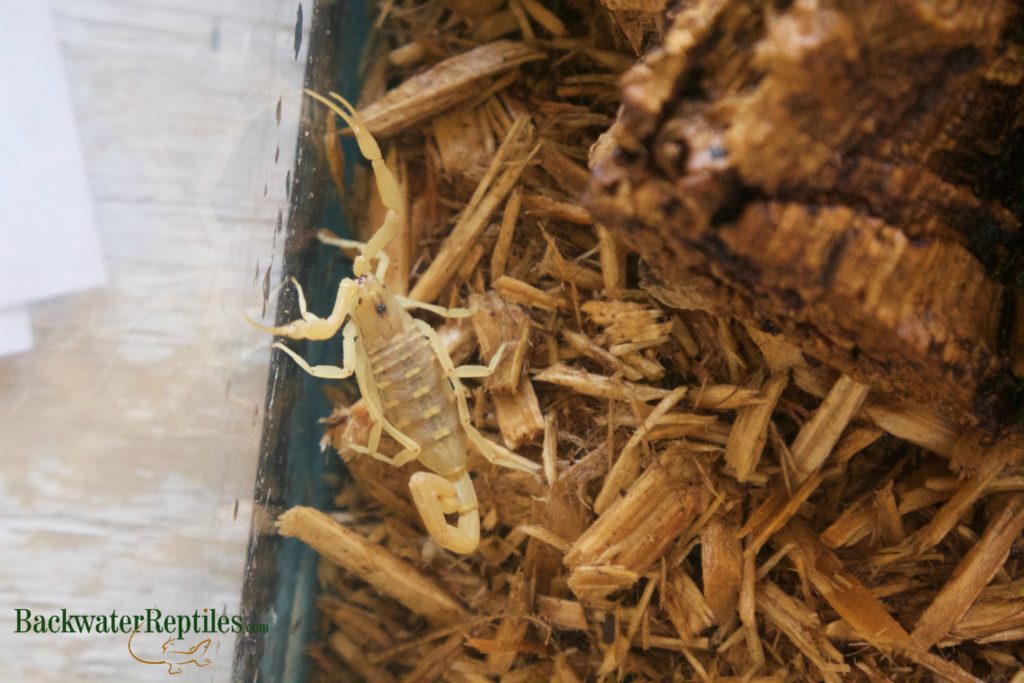
wood shavings as substrate
This Arizona Bark Scorpion was being kept in an enclosure with moist wood shavings.

Reptile Carpet

Reptile carpet is exactly what it sounds like. It usually comes packaged in a roll and has the texture of felt crossed with astroturf. It’s a nifty miniature liner for your reptile’s cage and it usually comes in a few different colors.

Pros:

Most of the carpets sold are washable! This means you can re-use them and not have to keep buying other types of substrate once they get dirty.

They can come in sizes predesigned for specific common herp habitat sizes. They also come in sizes that you can shape or cut to your desired size. There’s lots of flexibility.

You don’t have to worry about your pet accidentally ingesting substrate. Carpet has no loose pieces or small bits for reptiles or amphibians to eat.

Cons:

They are not as natural-looking as wood, soil, or moss substrates, so fans of life-like enclosures are generally not drawn to reptile carpet.

Paper Towels/Newspaper

Paper towels and newspaper aren’t really substrates that require much explaining. Both are paper products and both are commonly found in most households.

Pros:

Both these options are cheap! And you can also feel good knowing that you are recycling your newspaper after its initial first use.

Paper towels and newspaper are very sanitary. Because they are so inexpensive, they can be changed very quickly when soiled without much fuss.

They can be used for a multitude of different types of herps. You can shred them and make them a “fluffy” substrate suitable for burrowers, or you can lie them flat on the bottom of the cage.

Due to the texture and content of both newspaper and paper towels, there is also no need to worry about your pet accidentally ingesting substrate while eating. Therefore, you need not stress about impaction or move your pet during feeding sessions.

Cons:

Many herp owners who create elaborate and fancy habitats for their pets won’t use paper towels or newspaper because it’s not very aesthetically pleasing.

Paper towels and newspapers are great at absorption, however they lack odor control. If you are not able to change them quickly when they get dirty, the smell can get a little powerful.

Alfalfa Pellets

These compact little pellets are made of ground up alfalfa hay that is then compressed into tiny cylindrical bits.  They are dry and absorbent and generally work well for iguanas, bearded dragons, and even Uromastyx lizards.

Pros:

These are absorbent! That means that the waste products of well-hydrated reptiles will be kept in a single spot and can be cleaned up with very little mess or hassle.

Pellets are usually biodegradable and even have built-in odor control. Because the pellets are made from natural plant fibers, they are also safe in accidentally ingested.

Cons:

As previously mentioned, alfalfa pellets are quite dry. This means that they are not the best substrate for all types of pets. Make sure you are using alfalfa pellets only if your pet tolerates low humidity well.

Coconut Fiber

As its name suggests, coconut fiber is made from the husks/shells of coconuts. It can be sold in broken down, loose form in bags or compact little bricks.

Pros:

Coconut fiber is very versatile and works for a broad range of exotic pets. It is natural and therefore safe for animals to burrow in and it holds its shape well which means that it accommodates this type of behavior well.

It’s also helpful in maintaining proper humidity levels since it holds moisture well. Coconut fiber is a smart bedding choice for many tropical species and also works well with invertebrates.

Cons:

Coconut fiber can be a bit on the tougher side to keep clean. Because it holds moisture efficiently, it can pose an issue with clumping together and holding your pet’s waste all in one place for easy spot cleaning.

Moss

The two main types of moss used for substrate are peat moss and Spanish moss. Both can be purchased at pet stores.

Pros:

Moss is very aesthetically pleasing when creating natural-looking reptile enclosures. It adds color and texture to plain cages and provides many hiding places for animals.

Moss is also a good way to maintain proper humidity levels as it holds moisture well. Many amphibian owners choose moss as either an accent or mix-in for lining their pet’s cage.

Cons:

In order to avoid bacteria or fungus growing on the moist moss, it will have to be removed and dried out periodically. Many herp owners find that it’s just easier to purchase new moss rather than go through the process of disinfecting the moss, which does involve baking it.

Moss will also generally need another “thicker” or heftier substrate underneath it when using it line the bottom of an animal’s cage. Moss is best used as an accent to help maintain proper moisture levels and is generally  not used as a solo substrate.
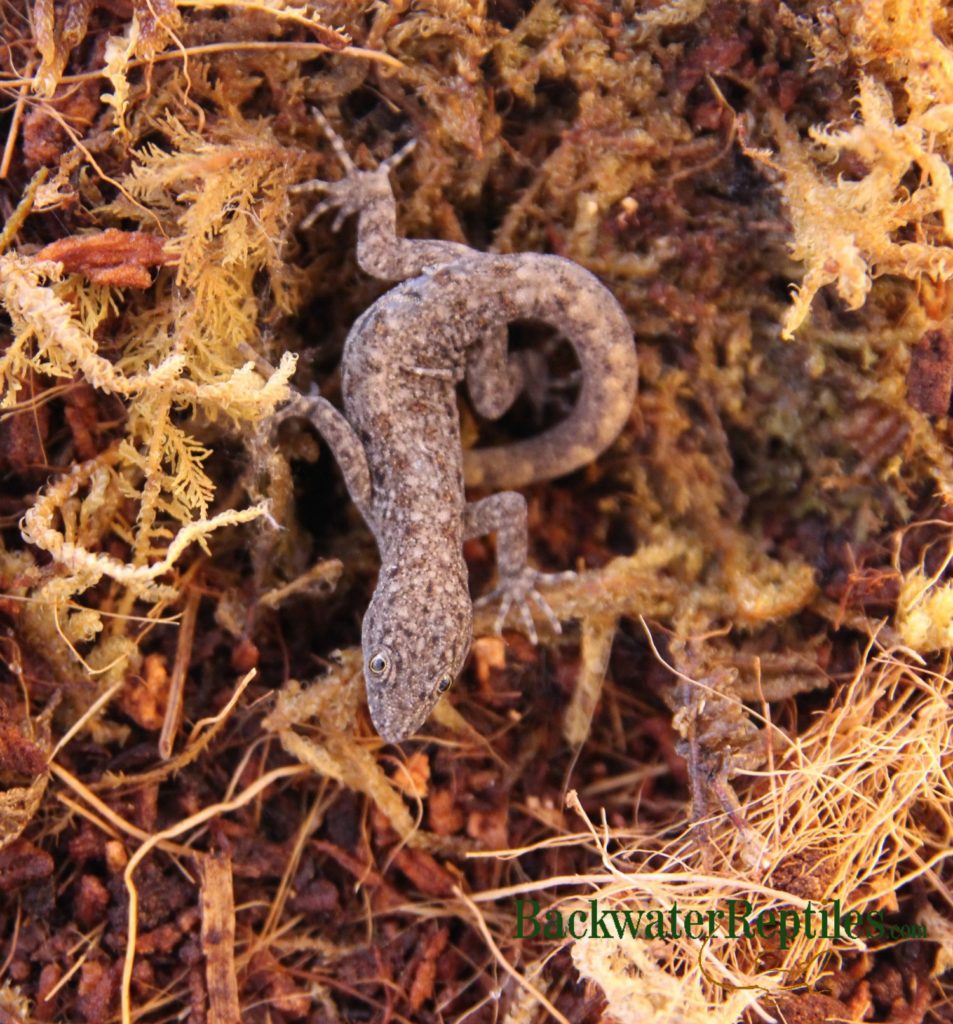
ashy gecko
This Ashy Gecko was being kept in an enclosure with a moss additive in order to maintain proper humidity levels.

Organic Potting Soil

This is a pretty simple and straight forward substrate. Soil that is not treated with chemicals or fertilizers is an extremely versatile option when it comes to reptile, amphibian, and invertebrate  bedding.

Pros:

Versatility! Potting soil can be used for many species of lizards, lots of invertebrates such as scorpions and arachnids, and also certain types of amphibians.

Potting soil is great for burrowing. Because it tends to hold just the right amount of moisture, it also holds its shape nicely so that burrowers can dig and tunnel and the soil won’t collapse on them.

You can purchase potting soil in many different locations including hardware store, department stores with garden sections, and even nurseries. This means that you likely won’t have to visit a special store in order to purchase what you need. But again, we’d like to stress that the soil must be organic and untreated with chemicals, fertilizers, or other plant growth promoting compounds.

Cons:

You can easily get potting soil too wet on accident. Unlike many other substrates that retain moisture well, soil cannot be easily dried or “wrung out” in the same manner that moss or pellets can. Once you get soil too wet, you essentially just have to wait for it to dry. And believe us when we say that you don’t want substrate that is too moist. It can lead to a whole host of problems including fungus, respiratory ailments in your pet, and bacterial infections.

Vermiculite or Perlite

Both of these substrates are used to help retain water in horticulture. They are usually added to soil. They are a bit unconventional and you probably won’t see too many herp hobbyists using them solo to line cage bottoms.

Pros:

Excellent moisture content! Both vermiculite and perlite are minerals that absorb and retain water, which is why they are commonly used in horticulture. This means they are also a sensible option for maintaining moisture and humidity levels with exotic pets.

Both of these types of substrate are commonly used as incubating mediums for reptile eggs.

Cons:

Both vermiculite and perlite are best used as accents to a staple substrate to help retain moisture. We don’t recommend using them alone as substrate, unless you are incubating eggs.

Vermiculite and perlite are also probably not the most cost effective type of substrate. For the quantity you should be using, you’ll be paying a bit more than many of the other options listed.

Sand

Reptile sand is commonly available at virtually all commercial pet stores, however playground sand purchased from a toy store can also be used.

Pros:

Sand is readily available and easy to find at various stores. It’s also generally very aesthetically appealing. It even comes in different colors if you want to create a fun, flashy enclosure for your pet.

Cons:

Sand can be messy! If you get it wet, it clumps and can stick to your pet’s feet, tail, and legs. Plus it’s a hassle to clean if you get any outside of the cage.

Impaction is a huge concern when housing a reptile on sand. If your pet accidentally ingests sand while consuming live prey, you run the risk of creating a blockage in the animal’s digestive tract which will be difficult for the animal to pass.

Sand also does not provide much (or any) odor control.

No Substrate

Most pet reptiles, amphibians, and invertebrates should always have a substrate of some kind lining the bottom of their enclosure. However, with certain arboreal species, substrate is not a necessity.

A great example of a species that does well with no substrate are chameleons. Because chameleons are rarely down on the bottom of their cages and spend the majority of their time in the plants and vines in their enclosures, it’s not necessary to line the bottom of their cage in order to make the lizard feel more at ease. Some chameleon owners do still line their cage bottoms with paper towels in order to easily collect and remove dead insects and feces, however it is not a requirement for the  health of the chameleon.
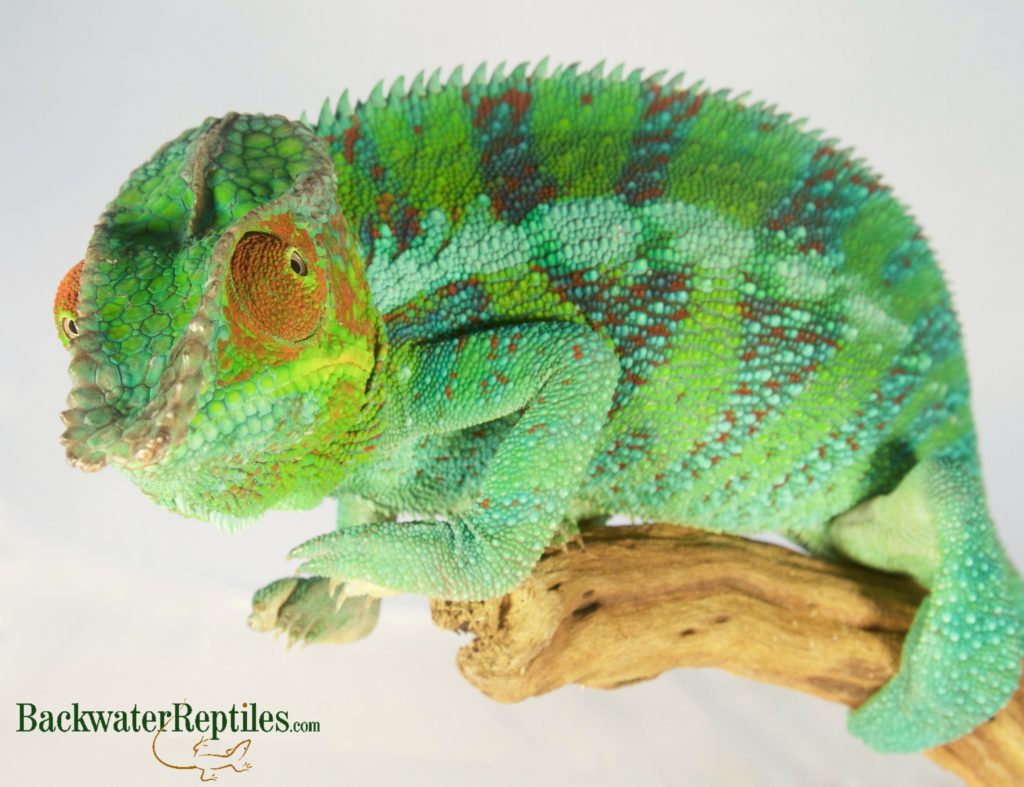
ambanja panther chameleon
Did you know that most species of chameleon actually don’t need a substrate in their cage to be healthy and happy?

Conclusion

It’s important to do your research when selecting a substrate that is appropriate for your pet reptile, amphibian, or invertebrate. Substrates are not “one size fits all” and different animals will most certainly require different beddings.

What type of substrate does your critter use?

Raptor’s Story – A Blue Tongue Skink Rehab Diary

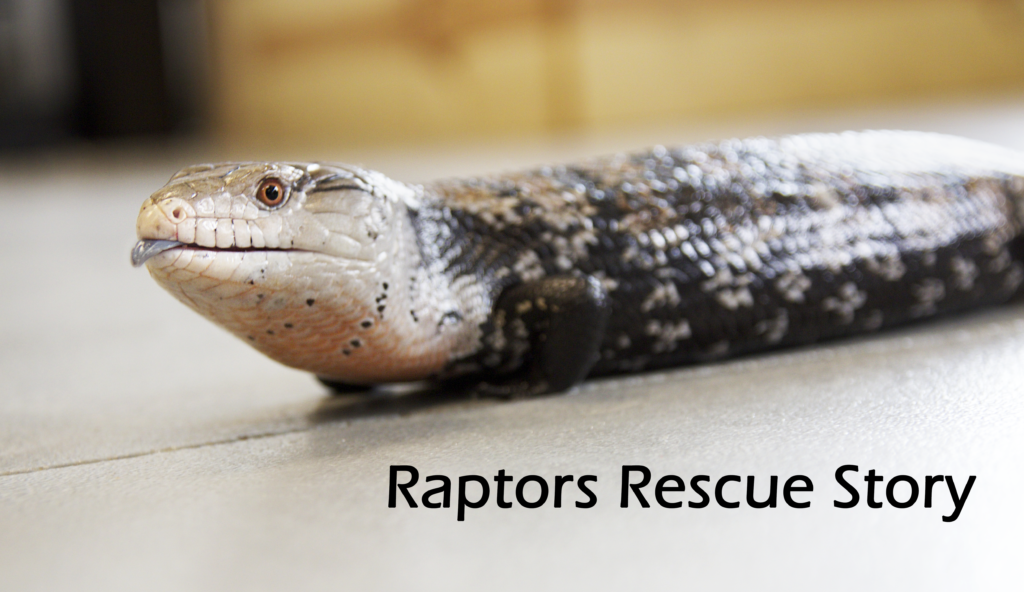
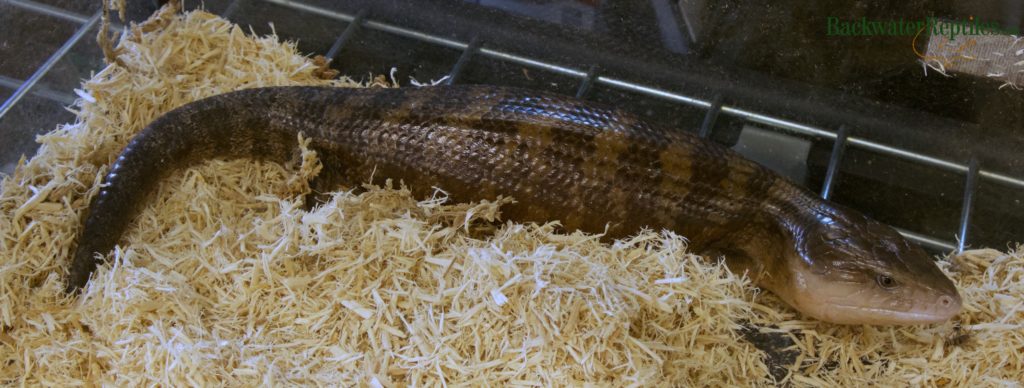
blue tongue skink rescue

We received Raptor as a rescue quite a few months back and he unfortunately came in with some pretty hefty concerns. We first noticed he had some breathing problems and difficulty shedding, mostly around his back, but we were determined to get him back to full health.

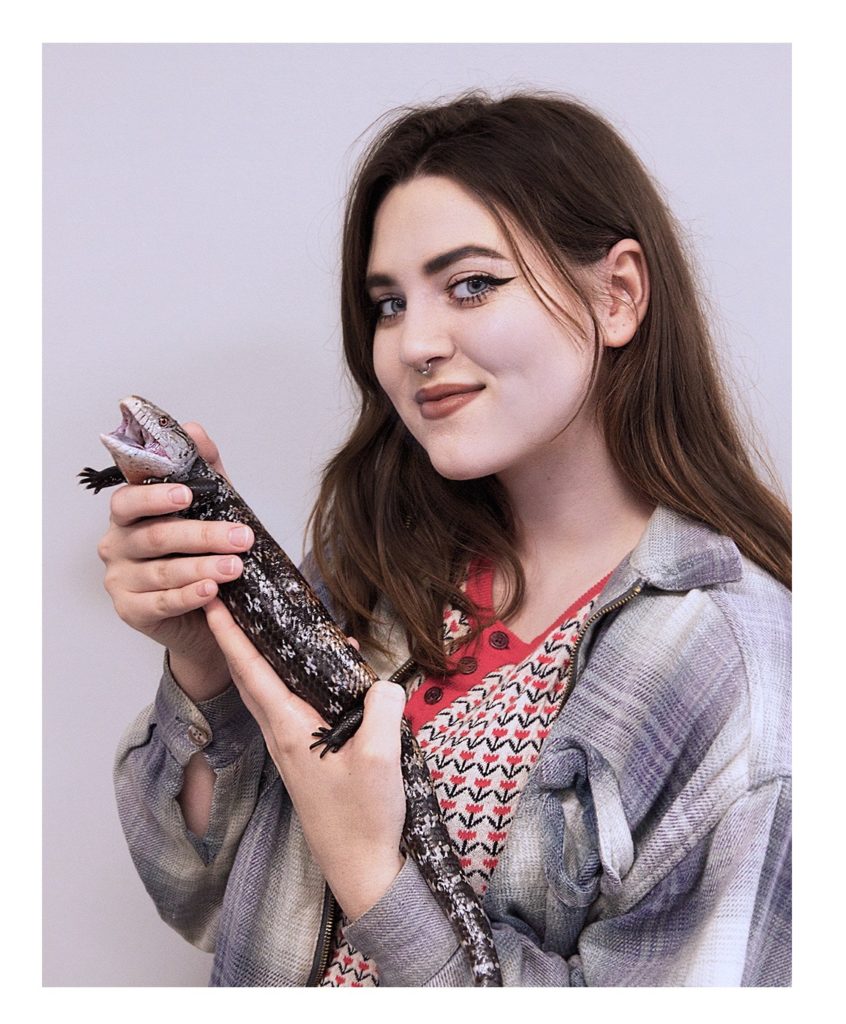
Blue Tongue Skink Rehab
Although Maura worked with Raptor quite a bit during his recovery process, you can see from this photo that he is still quite a feisty little guy with tons of attitude!

Since is is an Indonesian Blue Tongue Skink, we immediately housed Raptor in a humid, warm shelf with a heat pad because the problems he had were most likely caused by improper humidity.

The Indonesian Blue Tongue Skink species need higher humidity levels of around sixty to seventy percent as too dry of an enclosure can cause upper respiratory infections and improper shedding, which can then lead to skin infections and loss of toes.

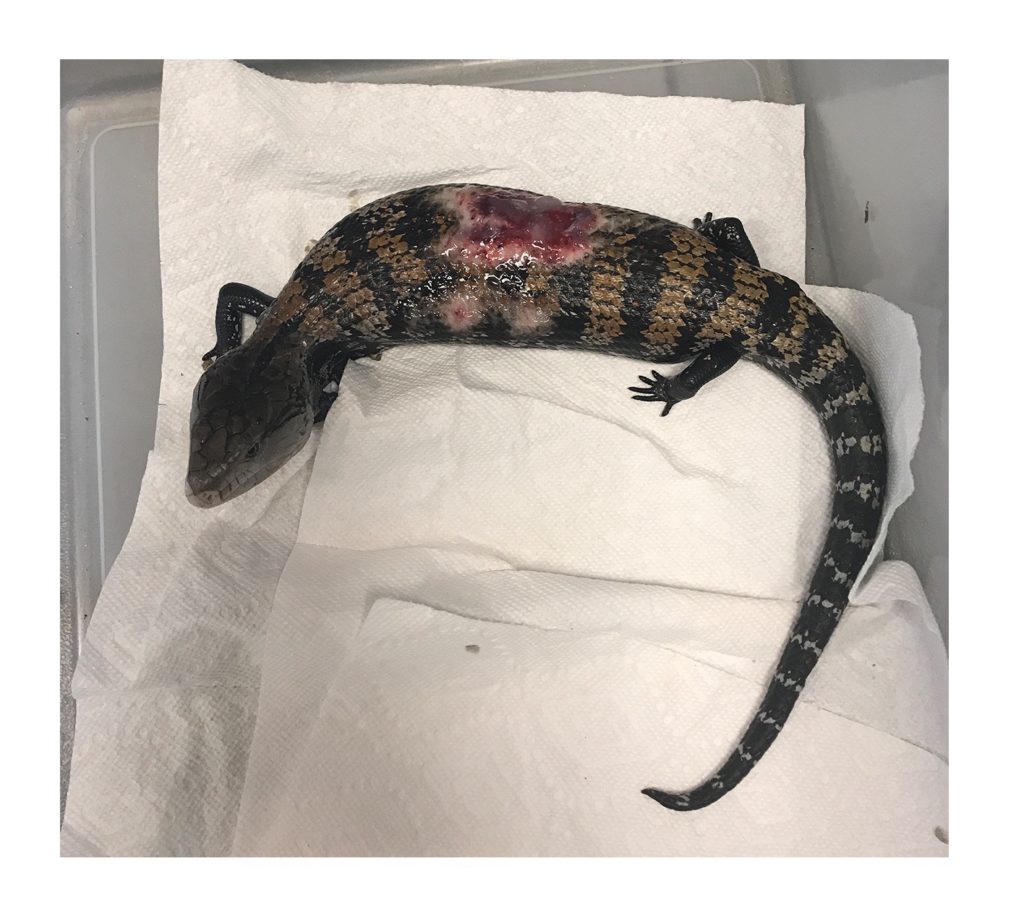
Unfortunately, it was too late for Raptor and we very quickly started noticing he had developed what looked to be a large bacterial infection under the scales of his back leading to much discomfort and a feisty attitude, which earned him his name. We helped gently peel off the necrotic scales with tweezers when giving him baths, provided that the skin looked ready to be removed.

rehab blue tongue skink
We used paper towels as a more sanitary option for substrate during Raptor’s recovery. His skin and scales were also treated with Neosporin to fight his bacterial infection.

As a side note, we only recommend trying to help an animal shed its scales when it has to be done and can be done professionally and safely. Peeling dead skin off if it is not already loose can be quite painful for the animal.

After bathing Raptor, we would then dose the area with Neosporin antiseptic cream every other day for two weeks to help it heal and prevent the injured area from becoming too dried out.

Because of his back scale issues, we had to rehouse Raptor in a bare, tall enclosure with paper towels as a substrate, a large water dish, and of course the proper sixty to seventy percent humidity levels.

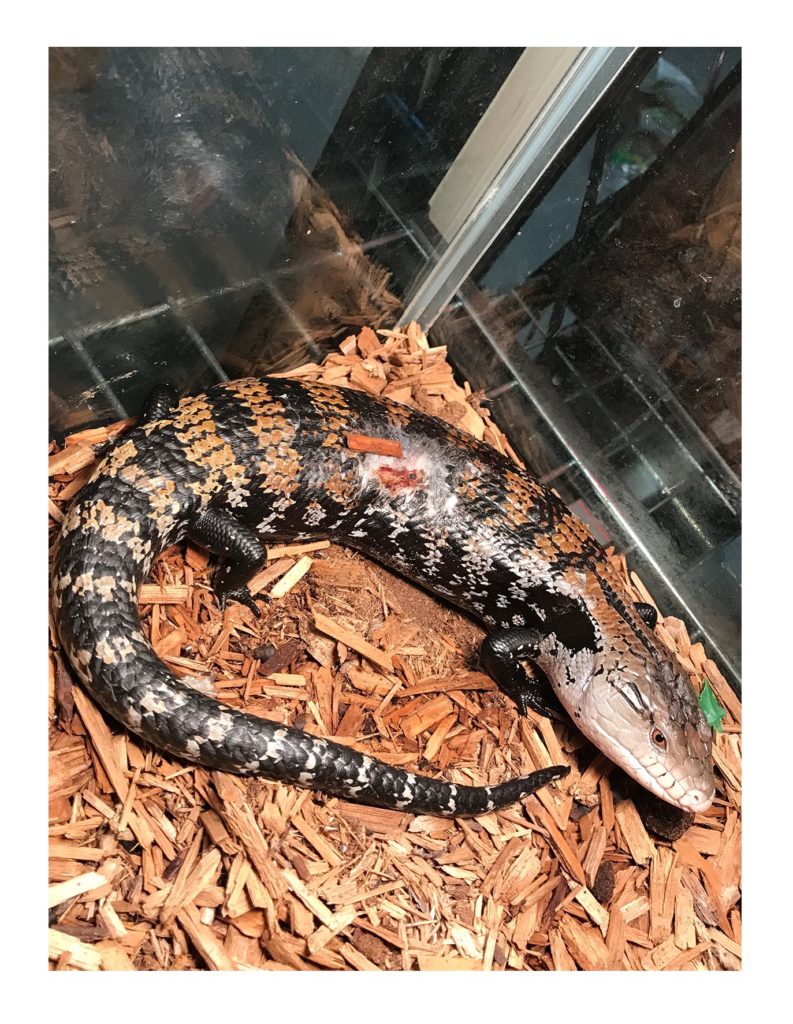
healing blue tongue skink
As you can see, Raptor’s skin needed some serious TLC when we first received him. Luckily, with much patience, treatment, and proper humidity levels, Raptor has made virtually a full recovery.

The humid air in his enclosure cleared up his breathing and at this point, he has just about made a full recovery from his infection, although his feisty attitude hasn’t changed!

Meet the Backwater Reptiles Resident Herps!

It goes without saying that every member of the  Backwater Reptiles team is passionate about reptiles, amphibians, and invertebrates. But did you know that we often fall in love with the critters that come to our facility? In fact, the Backwater Reptiles office is filled with the pets of Backwater Reptiles employees!

Want to meet the herps and inverts that we love and live with at the office? Read on to learn more!

Meet the Resident Reptiles, Amphibians, and Invertebrates of Backwater Reptiles

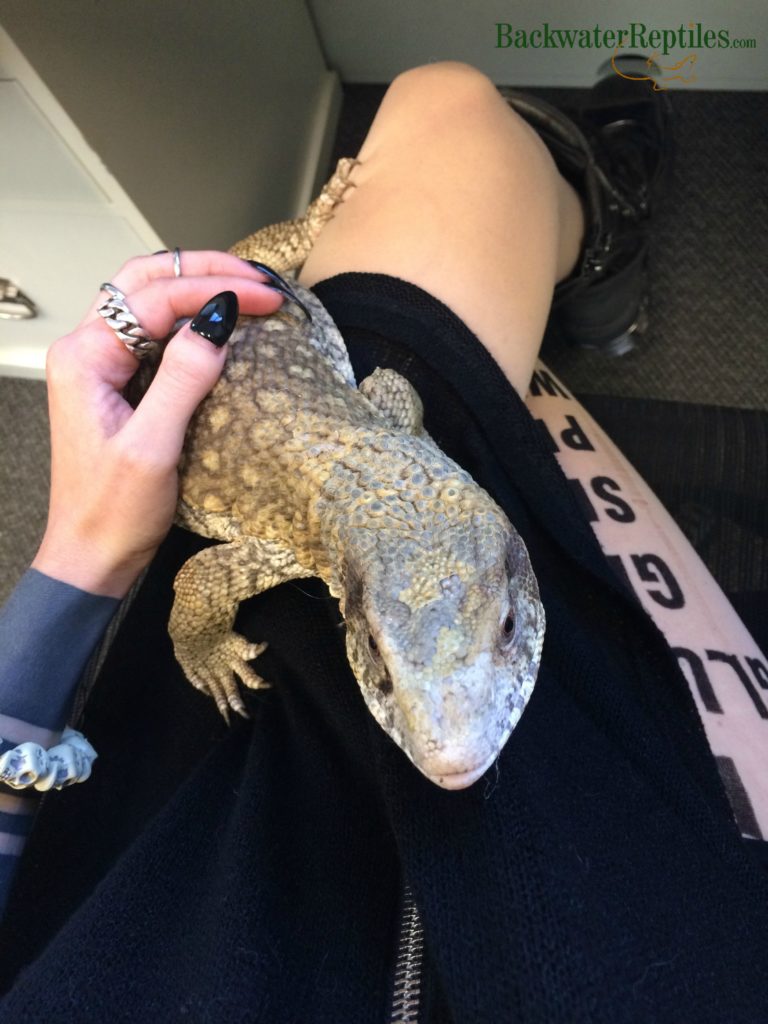
Nyke – Anerythristic Savannah Monitor (Varanus exanthematicus)

If there were a single reptile that is the face or mascot of Backwater Reptiles, it would be Nyke.

Nyke is approximately three years old and he was the first pet reptile adopted by an employee. He arrived at the facility as a tiny little anerythristic Savannah Monitor and he has grown into quite the beast with an appetite to match.

Nyke started out in a small terrarium eating small insects such as crickets, mealworms, roaches, and other similar invertebrates. Now, at his current size, he’s eating a varied diet of mice, eggs, and other animal proteins.

Check out the video of Nyke eating some quail eggs below.

Friendly as a lap dog, Nyke is known for roaming the office and begging the Backwater Employees for scraps, even if nobody is eating! He enjoys sitting on our laps, getting scratches on his head and chin, and staying warm and cozy under his heat lamp.

Savannah Monitors make excellent pets for reptile hobbyists who want an interactive animal. Not only do they take well to human interaction and provide endless entertainment at meal time, they are also known for their ability to adapt to leash walks and for taking baths in human bath tubs when they grow up.

anery savannah monitor
Nyke somehow manages to sit on laps, even though he’s got some impressive claws!

If you are interested in a pet Savannah Monitor of your own, Backwater Reptiles has them for sale, however please do your research and be prepared to keep a somewhat demanding animal. Not only do monitors of all types require lots of food, they grow to large sizes and will need a space big enough to comfortably house them.

Vossena – Hypo Motley Colombian Redtail Boa (Boa c. imperator)

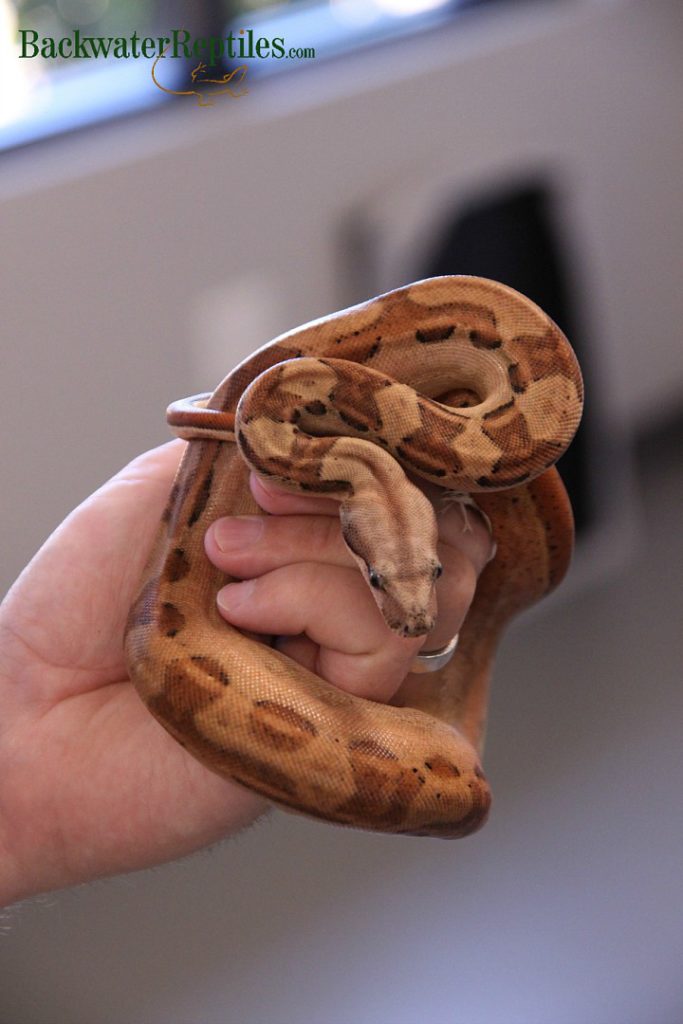
Vossena, a female Hypo Motley Colombian Redtail Boa, has been a fixture in the Backwater Reptiles office for quite some time. She came to us a little bit older than a hatchling, and she has most certainly grown!

hypo motley colombian boa
Vossena is a Hypo Motley Colombian Boa. This photo was taken of her shortly after she arrived at the facility. She has since doubled in size!

Although she’s not the cuddliest boa at the facility, Vossena does spend plenty of time outside of her cage during business hours, interacting with the team while they work.

Vossena can get a bit nippy when she’s hungry, so we always make sure she’s well-fed before handling her and we exercise caution when removing her from her cage.

Zedsly – Colombian Redtail Boa Mix (Boa c. imperator)

Zedsly came to the Backwater Reptiles facility as a rescue — and the team fell in love with him! We’re not one hundred percent sure, but he is a Colombian Redtail Boa mix with probable Hypo genes.

Zedsly is also the newest reptilian family member to join the Backwater Reptiles crew. He spends most of his time chilling out in his cage next to his mom’s computer work station, but like all the other resident office snakes, he enjoys spending time with the employees while they work.

Colombian Redtail Boas are very popular amongst reptile enthusiasts with good reason. They are adorable as hatchlings and they mature into decent-sized snakes that tend to enjoy being handled. If you are interested in a Colombian Redtail Boa of your own, you can purchase one from Backwater Reptiles here.

DeVille and Tartar – Crested Geckos (Rhacodactylus ciliatus)

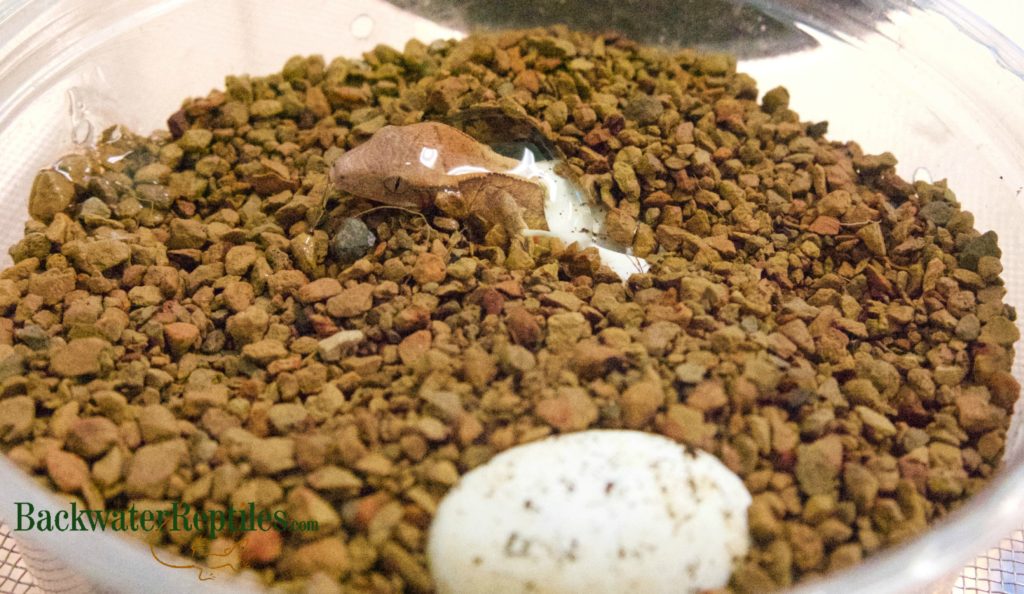
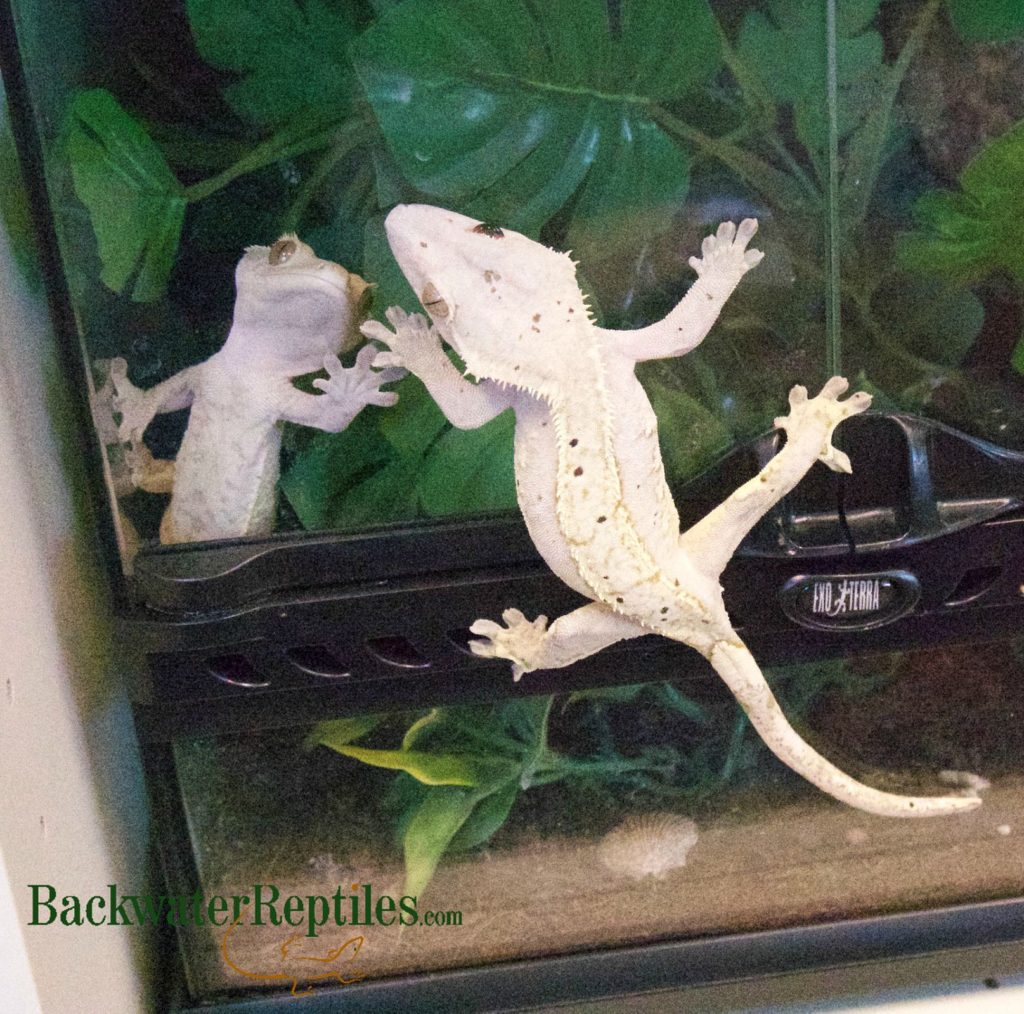
This Crested Gecko duo are actually related! Tartar, who got his name because his coloration resembles the condiment tartar sauce, is DeVille’s son!

hatching crested gecko
Tartar was hatched at the Backwater Reptiles facility and we were lucky enough to witness him emerging from the egg!

Little Tartar was actually hatched at the Backwater Reptiles facility last year. DeVille, on the other hand, came from a reptile show. Despite the fact that we handle reptiles and other critters on a daily basis, we are still susceptible to their charms and we rarely go to a show without taking a new family member home.

Overall, the geckos mostly keep to themselves. They enjoy meal time and hiding in the foliage in their cages.

crested geckos
Here’s a photo of DeVille with Tartar’s mother. Don’t they make a lovely pair?

If you are interested in a pet Crested Gecko of your own, you can purchase adults, babies, and various morphs here.

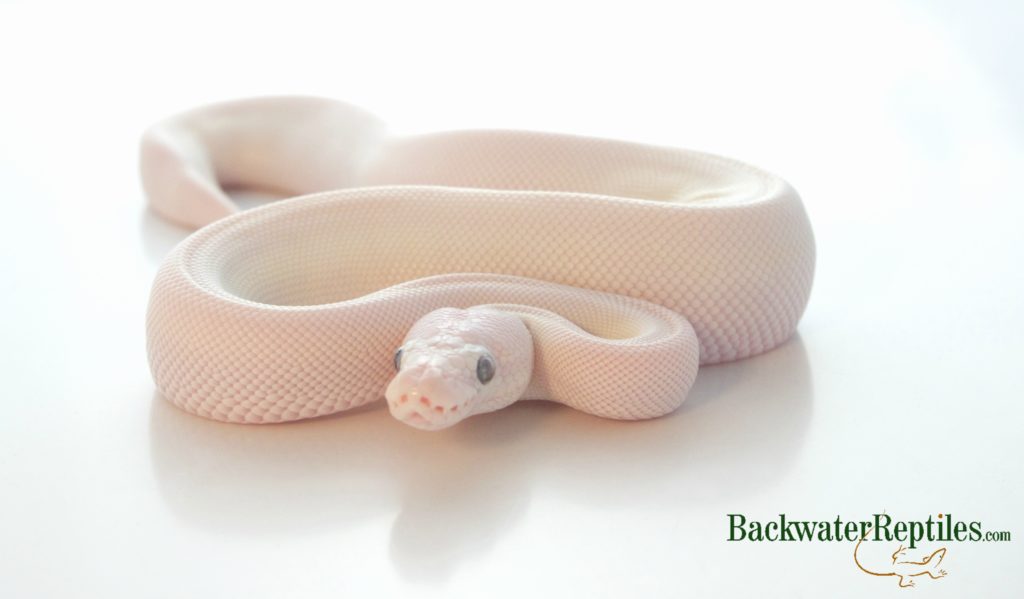
Hades – Blue Eyed Leucistic Ball Python (Python regius)

Hades is a blue eyed leucistic Ball Python around a year or so old. He arrived at the facility as a hatchling and has since undergone multiple sheds and grown appropriately.

If you were to visit the Backwater Reptiles facility, you’d likely find Hades sitting in his mother’s lap if she’s at the computer. He enjoys the warmth and helping out with sending emails.

While Ball Pythons can be stubborn or picky eaters at times, Hades has always had a healthy appetite. He’s grown from eating pinkie mice to frozen/thawed fuzzies. Sometimes he’ll even eat two in a row!

ball python
Hades is a blue eyed leucistic Ball Python. This is an image from his very first photo shoot on the day he arrived at the Backwater Reptiles facility a little over a year ago.

Overall, Ball Pythons are great pet reptiles for hobbyists of all experience levels. They aren’t very hard to maintain and their housing requirements are fairly simple. They are popular additions to reptile collections because they are available in a seemingly endless variety of color morphs.

If you are interested in owning a pet Ball Python of your own, Backwater Reptiles has quite a collection of morphs available for sale. We can also acquire rarer morphs – just email our customer support team at sales@backwaterreptiles.com if you are interested in a morph not listed on our website.

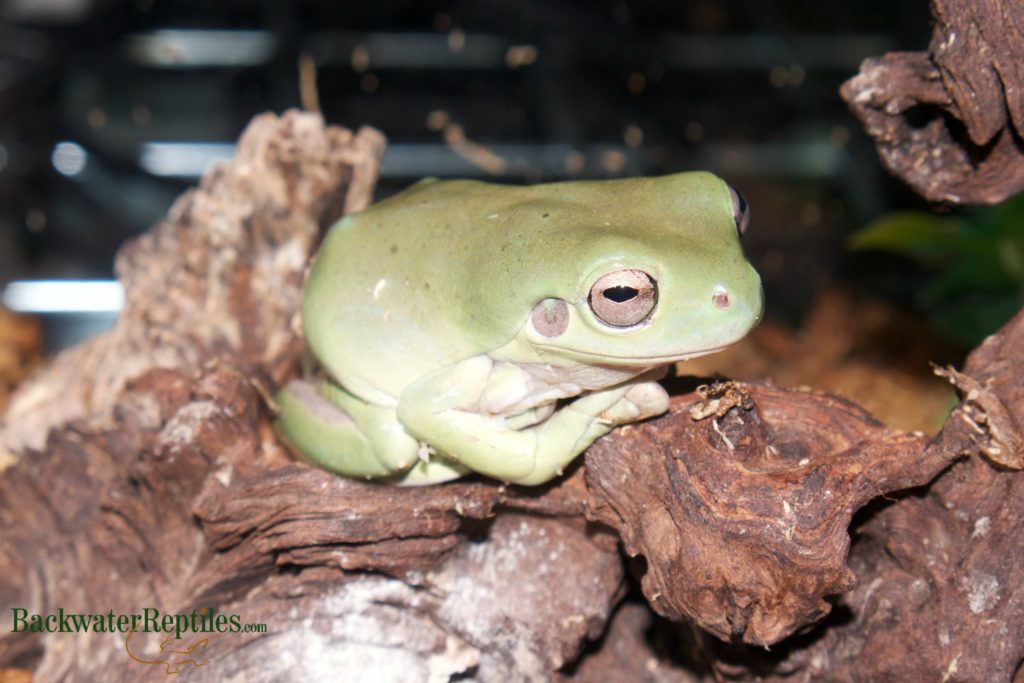
Franklin – White’s Tree Frog (Litoria caerulea)

Franklin the Dumpy Frog is a recent acquisition to the Backwater Reptiles critter family. He arrived at the facility last year and has been charming us with his cuteness ever since.

On any given day, Franklin can be found hanging out in the foliage or on the walls of his enclosure. He’s known for being very photogenic as he appears to be smiling in just about every photo he takes.

Franklin enjoys eating crickets and other insects and having his enclosure misted.

whites tree frog
Doesn’t Franklin look like he’s smiling?

Whites Tree Frogs are very hardy pet amphibians and we do highly recommend them for beginners. Like most pet frogs, they should be handled sparingly, but overall they are a friendly species.

If you’re interested in a Whites Tree Frog of your very own, Backwater Reptiles sells them here.

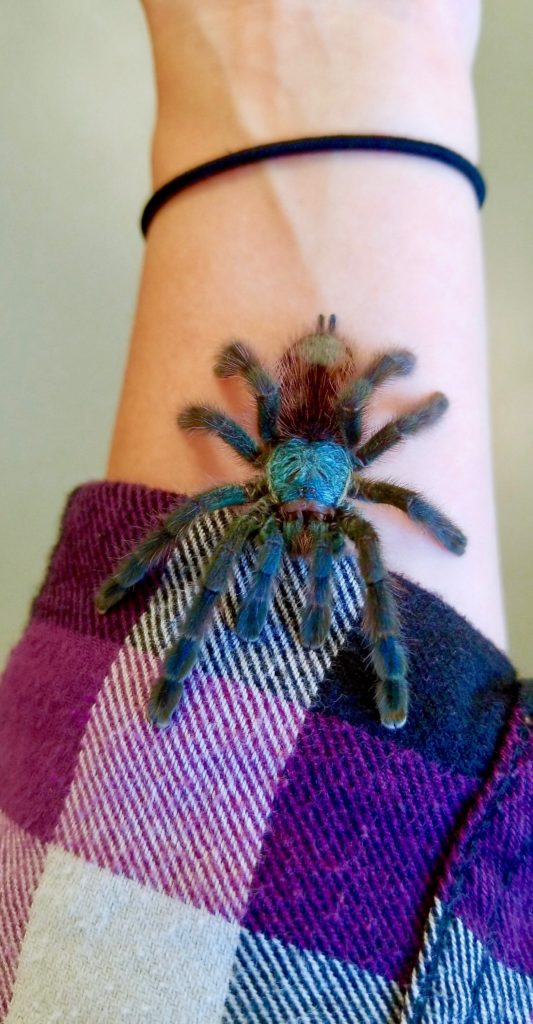
Manson – Antilles Pink Toe Tarantula (Avicularia versicolor)

Manson is an Antilles Pink Toe Tarantula about a year to a year and a half old. He arrived at the facility as a tiny spiderling with a half inch leg span and has grown into a colorful spider with a friendly disposition.

Manson has matured from consuming pinhead crickets to full-sized roaches and crickets. He’s got a healthy appetite and watching him at meal time is always a treat.

antilles pink toe tarantula
Manson has grown from a tiny spiderling into a colorful tarantula!

Although Manson doesn’t enjoy helping the team out with emails around the office, he does sit in his enclosure near the computers where he can oversee the Backwater Team comfortably.

Manson’s mom does handle him when he’s not preparing to molt and when he comes out of his hiding place or web to say hello.

Conclusion

Everyone working at the Backwater Reptiles facility loves reptiles, amphibians, and invertebrates.

So it’s no surprise that our office is filled with herps that make us smile and make the work day breeze by.

You can be sure that we’ll likely fall in love with more critters as they arrive at the facility. Guess it’s true for the Backwater Reptiles employees that reptiles are kind of like potato chips – you can’t have just one…even at work!

How to Pick Up a Pet Tarantula

Although tarantulas are not the most hands-on type of pet, they can be handled and interacted with if you understand the animal and its body language.

While we recommend leaving your pet tarantula to its own devices most of the time, there will be times when you will need to remove your spider from its enclosure. The most common time to take your spider out of its cage is when it requires cleaning.

In this article, we will discuss tips, tricks, and methods for removing your spider from its enclosure as well as handling it in a manner that is the most stress-free for both you and your arachnid.

how to pick up a tarantula
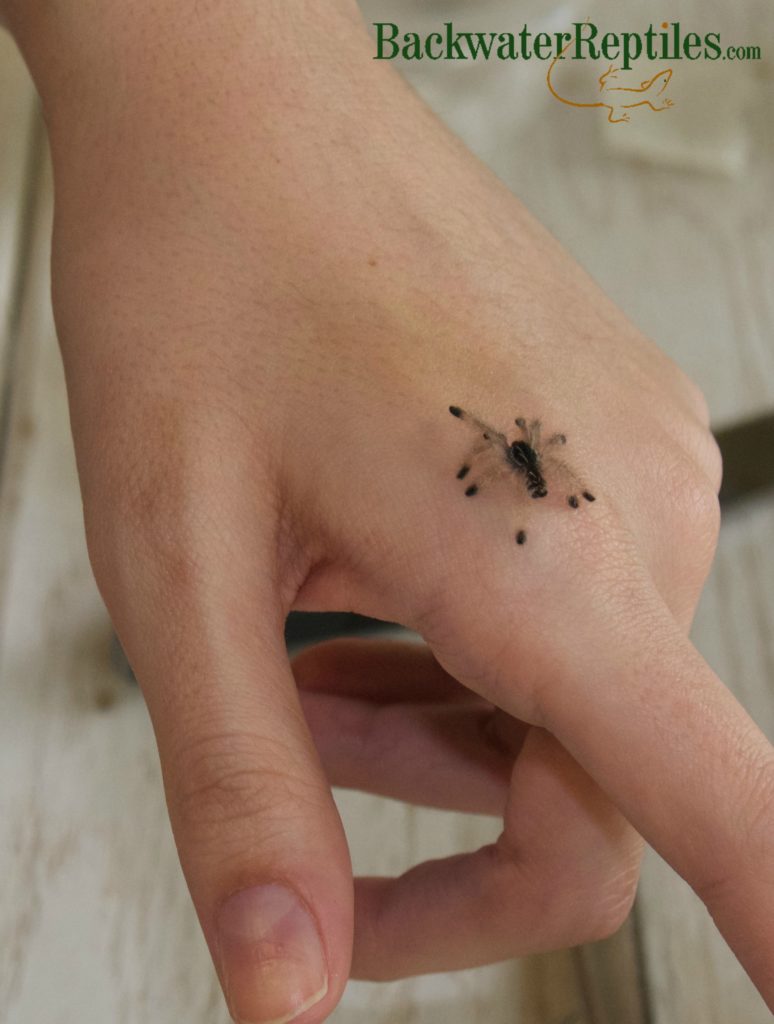
When picking up a spiderling such as this Antilles Pink Toe, be sure to support the spider entirely and be one step ahead of where it will be crawling. Baby spiders can be not only fast, but skittish, so you’ll want to be very careful.

How To Pick Up Your Pet Tarantula

Why would I need to pick up my pet tarantula?

Although it is true that in general most species of tarantula are best observed and not handled, if you are a tarantula owner, odds are that at some point in your spider’s life, you will have to remove the arachnid from it enclosure.

The most common reason to pick up any pet tarantula is to clean the spider’s cage. However, if you are a diligent spot-cleaner, you can certainly keep full-enclosure cleanings to a minimum. For instance, you should make sure to remove any molt exoskeletons once your spider has fully completed the process. Any uneaten cricket or insect corpses should also be removed in a timely fashion.

Many tarantula owners also have the desire to interact with their spider on a one on one level. Again, this should be done by experienced arachnid owners who know how to read their spider’s body language.

While tarantulas might not appear fragile, they can be rather delicate. Plus they have what are called urticating hairs that can be shed in distress. These hairs not only irritate human skin, but they can leave bald marks on the spider if they become overstressed and shed too many of these hairs.

brazilian salmon pink birdeater
Large spiders such as the Brazilian Salmon Pink Birdeater can have tricky dispositions, so be extra careful if you choose to handle one.

How do I handle my pet tarantula?

So now that you know that pet spiders can in fact be picked up and held if you choose to do so, what is the proper way to go about doing so? How do you pick up the spider without stressing it or causing it to bite?

First of all, you’ll want to know that there are certain species of tarantula that we simply do not recommend holding with  bare hands, regardless of your experience level. You can read more about those particular species later on in this article.

But if you do have a species of tarantula that is suitable for limited human interaction, first and foremost, before you even place your hand anywhere near the spider, you’ll want to know how to read the arachnid’s body language. Most tarantulas have very clear indicators that they are not in a good mood and if you notice any of these behaviors, you’ll want to steer clear of handling the spider until the bad mood has passed.

Here are the most common signs that your spider is simply not interested in interacting with you:

  1. Your tarantula lifts a leg or two from the ground and waves it. While the remainder of your spider’s body will stay grounded and relaxed, one or two of its front legs will raise up and be tense.
  2. Your tarantula is rearing up and displaying its fangs. This behavior is a very clear indicator that your spider is feeling aggressive. Odds are if you attempt to pick up, hold, or otherwise disturb your spider while it is in this posture, it will either attempt to bite you or rub urticating hairs in your direction.
  3. Your spider turns around and faces its abdomen towards you. This stance is usually followed by the tarantula rubbing its legs against its abdomen. If your arachnid does this, it is flicking urticating hairs in your direction and you should steer clear if you don’t want your skin to be irritated, red, and itchy.
  4. Your tarantula is extremely sluggish, slow, and hasn’t eaten in a while. In most cases, this means your spider is preparing to molt. While your tarantula might not be exceptionally grumpy during this time, you’ll certainly want to avoid disturbing it or handling it because it can upset the molting process and be hazardous to your spider’s health and well-being.
  5. If your tarantula is lying on it back upside down. This is a sure sign that the spider is undergoing the molting process and definitely should not be disturbed or moved in any way.
mexican fireleg tarantula
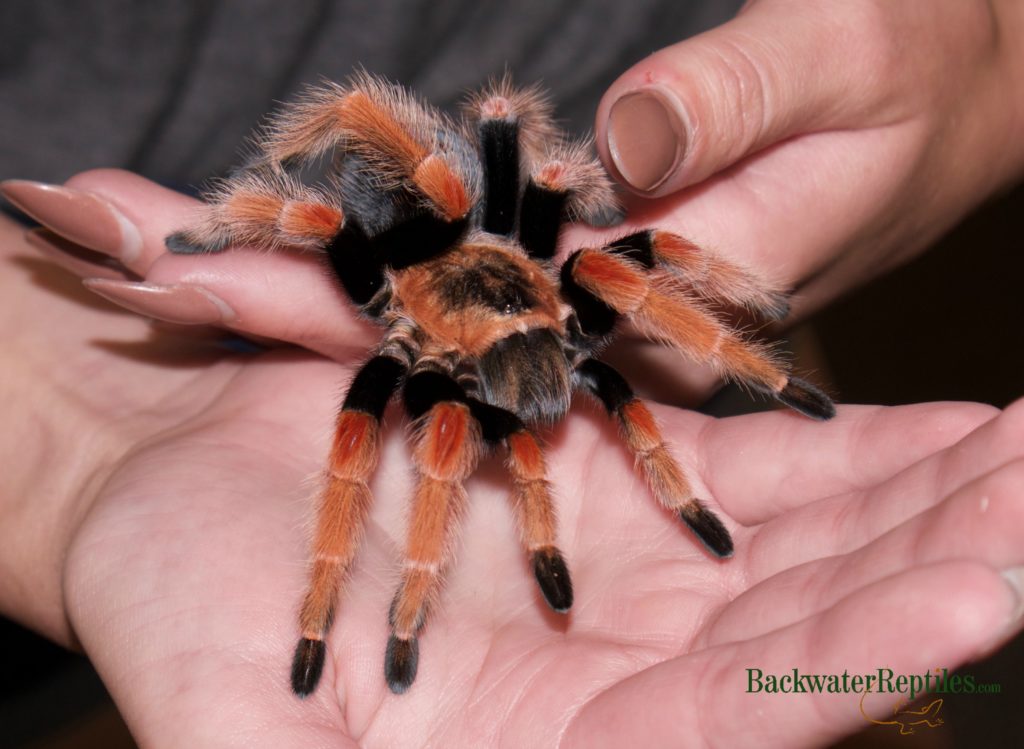
We always recommend using two hands when handling a tarantula as they will likely want to crawl.

If your tarantula is flat with his legs bent and abdomen gently parallel to the ground, it means that it is relaxed and feels safe in its current state. This type of posture means that your spider is in the proper mood to be held.

Once you’ve determined that your spider’s body language indicates you can interact with it, the next step is to make sure you are wearing the proper clothing. You might want to wear pants, long sleeves, and sometimes even gloves depending on the personality of your spider. Less skin that you have exposed means there is less of an opportunity for the tarantula to bite you should it become startled or defensive.

If you want to be hands on with your spider, we do recommend wearing gloves until you are 100 percent at ease with your pet and know how it tends to react and behave in general.

If you can, it’s best to have the spider on a flat surface so that you can gently place one hand in front of it and the other behind it to softly encourage the spider forward onto your hands.

Once you have eased the spider into your hands, make slow movements, speak softly, and avoid poking, prodding, or waving the spider around. Being at ease around your tarantula will in return put the animal itself at ease.

You can also use the “paper sliding under a cup” method of picking up your spider. More on that method later. Helpful hint: this method is best for very aggressive spiders.

golden knee tarantula
If you want an interactive pet spider, we highly recommend doing your research as not all species enjoy human handling.

What tips and tricks do you know for interacting with my tarantula?

A really good piece of advice that is (hopefully) self-evident for most spider owners is to keep your fingers away from the spider’s fangs. Don’t poke it or try to hand feed it. If you want to train your spider to accept food from you on command, always use tongs.

Be calm. When you make slow movements you will keep your spider in a calm mindset and it will feel far less threatened than if you make quick, frantic, or jerky movements.

Avoid touching the tarantula’s abdomen. Spiders that possess urticating hairs have them on their abdomen and if you brush these or rub them too hard, they will be released into your skin, which is not a pleasant experience for the spider or for the owner.

When you handle or interact with your tarantula, make sure that you are well out of the reach of other household pets. Avoid handling your spider around noisy dogs, clingy cats, or even other pet spiders. It’s best for the safety of all parties, human and animal, that are living in the household.

If you have a particularly active spider, hold it over a flat surface so that if it unintentionally walks out of your hand, it will not be injured by a fall from a high place. We also recommend keeping overactive spiders in your hands – don’t let them crawl into your hair, clothing, or appendages.

Which species of tarantula are the most interactive?

While many species of tarantula that are not considered classically docile can be held, it is true that there are certain types that are known for their calm temperaments and ability to interact with their owners.

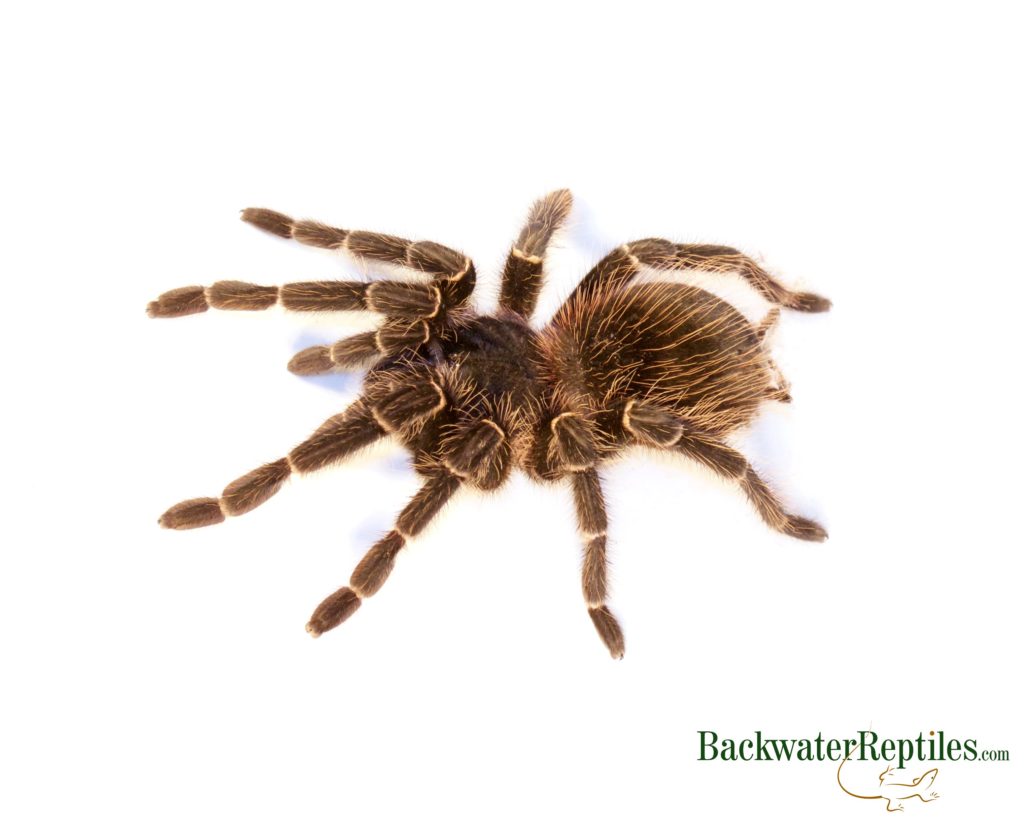
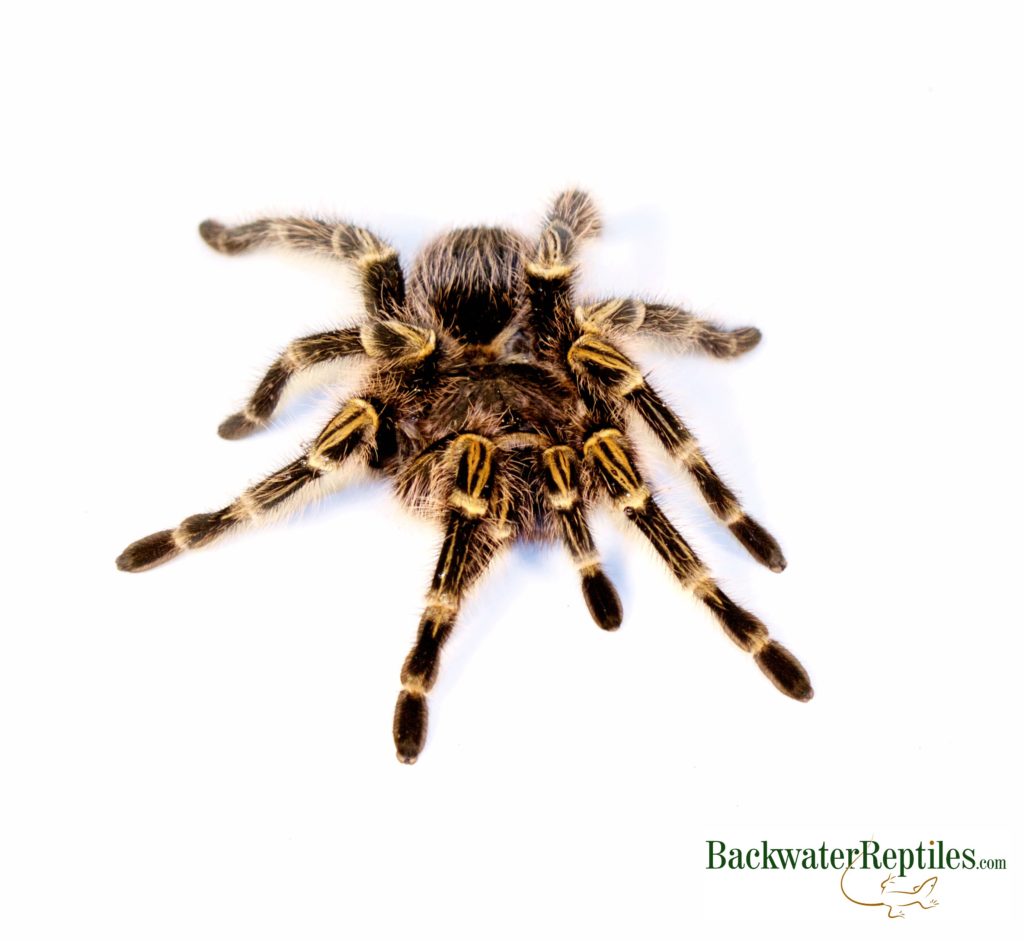
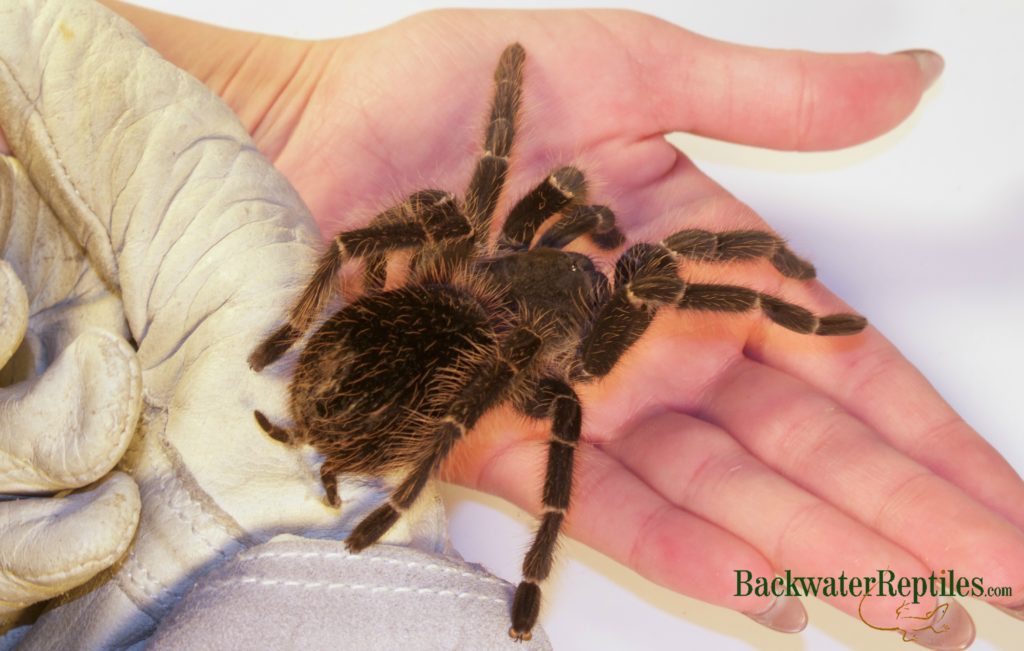
A few species that are excellent spiders for beginners and for people who want to hold their spider are: Mexican Red Knees (Brachypelma smithi), Brazilian Blacks (Grammostola pulchra), Rose Hairs (Grammostola rosea), Curlyhairs (Brachypelma albopilosum), and Pink Toes (Avicularia avicularia).

Which species of spider should not be handled?

Certain species of tarantula are known for their aggressive natures and propensity to fling urticating hairs and/or bite. These types of spiders should not be held. If you need to remove the spider from its enclosure, we recommend wearing gloves or using the paper sliding underneath a cup method.

Here are a few species of spider sold by Backwater Reptiles that we do not recommend picking up: any species of “Baboon” tarantula (King Baboons, Orange Baboons, Ornamental Baboons, etc), Goliath Bird Eaters, and Trapdoor Spiders. Each of these species would pack quite a painful bite.

What should I do if my spider is aggressive?

If you cannot get your pet spider to voluntarily walk into your hands, then you might want to try using a stiff piece of paper and a cup, bowl, or another similar object to place on top of the spider. Then you can gently scoot the stiff paper underneath the cup and pick up the entire set up and move the spider where you need it to go.

This method is best used for spiders that are not meant to be held or for spiders with tricky dispositions. It’s also great for arachnids that are easily stressed.

If you do accidentally get bitten by your spider, the first thing you should do is not panic. You’ll likely be very distracted and possibly even frightened of your spider if you get bitten, but in order to avoid further injury to either you or your pet spider, you’ll need to gently remove the spider from your person and place it back into its enclosure.

holding brazilian salmon pink tarantula
Sometimes it’s necessary to wear gloves when handling spiders with tricky dispositions.

The next step to take in the event of a tarantula bite is to clean the wound. Wash it with soap and water and apply an antiseptic. Watch for signs of infection, a lot of redness, difficulty breathing or an abnormal amount of swelling. If you notice any of these signs, we highly recommend seeking professional medical attention as you could be having an allergic reaction to the bite.

It’s very likely that your spider bite will be painful and likely get a bit puffy and red. Any normal pain reliever such as acetaminophen or Ibuprofen should help with the discomfort.

Should you be unlucky enough to get urticating hairs in your skin, the best way to remove them is to use a piece of tape. Put the sticky side on the affected area and pull it off and the hairs should come out.

If you experience a lot of itching, swelling, or other discomfort after handling a tarantula or after knowingly having urticating hairs flicked onto you, it might be necessary to see a physician, although most cases are not that serious.

NOTE: You should never put your face and/or eyes close to a tarantula, but if you do somehow get urticating hairs in your eye, we do recommend seeing a doctor as soon as possible if you experience side effects that are adverse or long-lasting.

Conclusion

Tarantulas make excellent pets! They are beautiful to look at, fairly low maintenance, and can be fun to handle.

Please keep in mind when buying a pet spider that not all species are meant to be picked up or held. Some species are more docile than others and will take well to human handling, while others are aggressive in nature and should be “look don’t touch” pets.

If you would like recommendations on the best species of spider to keep for your needs or for your family’s needs, you can always ask in the comments section or email our customer service support team at sales@backwaterreptiles.com.

How To Trim Your Tortoise’s Beak and Nails

We care for turtles and tortoises of all types, ages, and sizes at the Backwater Reptiles facility. While most of these shelled reptiles are pretty low maintenance, from time to time, they do require some additional care such as nail trimming or beak trimming.

Most of the time, trimmings won’t need to occur more than once or twice per year, and the process will be quick and easy to perform. However, because Backwater Reptiles accepts rescue animals, we do often receive turtles and tortoises who need to have this process taken care of right away.

In this article, we’ll address these topics and answer the following questions:

How to trim turtle and tortoise nails
Why is it necessary to trim turtle and tortoise nails?

How to trim a tortoise’s beak
Why is it necessary to trim a tortoise’s beak?


How to Trim Turtle and Tortoise Nails

What supplies do I need to trim my turtle or tortoise’s nails?

Luckily, you really don’t need many supplies to trim turtle or tortoise nails and the supplies are identical regardless of whether you’re using them on a turtle or a tortoise.

In order to trim your turtle or tortoise’s nails or claws, you will need:

1) Cat/Dog Nail trimmer OR human cuticle nail trimmer

2) Paper towels or other soft pliable material such as a normal towel

3) Corn starch

How do I trim my turtle or tortoise’s nails?

The first step you’ll want to take when trimming your turtle or tortoise’s nails is to secure the animal safely and eliminate squirming and discomfort to the animal as much as you can. This can be accomplished by wrapping the animal in paper towels or a soft towel. It will also help avoid slipping as it can be somewhat tricky to get a firm grip on the animal’s shell without some sort of “blanket” to hold the animal in place.

If you are trimming the front nails, wrap the back half of the animal firmly but not too hard. You don’t want to squash or harm the animal, and wrapping it up half way will help to make sure you don’t unintentionally over-restrain it.

Some owners find it useful to place the turtle or tortoise between their thighs while trimming, while others keep the animal on a counter or other hard, torso-height surface. We have used both methods and we recommend doing whatever feels safest for you as the whole process will run smoother if you are confident in your abilities.

turtle nail trimming
Sometimes turtle claws require trimming. This photo shows what the turtle’s nails looked like before being trimmed using the methods described in this article and what they looked like once the process was completed.

Once your turtle or tortoise has been securely wrapped, you’ll need your clippers. There are many types on the market and the type of clipper you will use will vary based on the size of your animal and the thickness of the animal’s nails or claws. We don’t usually use the guillotine type of clippers as we find they provide less accuracy, particularly with terrestrial turtles and tortoises. Our clipper of choice tends to be either the manicure clippers used by people or the scissor type used on cats and dogs. When it comes to your own pet’s needs, we recommend using whatever feels most comfortable for you personally that will also get the job done quickly. The speedier you are able to perform the process, the less stress you will cause the animal.

Once you’ve determined which type of nail clipper works best for you and your animal, you will simply trim the nail as close to the quick as possible without actually hitting the quick itself. The quick of the nail is the portion that still receives blood flow. It’s essentially a blood vessel within the nail or claw.

The corn starch is really just a precautionary measure. You will only require it if you accidentally trim the nails or claws too close to the quick and cause bleeding. If this occurs, simply dab the tip of the claw in enough corn starch to staunch the bleeding. And while you’ll obviously want to avoid hitting the quick if possible, this is not always realistic as reptiles are not known for their ability to sit still during procedures such as nail trimming. But not to worry – your animal will recover quickly and so long as you keep an eye on the nail itself to avoid infection, there shouldn’t be any lasting damage.

Keep in mind that turtles and tortoises in particular, can be shy animals. They will likely do everything in their power to tuck in their feet as much as possible when you try to trim their nails. Please be patient with your pet and don’t attempt to trim their nails if you don’t feel you are capable and prepared for this measure. There are plenty of veterinarians who will perform this process for a small fee and we highly recommend taking your turtle or tortoise to the vet if you are nervous about doing the procedure on your own.

A word of caution: Sometimes the process of nail trimming can bring out attitude in even the calmest of animals. If at all possible, keep your fingers away from the beak of your turtle or tortoise so that you can avoid potential bites. You also want to avoid being scratched by the long nails, which is another reason why we do recommend wrapping the animal in a towel if possible.

Some helpful tips and tricks for getting your turtle or tortoise to stick out a leg:

1) Tickle the animal’s shell. This is particularly useful underneath the shell on the plastron. Sometimes the sensation of touch elsewhere on the animal’s body will bring it out of hiding.

2) Push in gently on the leg on the other side of the retracted limb. There is only so much room inside a shell and a natural response to the crowding will be to relieve it by pushing out a limb.

3) Hold the animal in the air rather than cradling it in your lap. Because the animal will sense that there is nothing underneath it, it might try to walk or start wiggling a little bit and there’s your opportunity!

4) Please be patient with your shelled friends. Never shake or jiggle your turtle or tortoise as this is not only stressful but could cause the animal injury. Eventually, your turtle or tortoise will get tired and you will be able to get at their toes without much struggle.

For your convenience and reference, we’ve included a brief video below demonstrating how we trim nails at the Backwater Reptiles facility.

Why is it necessary to trim my turtle or tortoise’s nails or claws?

While it is true that several species of turtle (cooters, sliders, and three-toed box turtles to name a few) naturally have longer front nails as a sign of prowess or physical fitness, in captivity, these long nails can become a health hazard if they grow too much.

Aquatic turtles can accidentally get their claws caught in filters or in carpet if you remove them from the tank for some exercise. The nails can also unintentionally injure other turtles as they do tend to climb all over one another if they are kept communally. Not to mention, if you enjoy handling your turtle, shorter, clipped nails are far less likely to inflict scratches on their owner.

In the wild, turtles and tortoises walk or exercise enough that their nails will naturally wear themselves down to a manageable length. However, in smaller enclosures, the nails can continue to grow and therefore will require trimming.

How To Trim a Tortoise’s Beak

What supplies will I need to trim my tortoise’s beak?

Trimming a tortoise’s beak is a bit tougher than trimming a turtle or tortoise’s nails, although the supplies needed are virtually the same.

1) A pair or clippers. Human cuticle clippers or pet scissor nail clippers will both work.

2) Paper towels or another type of soft towel or wrap.

3) A nail file. Do not use the metal or glass kind.

And that’s pretty much it! Not much is needed, but you will definitely want to make sure that the pair of clippers you select is an appropriate type. They need to be small enough but still strong enough to cut through the beak quickly.

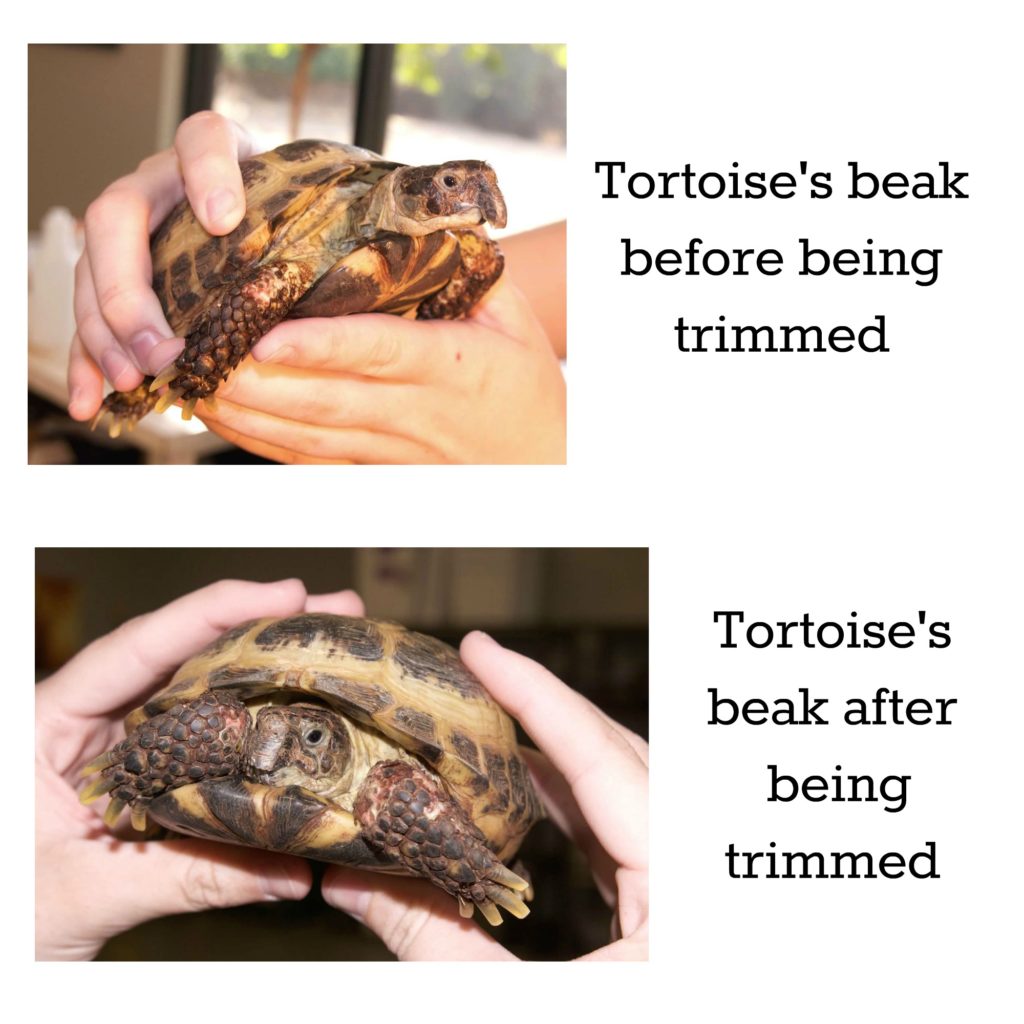
tortoise beak trimming
This rescue tortoise was in desperate need of a beak trim. We used the methods described in this article to carefully trim his beak to a normal and manageable length.

How do I trim my tortoise’s beak?

First of all, we’d like to mention that you can help minimize the amount of beak trimming you actually have to do by providing a cuttlebone within your tortoise’s enclosure. Like many bird species, tortoises can use a cuttlebone to chew or nibble on to keep their beak at bay.

However, if you do find that you need to trim your pet’s beak, the first step is to secure the animal using the paper towels or other wrap. If possible, you’ll want to make sure that you can keep the legs inside the wrap so the tortoise doesn’t push the clippers away or use them to shield its face.

Next, you’ll want to be very patient in order to gain access to the tortoise’s face. Odds are your tortoise will be shy and it will retreat into its shell. If you are careful and very delicate, you might be able to trim the beak while the tortoise’s head is inside the shell, but it’s much easier if you can gain access while the tortoise has its head outside the shell.

Sometimes, it’s helpful to grip the tortoise’s head gently but firmly for a few brief moments while another person utilizes the clippers to trim the beak. However, we’ve found that for most tortoises, this can actually stress the animal more. Ultimately, you know your animal best and you should use whatever methods work best for you and your pet while minimizing stress.

With most clippers, we’d recommend performing a series of clips. You likely won’t be able to clip the entire beak in one shot. Try angling the clippers at 45 degrees on both sides at first to create a “point” at the beak’s tip. Then you can carefully trim the tip of the point and get it semi-squared off. You’ll want to mimic the natural shape of the tortoise’s beak as much as possible.

Once you have managed to trim the beak down to a normal length, you might need to file it a bit in order to shave down any rough edges. This is where your nail file or emery board comes in handy.

When filing, we highly recommend avoiding files with sharp points or very stiff natures as they can unintentionally injure the tortoise if it happens to jerk or squirm during the process. A simple, flat, emery board works best for this procedure.

Below you will find a video demonstrating how we trim tortoise beaks at the Backwater Reptiles facility.

https://youtu.be/pXrW7jTxP9Y

Why is it necessary to trim my tortoise’s beak?

In the wild, tortoises have to work a lot more to find their food as well as to consume their food. This means that their beaks actually endure more wear and tear and essentially, trim themselves.

In captivity, your tortoise has no need to forage or roam or even really chew its food because most owners do all of that for them. While this is standard pet owner behavior, it does mean that your tortoise could eventually require a beak trim, especially if it doesn’t have a cuttlebone to rub on.

If you allow your tortoise’s beak to become overgrown, it can actually inhibit the animal’s ability to eat. The beak can prohibit the tortoise from opening its jaw wide enough to fit anything its mouth.

Another serious issue that we’ve witnessed in some of our rescue tortoises is scale rub. If the beak becomes too overgrown, it can begin to rub against the scales on the tortoise’s front legs causing irritation and infection.

Conclusion

Turtles and tortoises are very popular pet reptiles and they require relatively minimal care. However, from time to time, it might become necessary to trim either their beaks, their nails or both.

We hope that this article has helped instruct you how to go about these processes. And please – if you’re not comfortable performing these procedures or you think that you might injure the animal by performing them, take the reptile to a vet. Don’t risk your pet’s health.