Have you ever wondered how to breed Panther chameleons? Well you’re in luck, because I’m going to explain the entire process to you, from initiating mating through successful incubation of the eggs–and everything in between.
I’ve bred many generations of Panther chameleons (Furcifer pardalis) and have acquired a significant amount of knowledge about these incredibly beautiful and ultimately rewarding reptiles.

Selecting a male and female Panther Chameleon
The first step is to purchase a male and female Panther chameleon. The “locale” doesn’t really matter, although I prefer keeping the lines pure, some may want to experiment with “crosses,” and if that’s your desire, go for it.
A “locale” references the area of Madagascar from which your type of chameleon originates, such as “Ambilobe,” “Nosy Be,” “Nosy Faly,” and so on. They are all compatible, and a “cross” is when you breed one locale to another local, such as an Ambilobe with a Nosy Be.
We offer top quality, captive bred Panther chameleons for sale if you would like to start out with some quality stock. Regardless of where you purchase, we highly recommend starting out with juveniles, but not adults. The reason is, with juveniles, you can be sure they are raised correctly with proper care and nutrition, which prepares them successful breeding. Avoid wild caught specimens.


Panther Chameleon Enclosures
If you’re not overly familiar with how to keep chameleons successfully in captivity, please reference our detailed chameleon care sheet. Going forward, this article assumes you understand how to raise a chameleon, including subjects such as feeding, hydration, lighting, etc.
Before breeding your chameleons, we highly recommend keeping your Panther chameleons in separate screen cages. We sell screen cages and complete screen cage kits as well (just scroll down on any of our chameleon pages to purchase). The reason for this is that virtually all chameleons can become very stressed having to share an enclosure with another specimen–it’s just not their nature. While it is possible to raise them together, it is not advised and will likely shorten their lifespan.
Keeping your chameleons in separate enclosures also makes breeding easier, as the old adage goes, “Absence makes the heart grow fonder.”
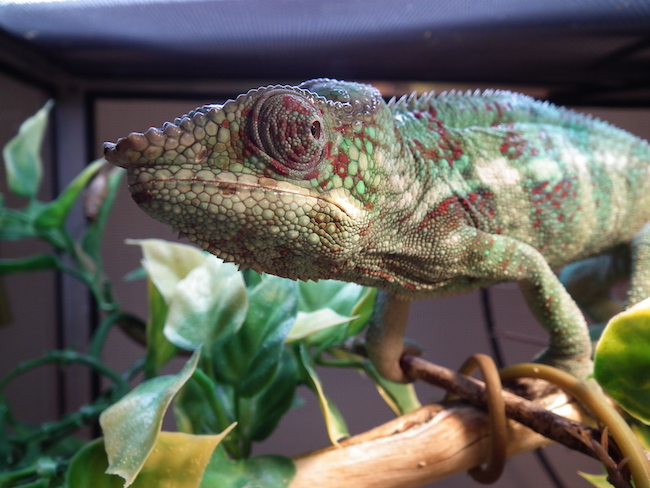
Here’s a video where I detail exactly how we set up our chameleon cages for breeding. We sell this exact kit on each chameleon page of our website–if you purchase a kit with your chameleon, we guarantee the chameleon for a full 30-days!
Panther Chameleon Breeding/Mating
Once your chameleons reach about one year in age, it’s time for the introductions. Breeding them at six months is possible, but it’s tougher on the female’s body, so it’s best for the long-term to wait until they’re both adults. She’ll live longer and will have larger egg clutches.
Some breeders believe putting the female into the male’s enclosure is best, as he is supposedly going to be more territorial and will want to display his dominance, but we’ve actually had great success placing the male into the female’s enclosure as well. At the end of the day, it probably doesn’t matter much.
One trick to get the male fired-up is to hold a mirror in front of him for a minute or two. He’ll think it’s another male, and it will ignite a territorial reaction in him. If you haven’t guessed, one show of dominance is mating, or being the alpha male. Although, we’ve also found that using a mirror isn’t usually a necessary step.
Important note: a peach/pink colored female is generally ready and receptive for mating.
Once you’ve placed the female into the male’s enclosure (or vice-versa), pay close attention to the female. You’re looking for signs that she’s either receptive to mating, or not receptive. Watch her intently, and once she spots the male, she’ll either calmly continue slowly walking or swaying (this means she’s likely receptive), or she’ll put on a defense display by widening her body and hissing or frantically trying to run away (or both). If she wants to escape and is obviously is distress, remove her–she’s just not ready.
If she is receptive, let nature take its course. Mating should begin in minutes, and will last anywhere from five to thirty minutes or so. We usually leave them together for 12-24 hours as mating may take place more than once.

Is your Panther chameleon gravid?
So, your pair has mated–but did it work? Well, you’ll find out within about 24 hours. If the female is now gravid (pregnant), she will turn dark brown, with a bright peach stripe down each side. It’s unmistakeable.
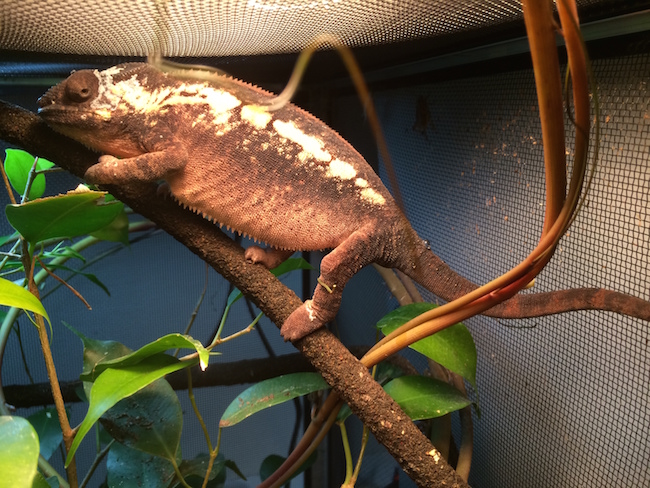
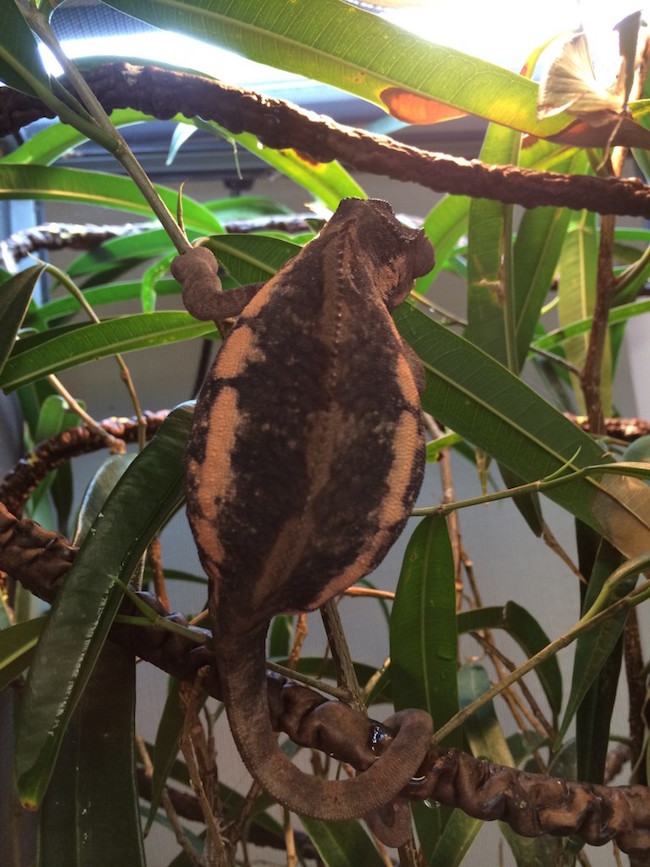
Gestation is the amount of time between mating and laying eggs. Our Panther chameleons average around 3-4 weeks, but sometimes up to 5-6 weeks. During this time, feed her plenty (as much as she’ll consume), and dust the feeders with a high quality calcium supplement once to twice per week.
Preparing for Egg Laying
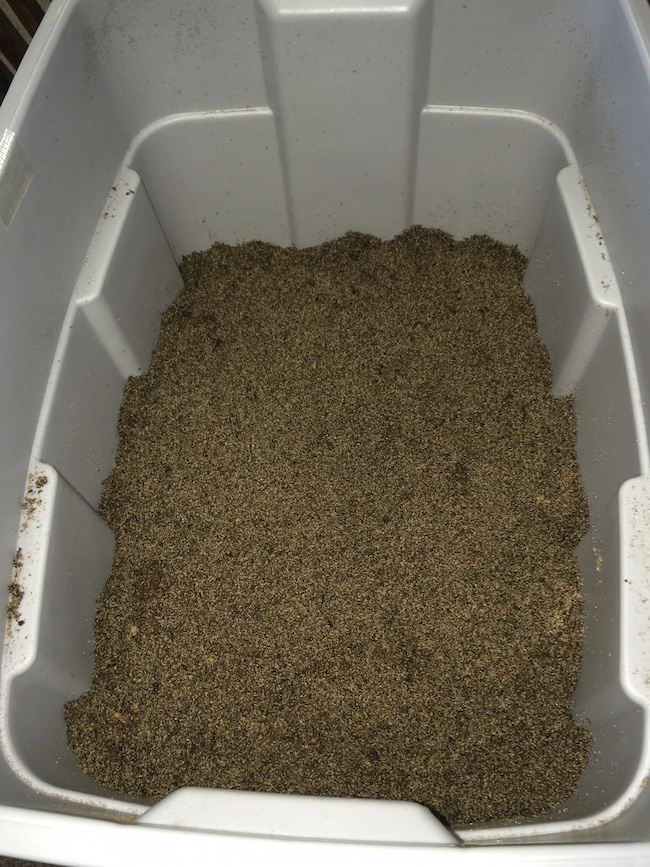
We always have a few laying bins prepared, but even on a small scale, make sure you have a bin ready for your female before she’s ready to lay. We use simple plastic bins from Home Depot, which are around 24″ x 16″ x 18″ (L x W x H). While you’re at the store, purchase a bag of peat moss, and a bag of sand.
Fill the bin with approximately 8-inches of a mix of peat moss and sand, at an approximate ratio of 3:1, respectively. Now, add enough water so that you can clump the peat/sand mix in your hand, but avoid making it wet. If you squeeze a handful of the mix, there shouldn’t be any water dripping from it. Now, press downward on the peat/sand mix surface firmly with your hand so that its all well packed. This makes it easier to hold a tunnel during the digging process.
The point here is to make it damp enough to hold the tunnel that the female Panther chameleon will dig, and damp enough so it doesn’t dry-out the eggs in case you can’t get to them immediately.
Laying the Eggs
Ok, so you’ve bred your Panther chameleons. If you’re wondering how to tell when the female is ready to lay eggs, no worries, it’ll be obvious. The moment you see her pacing the floor of her enclosure, you know it’s time. Gently move her into the laying bin. We then place the cover of the bin over about two-thirds of the top, leaving most of it dark, but about a third of it lit.
Leave the female alone, and avoid checking on her often as it can spook her and prevent her from laying her eggs (she thinks you’re a potential predator waiting for eggs to eat). We set up remote cameras on our laying bins so we can check from our mobile phones to observe their progress.
She will potentially dig a couple test holes, but will soon find a spot she likes and will dig a tunnel about 6-8 inches deep, at the end of which she’ll lay her eggs, upwards of 35 of them if she’s in peak condition. The vast majority of the time our’s will choose a corner of the bin to dig a tunnel.
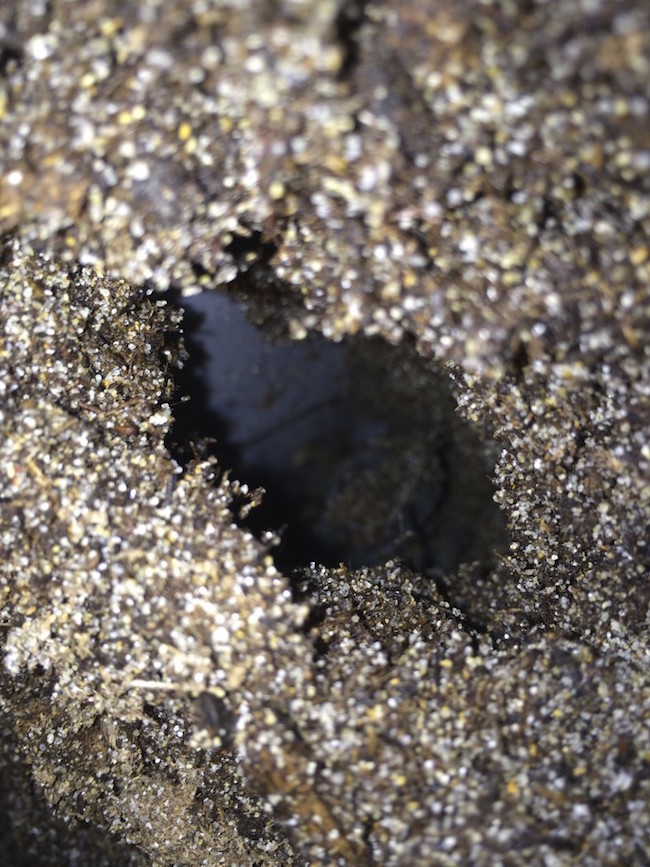
When she’s done, she’ll turn around and start burying the eggs. She’ll re-fill the entire tunnel, and will pack it down and disguise the surface so well that you’d never even know where she laid them–it’s impressive.
Remove the female, and place her back into her enclosure. Start a slow drip in her enclosure so that she can rehydrate, as she’ll be exhausted. She may want food immediately as well, so offer a few crickets to see how she responds. You don’t want to annoy her with feeder insects if she’s not hungry and just wants to drink and rest.
Now, assuming you know the corner where she buried her eggs, start gently swiping the peat/sand mix away, digging very slowly. I use my fingertips and use a back-and-forth motion, almost like you’re dusting sand off something. We’ve never damaged a single egg (out of thousands) using this method. Don’t ever dig with a tool–you’ll lose the sensitivity of touch.
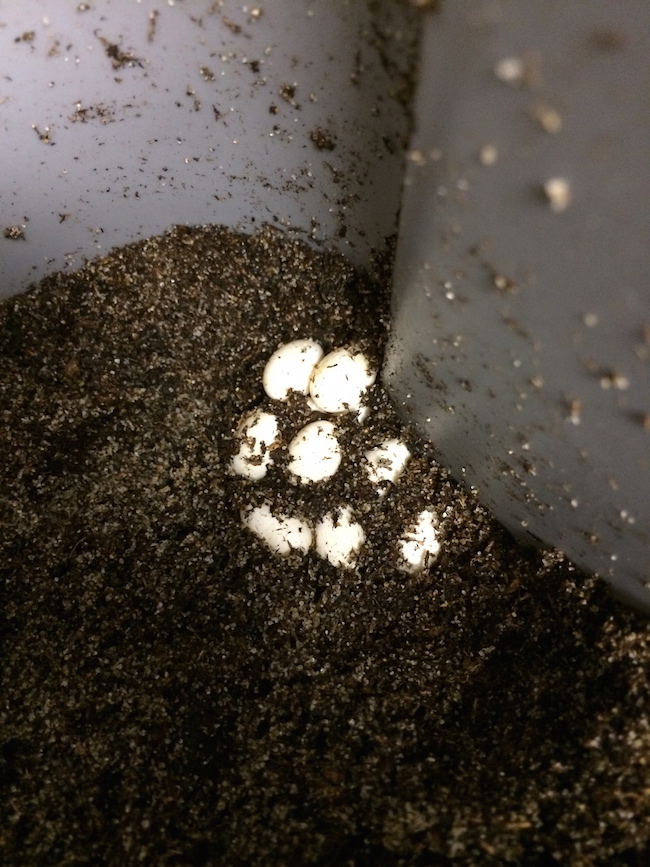
Eventually, you’ll see a flash of white–you’ve found the eggs. It’s exhilarating every single time–it never gets old! Now slow down and very carefully continue dusting the surrounding peat/sand mix away so that you can start harvesting the eggs.
Handling the Panther Chameleon Eggs
It’s time to bear the fruit of Panther chameleon breeding! Carefully remove the eggs, one at a time. Make sure you don’t rotate them around their axis–it’s vitally important you keep the eggs in the same position (there’s an air bubble inside each egg that settles at the top–rotating the egg after laying can potentially kill the embryo).
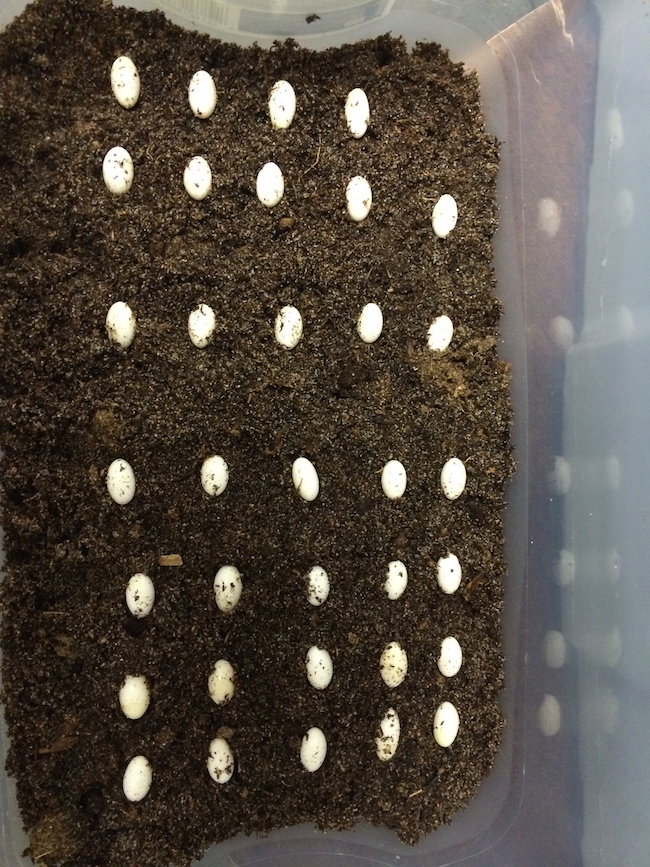
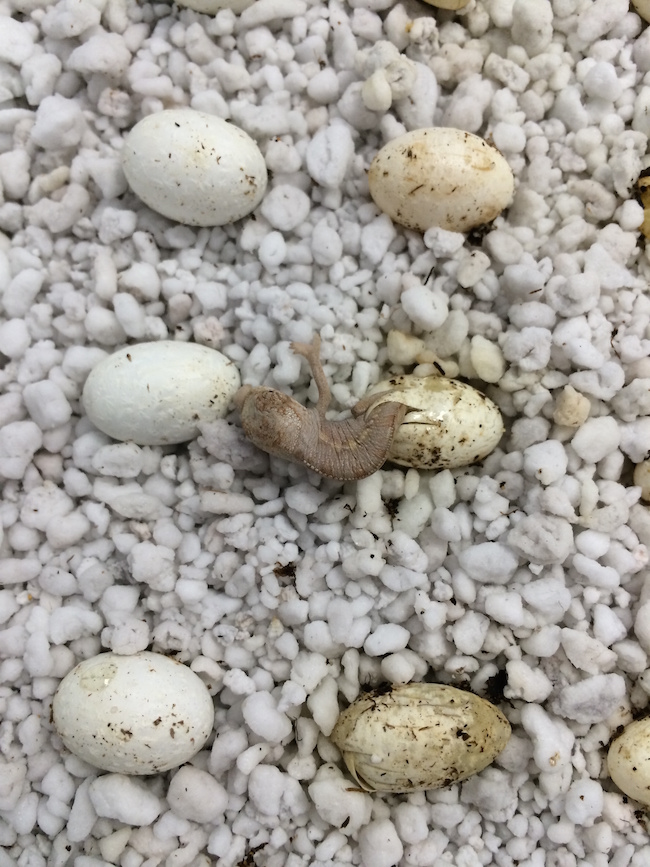
Place the eggs into the incubation container (we use plastic shoe boxes with no air holes). In the below picture, we used the same peat/sand laying mix with success, but we now use Perlite, mainly because it’s cleaner and more sterile. If you’re using Perlite, add enough water so that the perlite is barely damp, but definitely not wet. The eggs are pretty tough, so there’s generally plenty of leeway. We almost always get 100% hatch rates with our Panther chameleons. If you’re using vermiculite, dampen it enough so that when you squeeze it with your hand, it clumps but doesn’t drip.
Incubating Panther Chameleon Eggs
As mentioned above, we use plastic shoe boxes and we do not drill air holes. We’ve found that adding air holes does not increase hatch rate percentages, and adds the risk of the eggs dehydrating. In nature, when they are buried six inches in the dirt, they’re not getting any air.
We recommend that you avoid buying a commonly available reptile egg incubator, as we have found they are unreliable, and experience quick temperature swings. Specifically, we’re talking about reptile egg incubators in the $100-$300 range. If you want to spend $1,000 or more, you can get a good quality incubator.
Do you know what temperature we incubate all our chameleon eggs at? Room temperature. That’s right, we keep the plastic shoe boxes stacked in a room, and let the natural room temperature do its thing. This means a daily fluctuation of around 66F to 76F, depending upon the season. Our hatch rates are sky-high, and its free. Don’t overcomplicate things.
The dangerous part of reptile egg incubation is a quick temperature change, not a slow one. Chameleon eggs are actually pretty tough as long as rapid temperature changes are prevented. This is why the reptile egg incubators are dangerous in our opinion–they can quickly increase or decrease in temperature, and for no apparent reason.
Hatching Panther Chameleons
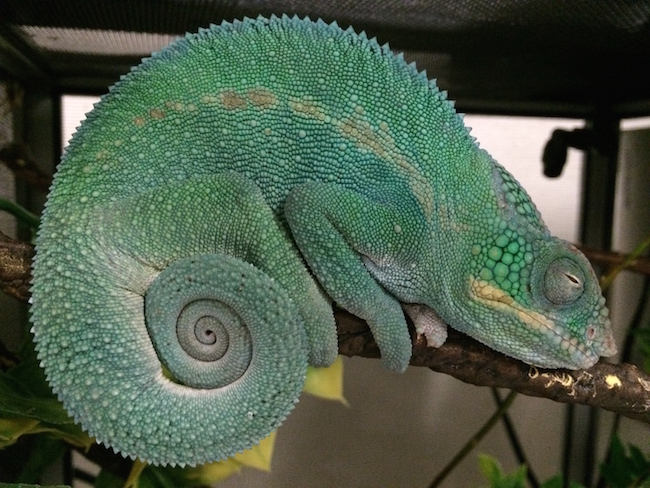
Let’s continue using the above clutch in our article on how to breed Panther chameleons. The eggs were laid on November 11th, and started hatching on May 18th of the following year. That’s an incubation period of a little over six months, although it can take a little longer in some cases. The eggs continued hatching for a period of about a week.
Quick tip: Resist the temptation to remove the first hatchlings as soon as they appear. The reason is, eggs seem to communicate. Once one starts hatching, it seems to somehow signal the other eggs to start hatching too. I’m not sure if it’s chemical, but there’s definitely some sort of phenomenon that occurs. Let the initial hatchlings wander around in the laying bin for a day before you remove them.
One sign to watch for during incubation is what’s called “sweating.” This is when an egg appears to sweat, which means a clear liquid beads-up on its surface. This is your signal that hatching is about to begin!
Summary – How to Breed Panther Chameleons
We hope you’ve enjoyed reading our in-depth article on how to breed Panther chameleons. It’s a process that’s not only easy, but extraordinarily rewarding. We encourage you to use our guide to try to breed your own Panther chameleons, and don’t forget that you can buy your first pair on our website by visiting our Panther chameleon page.
If you purchase from us , we’re always available for questions and breeding guidance. Also, don’t forget that you can buy the exact chameleon kits we use and you’ll get a free 30-day guarantee on your new chameleon.
Here’s a quick summary of our chameleon kit promotion:
If you’d like to read some high level information on this species, check out the Wikipedia Panther chameleon page.
